AutoCAD:
Practice Exercises
Summary: This
will introduce the student to AutoCAD.
Objectives: By
the end of the lesson the student:
- will be able to draw
lines of any length at any angle;
- erase one or more lines
with one command sequence;
- draw arcs and circles;
- use the trim and extend
commands.
Content:
| 
|
This
is one of the practice drawings on the first exercise sheet.
All of these instructions will be discussed in class as
well. |
Getting Started
- The limits should be
set to 29,27.
- Do not forget to 'zoom'
'all' before you start the line command.
- If you want to save
all the drawings on your computer select the link here.
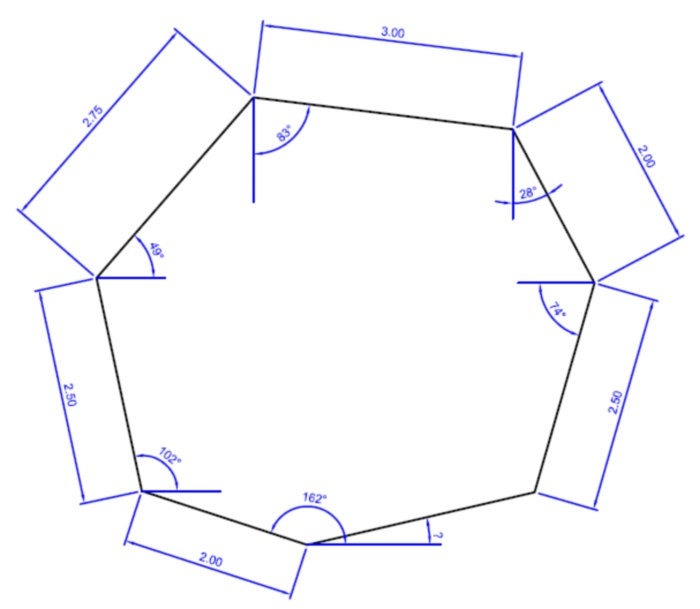
Exercise
#1
For the first exercise,
begin by drawing from the bottom of the object (at the corner that
says 162 deg.) and work your way around in the clockwise direction.
When you get to the end make sure your OSNAP setting are selected
and just have to click on the beginning of the first line to complete
the drawing.
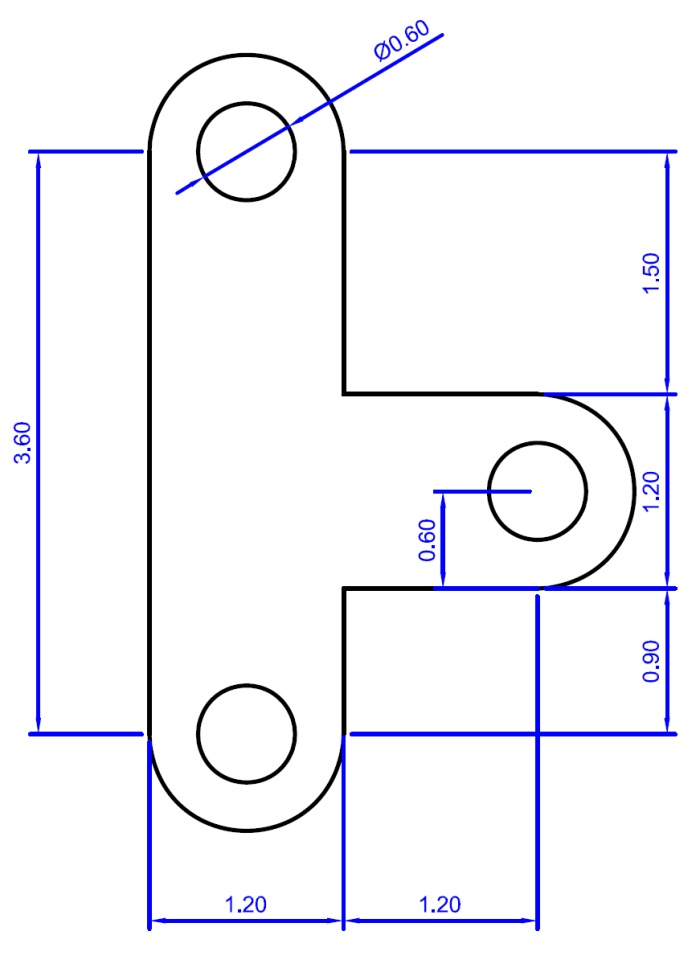
Exercise #2
Begin by drawing the object
as though there were no arcs or circles on it; just draw straight
lines across instead. See the drawing process here.
- Ensuring the 'midpoint'
box is checked of in the osnap menu (right click 'osnap' at the
bottom of your screen and go to 'settings') draw a circle by selecting
the midpoint of one of the temporary straight lines. Then type in
the radius of the circle which in this case is '0.3'.
- For the arcs, remember
they are drawn in a counter-clockwise direction by AutoCAD. So after
you select 'draw' 'arc' 'ser', be sure to choice the correct start
point for you arc.
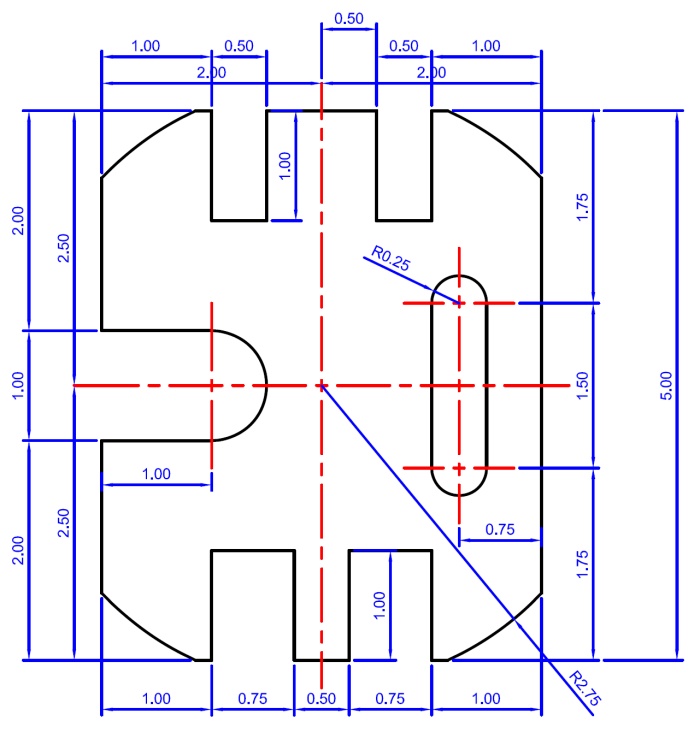
Exercise
#3
Start by drawing the perimeter
of this object; ignore the arcs for now. Just like you did for the
drawing above.
- Draw in the slot on
the right half of the object.
- Add the arcs to the
slot and to the notch on the left side.
- Now is the really challenging
part... how do you figure out those curves on the four outside corners?
- If you can't figure
it out check out the drawing process hints.
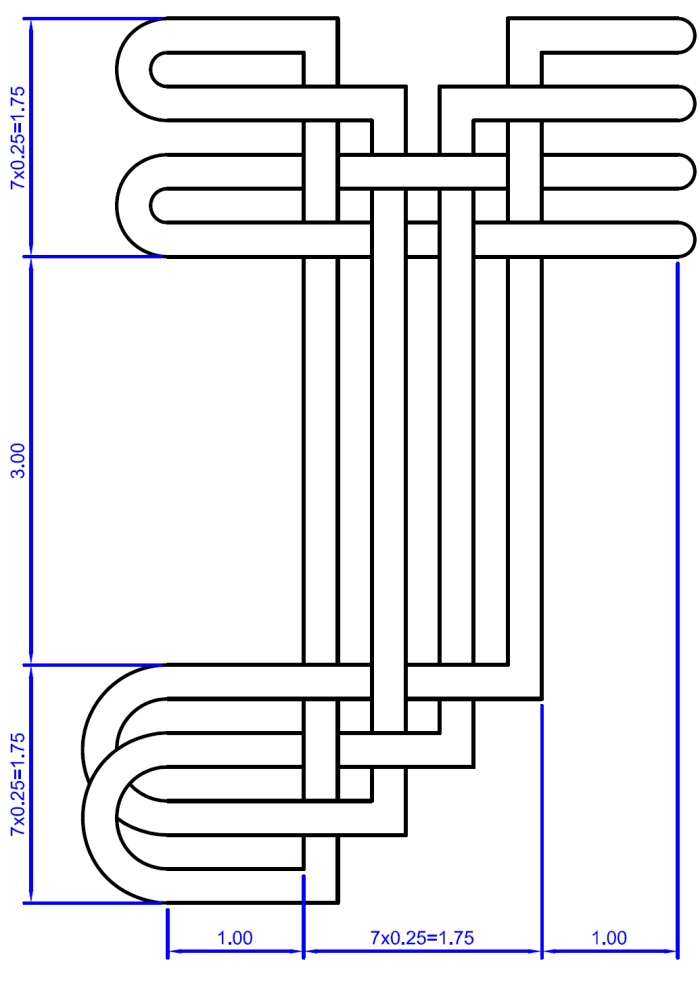
This can take over a day,
or just a few minutes. To save yourself a lot of time, be sure to
use the 'offset' 'extend' and 'trim' commands!
- Begin by drawing one
vertical line 3.0 units tall.
- Using the offset command,
add seven more lines spaced 0.25 units apart.
- Repeat this technique
for the horizontal lines. You can draw just one horizontal line
1.0mm long and then add seven more with the offset command.
- Use trim and extend
extensively to finish the main part of the drawing
- Put in your arcs
once the main part is finished
- If you can't figure
it out check out the drawing process hints
Actions:
Complete the four drawings
on the front side of the exercise sheet.
Reference: n/a
|