LESSON 04 – JAVASCRIPT &
FORMS
RECAP 1
Earlier,
we learned how to declare, initialize and change the value of a variable. We also learned how to display a variable on
the screen.
Consider
this example as a reminder:
var x; //declaring variable x
x = 3; //initializing variable x
document.write(x); //displaying x on the screen (3 will be
shown)
x = 5; //changing x
document.write(x); //displaying x on the screen (5 will be
shown)
x = x + 1; //increasing x by 1
document.write(x) //displaying x on the screen (6 will be
shown)
RECAP 2
Now we
will consider the same type of example as in Recap 1 but storing strings
(words) in a variable.
var w = "hi"; //declaring and initializing
variable w
document.write(w); //displaying w on the screen (“hi” will be
shown)
w = "hey" //changing w
document.write(w); //displaying w on the screen (“hey” will be
shown)
w = w + "there"; //adding “there” to the end of w
document.write(w); //displaying w on the screen (“heythere”
will be shown)
USING JAVASCRIPT TO PLACE TEXT IN A TEXT FIELD
Now we
will learn how to place a word in a text field.
Step 1 –
Create a form with a text field in it.
Step 2 –
Make sure both the form and the text field have names.
Step 3 –
Run a script that will set the value of the text field to the word(s) that you
want to show.
Step 3 is the tricky part. You have to
know how to set the text field’s value.
Here is how to do this in general:
formName.textFieldName.value =
"word";
Of
course, you need to put the actual form name, then a period, then the text
field’s name, then another period, then the word value.
EXAMPLE 01
Consider
the code below. Notice the name of the
form and the text field. Now notice in
the script section that we set the value of the text field to "YODA".
<form name="example">
<input type="text"
name="tf"><br>
</form>
<script type="text/javascript">
example.tf.value="YODA";
</script>
Click here to see this script in action. Note that since the script is executed right
away, the word YODA is in the text field right away as well.
EXAMPLE 02
The
script in the example above places “YODA” in the text field. If anything had been in the text field
already, it would have been overwritten (erased). If we want to add something to the end of the text field without
erasing what is in it, we could use:
example.tf.value = example.tf.value
+ " I AM";
Here is
the whole code:
<form name="ex">
<input type="text"
name="tf"><br>
</form>
<script type="text/javascript">
ex.tf.value="YODA";
ex.tf.value=ex.tf.value + " I AM";
</script>
Click here to see this script in action.
EVENTS
The examples we have seen above are not showing us anything new. Not yet. What we need to learn now is how to make the script execute only when something happens (such as a mouse click).
In the
world of computer programming, an event is when something such as a key press or a mouse click happens. Most programming languages provide a way to detect such events
and allow you to do something in response.
This response comes in the form of a script (program).
Essentially,
you will tell the computer to watch for a specific type of event to happy and
then respond in a specific way.
The best
way to truly understand this is to see an example.
EXAMPLE 03A – BEFORE JAVASCRIPT
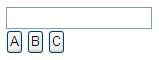
The code
below will create a text field and three buttons. However, there is still on interactivity.
<form name="ex03">
<input type="text"
name="tf"><br>
<input type="button" value="A"
name="buttonA">
<input type="button" value="B"
name="buttonB">
<input type="button" value="C"
name="buttonC">
</form>
It looks like this:
Click here to see the html document.
EXAMPLE 03B –
ADDING INTERACTIVITY
The code below now adds
interactivity. We will see afterwards
how it works. Notice that all we did is
add an attribute into each of the button tags.
<form
name="ex03">
<input
type="text" name="tf"><br>
<input
type="button" value="A" name="buttonA"
onClick="ex03.tf.value='Yo';">
<input
type="button" value="B" name="buttonB"
onClick="ex03.tf.value='Ya';">
<input
type="button" value="C" name="buttonC"
onClick="ex03.tf.value='Yuck';">
</form>
Click here to see the interactive result.