LESSON
03 – BRUSHES
THE ICON
The
tool looks like this:
![]()
but
it can be hidden by one of these:

INTRO TO THE TOOL
The
brush tool paints a shape onto your image or canvas. If you click once, the shape is painted only
once. However, if you keep the button
clicked, then the shape is continuously painted as you move the mouse.
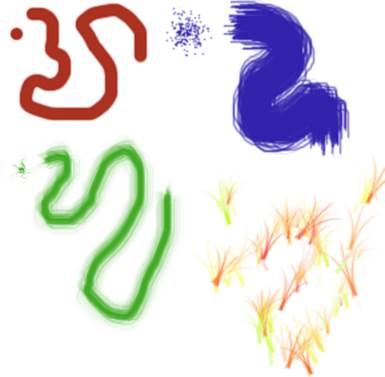
Examples
Here
are a few examples of the default brushes in photoshop. In each case, you see a single click showing
the basic shape and then you see how the brush looks when the button is held
down and the mouse is moved.
SHAPE OF THE BRUSH
You
can use just about anything you’d like for the shape of the brush. In fact, you can make your own shape. This has led to many people creating their
own packages of brushes called brush sets.
These custom brushes are often shapes that are not truly made to be
repeated continuously. Instead, they are often most useful as single
stamps. Here is a brush set that was
taken from the internet:

ADDING EXIST BRUSH SETS TO PHOTOSHOP
A
brush set comes in a .ABR file. To make
a brush set appear in photoshop, all you need to do is place the ABR file in
the proper folder.
In
Photoshop Elements 5, the folder is:
C:\Program
Files\Adobe\Photoshop Elements 5.0\Presets\Brushes
You
have to do this before loading up Photoshop.
If you don’t, you will have to close Photoshop and load it up again.
FINDING BRUSH SETS
The
Resource section for this course has some Brush Sets available to you. Check them out.
You
can also find brush sets on the internet.
MAKING A BRUSH
Making
a single brush simply requires that you create it and then you choose Edit >
Define Brush.
MAKING A BRUSH SET
After
you have made several brushes, you can save them as a brush set. To do this, you need to choose Edit >
Preset Manager. Then, you need to select
all the brushes you want in your set and click on save.
Remember
to save your brush set to your H drive.