|
GETTING STARTED WITH LOGIC.LY (ONLINE VERSION) TASK DESCRIPTION In this task, you will look at the basics of the Logic.ly interface
and the tools. You will also learn a
few conventions that you will be expected to follow. GUIDE STEP 1 – THE INTERFACE
Notice the components on the left are separated by category. For now, we will focus on the Input Controls
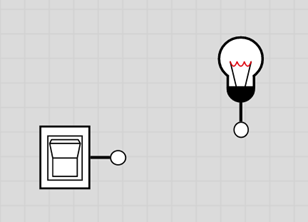
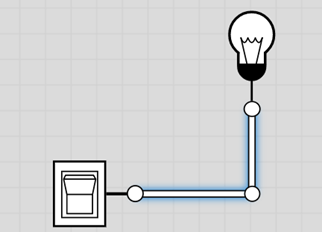
and the Output Controls STEP 2 – CONNECTING OUR FIRST CIRCUIT Drag a Light Bulb and a Toggle Switch into the work space.
Notice that clicking in the middle of the switch turns it on and
off. To connect the two devices, you click on one of the connection
circles and drag the mouse to the destination device’s circle.
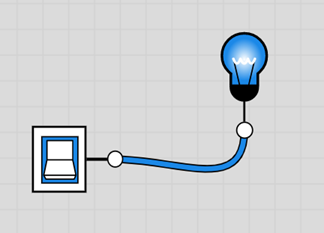
Try clicking on the switch and see what happens to the light bulb.
Notice that a blue wire means that it is in HIGH STATE (also known
as a Logical 1). A white wire is in
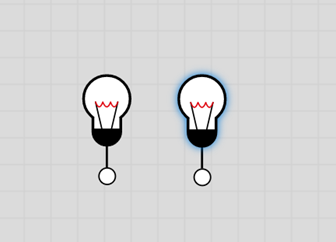
LOW STATE (or Logical 0). STEP 3 – SELECTING COMPONENTS You can select most components by clicking on them. A selected component has a blue glow around
it. Switches are a little trickier to select since clicking on them also
toggles their state. You need to click
on the perimeter of the switch to select it. You can also select one or more components by clicking and dragging
a rectangle around them. In the image below, the light bulb on the right is selected.
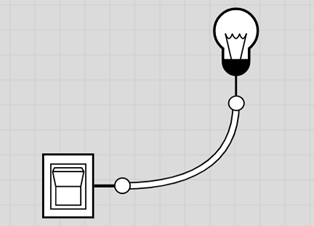
STEP 4 – OPTIONS WITH SELECTED COMPONENTS Movement - We can move selected components by dragging them around. Precise movement – We can use arrow keys to precisely move selected components. Deleting – We can hit the delete key to remove selected components. Attributes – Some components have attributes that you can chance in a small window at the bottom right when that component is selected. Try all of the above. STEP 5 – WIRING CONVENTIONS You are expected to always place your wires so that they appear horizontally and vertically and straight. You should not have diagonal or curved wires. To do this, you need to learn how to make the wires snap to their horizontal and vertical parts. Start by connecting a switch to a light bulb. Notice the wire is curved and diagonal.
To straighten and square the wire, you can anywhere on the wire and drag it near where it would bend and it will snap to a horizontal/vertical connection.
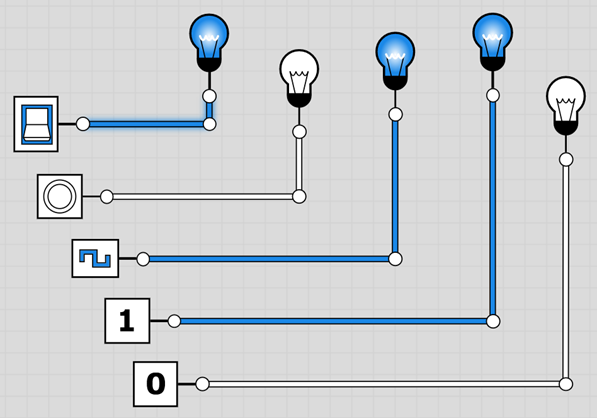
TASK Connect each of the five Input Controls to their own light bulb and make sure you understand what each one does. Your work should look like the image below. Once completed, take a screen shot and submit your work to your teacher.
Make sure you know the answer to the following questions: A) How
does a Push Button work? B) What
is the difference between a Toggle Switch and a Push Button switch? C) What
does the clock do? Do you know what
the symbol on the clock component represents? D) How
do you change the speed (in milliseconds) for the clock rate? (Try selecting the component.) E) What
does High Constant (aka Logical 1) do? F) What does Low Constant (aka Logical 0) do? TO SUBMIT A screen capture of your diagram. |