|
MINI LESSON 1 - BREADBOARDS WHAT
IS A BREADBOARD? A breadboard is a simple device that allows you to connect multiple electronic devices together using wire. WHY
USE BREADBOARDS? Without having done “real world” circuitry, it is easy to overlook
some of the physical challenges involved with it. One major challenge is to keep the
different connections together. The
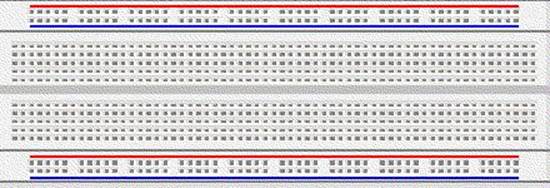
use of a breadboard makes the creation of a circuit fast and dependable. TOP SURFACE The top of a breadboard looks like this:
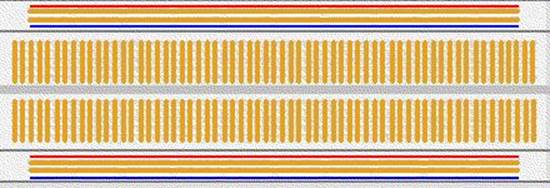
INNER CONNECTIONS Internally, some of the holes are connected together. The following image shows how a copper
strip connects different holes.
The top and bottom rows of holes are connected together. Then, in the center, short columns of holes
are connected together. Note that the column above the “ditch” doesn’t internally connect to
the column under the “ditch”. WIRING The part of the wire that enters the breadboard should be stripped
away about 8mm. Make sure that the
stripped wire is straight. The part of the wire that runs on top of the breadboard should be as
short as possible running flat on the board.
Generally, we try to run these wires vertically and horizontally for
maximum neatness. For wires that have to be switched locations often, it is acceptable
to leave these wires longer. It is
often a good idea to use a special wire colour like
green to denote these wires. |