|
EXAMPLE OF CREATING A GIF ANIMATION FROM A SPRITESHEET
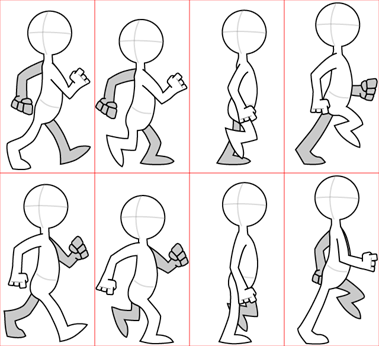
STEP 1 – FIND A SPRITESHEET
Find a spritesheet that has the same space given to each
sprite. The example we have below
has an equal distance between each sprite.
Source
STEP 2 – COPY THE IMAGE
If you are
in a browser, simply right click the image and choose Copy Image.
STEP 3 – OPEN PISKEL
Open Piskel. Do this
in a new tab where you have not done anything in Piskel
yet.
STEP 4 – PASTE YOUR IMAGE
Use CTRL-V
(or CMD-V on a MAC) to paste your image.
STEP 5 – WINDOW
This window
should appear:
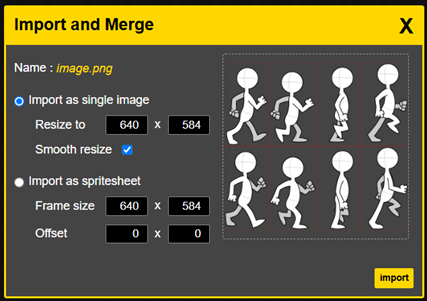
STEP 6 – IMPORT AS SPRITESHEET
Click the
bottom option: Import as spritesheet.
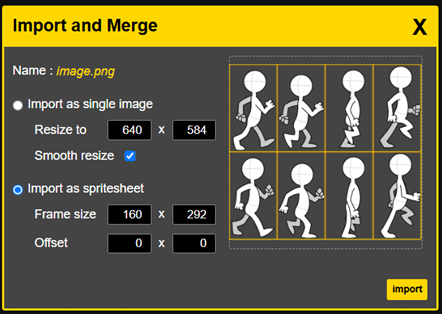
STEP 7 – SPECIFY SIZE OF EACH FRAME
Frame
width:
- In the image above, take the width
640 and divide by 4 since there are 4 columns to get a value of 160.
Frame
height:
- In the image above, take the height
584 and divide by 2 since there are 2 rows to get a value of 292.
STEP 8 – HIT IMPORT
Here is the
result:

|