Exploding Planet
Found by: Andrew Nunn
Source: http://imgry.com/exploding_planet/step-1.html
This tutorial has not been verified by Mr. Campeau. Therefore, I cannot guarantee there will not be difficulties. |
Step 1 - Elliptical Marquee
Although you can choose any size in this tutorial I will be working with a 400x400px canvas.
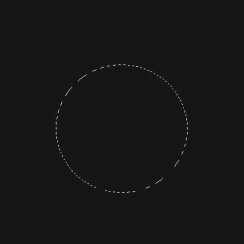
Once you have opened a new file with your preferred size and filled it with black, go to the tools
window and pick "Elliptical Marque Tool" and select a part in the middle of the canvas.
(Note: remember for now to keep it all on one layer)
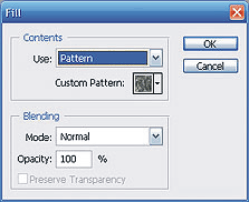
Step 2 - Patter Filling
Right click and go to "Fill" and use the settings in the image above.
The Custom Patter is "Stone Marble" and you can get it by loading the "Rock Patterns" which
are in the Presets.
After you have finished with the fill still keep the
Marquee tool on.
Go to Filter > Distort > Spherize and put the amount to
100%.
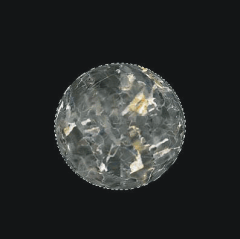
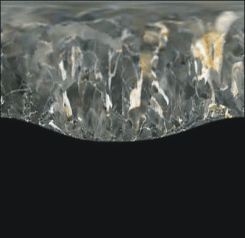
Step 3 - Sharpen
Now go to Filter > Sharpen > Sharpen and you
should have something that looks like the image above.
Step 4 - Polar Coordinates
Now go to Filters > Distort > Polar Coordinates and set it to Polar to Rectangular and click OK.

Step 5 - Wind Stylize
Go to Image > Rotate Canvas > 90° CW
Next, go to FIlter > Stylize > Wind and use the following settings:
* Method - Stagger
* Direction - From the Right
Click OK and press Ctrl+F to repeat the same filter, do this twice.
Now go to Image > Rotate Canvas > 90° CCW.
You should now have something like the image above.
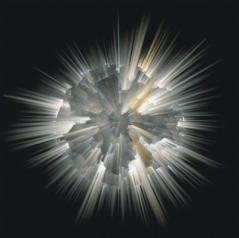
Step 6 - Polar Coordinates Again
Now go to Filter > Distort > Polar Coordinates and
set it to Rectangular to Polar.
Step 7 - Colorizing
Now make a copy of the background you have now.
Highlight the bottom layer and go to Image > Adjustments > Hue/Saturations (Ctrl+U).
Check the box next to Colorize and use the following settings:
* Hue: 0
* Saturation: 100
* Lightness: 0
Once you've done this hold Shift+Ctrl+F and put the Opacity on 50%.
Now highlight the top layer and press Ctrl+U to bring up the Hue/Saturations box.
Check the box next to Colorize and use these settings:
* Hue: 60
* Saturation: 50
* Lightness: 0
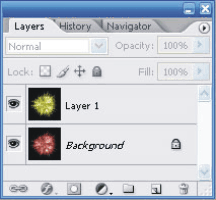
Now put the top layer on the mode Overlay.
Your layers window should look something like the image above.
Step 8 - Orange Planet
Now hold Shift+Ctrl+E to merge the two layers.
Your image should look something like the image
above now.
Step 9 - Duplicates
Now make 3 copies of the image you have now and on
each of the three apply Filter > Distort > Wave and
remember to press Randomize for each of them to get
different results each time.
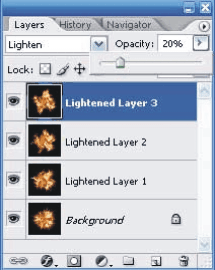
Now put those three layers on the mode Lighten and put
their Opacity on 20%.
Your layers window should look something like this now.
Step 10 - Merge Planet
hold down Shift + Ctrl + E to merge the four layers.
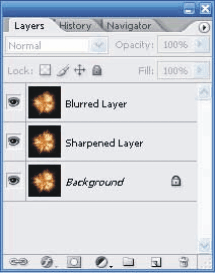
Step 11 - Blurring
Nearly finished now...we just need to add a slight glow to it.
Make two copies of the pictures.
To the middle one you should apply Filter > Sharpen >
Sharpen and set the layer mode to Lighten.
To the top one apply Filter > Blur > Gaussian BLur with a
radius of 2.5px and set the layer mode to Lighten.
Your layers should look like this now.
2.
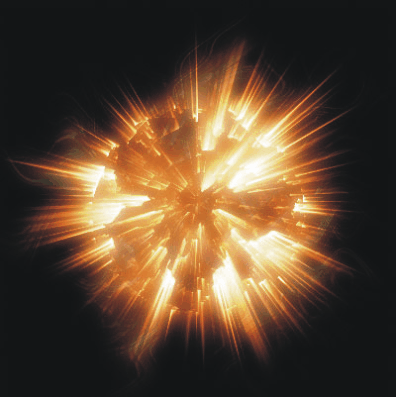
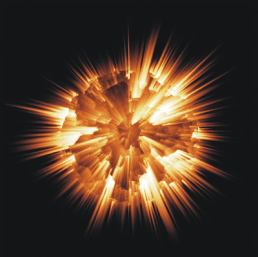
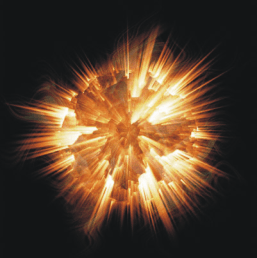
Step 12 - The Finish Line
Now all we need to do to finish this up is merge the three layers.
Press Shift + Ctrl + E to merge the layers.
You should now have a final product that looks like the photo below!