Starfield – Tutorial
Info:
a) the layer names I used are in the [].
b) you'll need the ed-effects: http://paintdotnet.12.forumer.com/viewtopic.php?t=2085.
Ok, let's get started.
1. Open your PdN, open a new project and set the size
to 1024x760. 800x600 WON'T do, you can try, though.
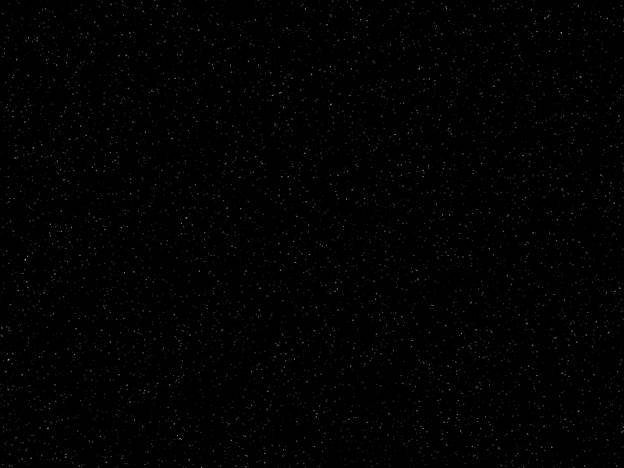
2. [small stars] Create a new layer and make it black,
after that add some noise (Intensity 40, Colour
saturation 0). Now you need to tune the brightness and contrast, I used 80 for
brightness and 90 for contrast
3. [big stars] Duplicate the layer and set the new
layer's blend mode to screen. Now do a 2x zoom (layers > rotate/zoom)
Duplicate the big stars layer and set it to "not used" (remove the
"v")
4. [dust] Create a new layer and set its blend mode to
colour dodge. It's time to give some colour to the starfield, make
clouds. I used scale 160, roughness 50. Now the colour.. you'll need to download the
"ed effects" to do this, get them here: http://paintdotnet.12.forumer.com/viewtopic.php?t=2085.
Use the colour tint effect to colourize,
I used a calm blue.
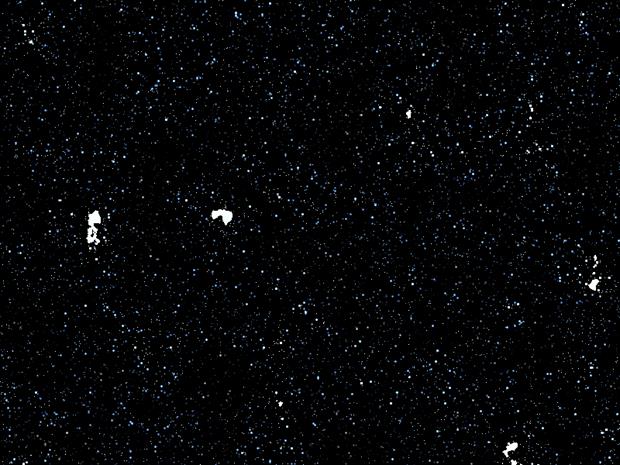
5. Still not so cool... get back to the big stars layer and use the glow
effect. My settings: (from top to bottom) 100, 23, 10. If your stars are
blocky, do a gaussian blur with a 2 pixel radius. Now
activate the other big stars layer, sometimes it makes your work look better,
sometimes not. You decide.
6. This is where I drop off, you can too, or continue exploring new ways to
make your work cooler.
|
This
tutorial was taken from the following url: http://paintdotnet.forumer.com/viewtopic.php?f=15&t=3242 The
author’s name is unknown. The author’s
alias is Jezulkim. |