Crazy Lightning Ball – Tutorial
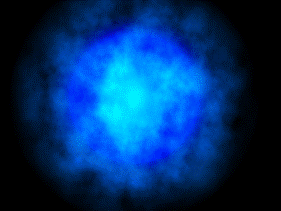
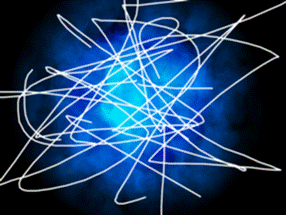
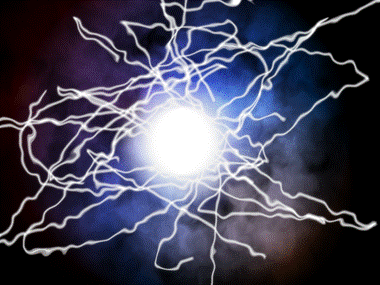
This is
what you will create using this tutorial:

STEP 1
You need
the following plug-ins:
- Dents
- Fragments (Ed Harvey Package)
STEP 2
Start
with a blank canvas that is 800 x 600.
STEP 3
To get
the same colours as in this tutorial, you need to set your primary color to
blue and set your secondary color black.
Of course, you can change the colours if you wish.
STEP 4
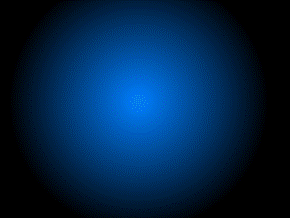
Use the
gradient tool to create a radial gradient in the center of the canvas.
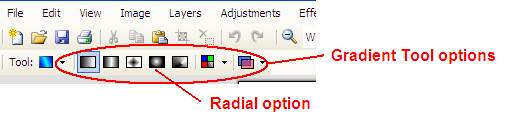
Note:
To set the tool to do a radial gradient, first choose the gradient tool and
then pick the radial option at the top. (see below)
You
should now have something that looks like this.
STEP 5
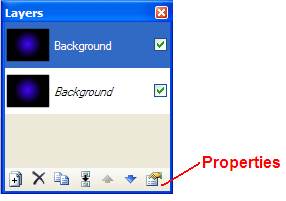
Duplicate
that layer by choosing (Layers > Duplicate Layer).
You
should see two layers in your Layers Window (like below).
STEP 6
On the
top layer, under Properties (see above), choose Mode > Color Dodge.
STEP 7
Flatten the image (Image
> Flatten).
STEP 8
Create a new layer (Layers > Add New Layer).
STEP 9
Set your primary colour to black and your secondary
colour to white.
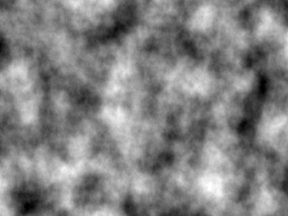
STEP 10
Use the
Clouds Effect (Effects > Clouds).
Keep the default settings.
STEP 11
On the
top layer, under properties, switch the blending mode to Overlay with Opacity =
135.
STEP 12
Use the
Dents effect on the top layer (Effects>Distort>Dents). Keep the default settings.
Note: You
need to add this effect before using it.
STEP 12B
(Optional)
Some
people like to apply another Fragment Blur (Effects > Blurs > Fragment)
to blur the individual dents. Use the
settings you want.
STEP 13
Flatten
the image (Image > Flatten).
STEP 14
Create a
new layer (Layers > Add New Layer).
STEP 15
Set the primary colour to the colour you want for the
lightning.
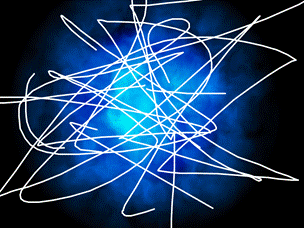
STEP 16
Using the line/curve tool or a regular paintbrush draw squiggles on the new layer. You are suggested to use a brush size of about 4.
STEP 17
Do a fragment blur on the top layer (Effects > Blurs > Fragment). Use the following settings:
Fragments:
4
Distance:
2
Note that
you can change these settings if you feel something else works best for your
squiggles.
Note: You
need to add this effect before using it.
STEP 18
Use the
Dents effect on the top layer (Effects > Distort > Dents). Use the following settings:
Scale:
98,
Amount:
10,
Quality:
2
STEP 19
Use the
Glow effect (Effects > Glow). Use the
settings you want.
STEP 20
Flatten the image (Image > Flatten).
STEP 21
Create a
new layer (Layers > Add New Layer).
STEP 22
Make sure
your primary colour is the same as your squiggle lines.
STEP 23
Select
the Paintbrush tool and set the brush width to 200. On the new layer, make a dot at the center of
your lightning bolts.
STEP 24
Do a
fragment blur (Effects > Blurs > Fragment). Use the following settings:
Fragments:
32
Distance:
30
STEP 25
Do a
motion blur (Effects > Blurs > Motion Blur). Use the following settings:
Angle:
0.00
Distance:
30
Note: Mr. Campeau tried
this and preferred a Distance of 60.
Pick what you want.
STEP 26
Add a
glow (Effects>Glow). Use the settings
you want.
STEP 27
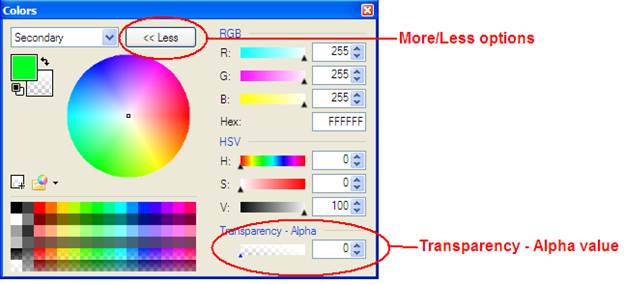
(OPTIONAL)
Pick a color for your primary color and put white transparency alpha 0 for your secondary color. (see below)
Note: Mr.
Campeau did not have all that much luck with steps 27 and 28. In the end, he skipped them.
STEP 28
Pick the
gradient tool on radial gradient and create a radial gradient near the ball of
lightning. This creates some color.
Note: Mr.
Campeau did not have all that much luck with steps 27 and 28. In the end, he skipped them.
STEP 29
Flatten
image (Image > Flatten).
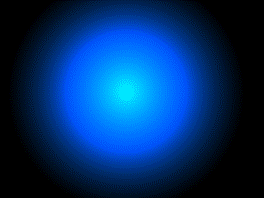
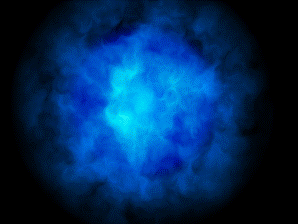
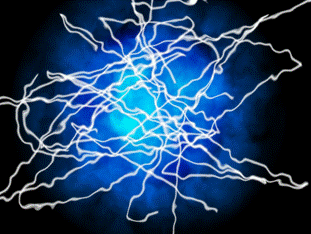
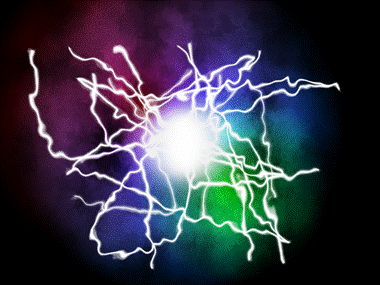
another example:
Thats it! Your done and you have a beautiful creation!
I'm sure you can change lots of things and get different outcomes!
|
This
tutorial was taken from the following url: http://paintdotnet.forumer.com/viewtopic.php?f=15&t=20350&sid=daecf61a827c9cf1384d8a48fbdb6b1a The
author’s name is unknown. The author’s
alias is Bowie. |
