Adding Water Bubbles Tutorial
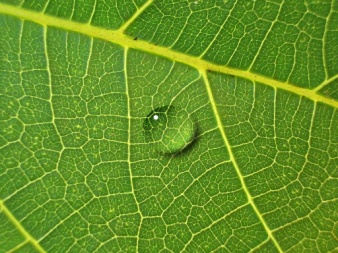
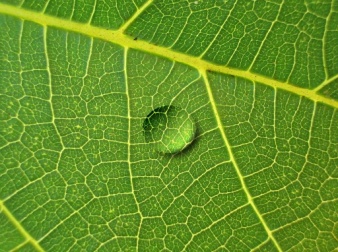
The goal is to create a drop of
water. I'm making mine on a leaf, but I guess you could do this on other
objects as well (maybe fruits or vegetables to give them that fresh look).
The end result will be like this:
STEP 1
The first step is to find a picture of the object you
want to do, here's mine:

STEP 2
a) Create a new layer and select it by click on its
name.
b) Double click on the layer’s name
and change it to “waterdrop”.
STEP 3
a) Use the ellipse select tool to
make a circular or slightly ellipse shaped selection.
b) Use the gradient tool to fill it
with a black to white gradient. See the image below.
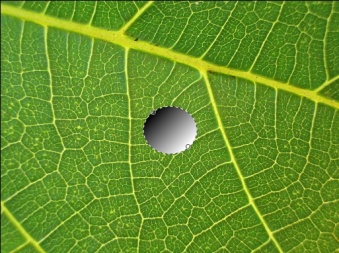
STEP 4
Set the blending mode of the waterdrop layer to
"overlay". To do this, you
simply need to double click on the layer name and change the blending mode in
the window that appears.
The image below shows you what you
should have.
STEP 5
a) Create yet another layer.
b) Name it "drop shadow".
STEP 6
a) Select the waterdrop
layer.
b) Select the Magic Wand tool and
set the Tolerance to 0%.
c) Click on the canvas anywhere
outside the water drop. This will select
everything but the drop.
d) We want to select only the drop
so we must invert the selection. You can
do this by hitting CTRL-i or by choosing Edit >
Invert Selection.
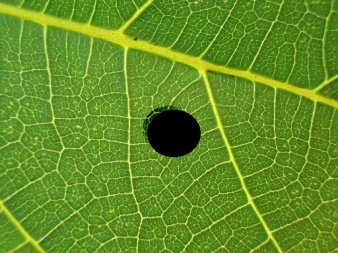
STEP 7
a) Select the drop shadow layer.
b) Fill your selection with black.
STEP 8
a) Remove the selection (by
clicking away from the selection or hitting CTRL-d).
b) Choose the Move Selected Pixels
tool (top right tool in toolbar).
c) Move the drop shadow layer a
slight bit to the right and bottom. In the next picture you can sort of see how
much I've moved it.
STEP 9
a) Select the waterdrop
layer.
b) Use the magic wand to select the
drop like before. The steps were:
·
Select the Magic Wand tool and set the Tolerance to 0%.
·
Click on the canvas anywhere outside the water drop. This will select everything but the drop.
·
We want to select only the drop so we must invert the
selection. You can do this by hitting
CTRL-i or by choosing Edit > Invert Selection.
STEP 10 & 11 (Revised Apr 2011)
We now have the original waterdrop selected.
We want to delete any shadow that is directly underneath it.
a)
Select the drop shadow layer.
b) Use the eraser tool to
erase the drop shadow that is inside the selection.
STEP 12
a) Remove the selection (by clicking away from the
selection or hitting CTRL-d).
b) Apply a Gaussian Blur effect
(Effects > Blurs > Gaussian Blur) to the drop shadow layer. I used a setting of 10px.
STEP 13
a) Pick the Move Selected Pixels
tool in the toolbar.
b) Click and drag anywhere on the
canvas to move the drop shadow layer back to it's
original position (only a tiny bit, to imply the effect of seeing the edge of
the drop's shadow through itself.
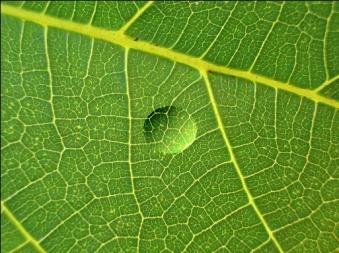
STEP 14
a) Finally, move your drop shadow
layer under your waterdrop layer in the layers panel.
STEP 15
a) As a final touch, create a new layer (named "highlight")
and select it.
b) Choose the Paintbrush tool from
the toolbar.
c) Be sure that Antialiasing
enabled is selected in options for that tool.
(See image below)

d) Put a small white dot at the
left top of the droplet to create the effect of a highlight.
The end result (as shown before):
Play around
a bit with various settings and distances to get results to your tastes
(slightly lowering the opacity of the waterdrop layer
adds a touch of softness).
POSSIBLE ADDITION
Try using the sphere option in the Shape3D
plugin to give a more round effect.
|
This tutorial was
taken from the following url: http://paintdotnet.forumer.com/viewtopic.php?f=15&t=3790&sid=35350555a66f03798398092609aa6480 The author’s name is
unknown. The author’s alias is Eraesr. |