Enhancing
Portraits Tutorial
Portraits can often be improved with
selective blurring.
First, blurring the background gets rid of
distracting detail. Large format photographers can do this by controlling depth
of field, but digital cameras have so much depth of field that little can be
done at photo time.
Second, most of us have a few blemishes on
a given day that we would rather hide. Selective blurring can help here, too.
Below is a step-by-step guide to portrait
enhancement using Paint.NET. Of course, this could be done in almost any
advanced editing software.
|
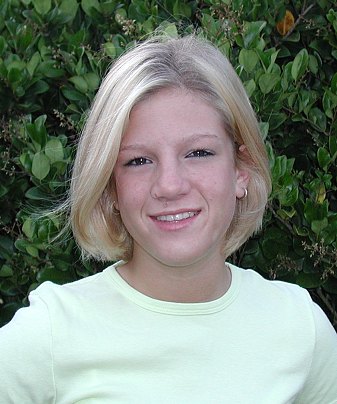
Here
is the original. A nice portrait of a girl, but even an excellent portrait
can benefit from some tweaking. |
|
|
1.
Use clone brush to get rid of main blemishes.
(Simply cover them up with skin colour.) |
|
|
2.
Next, select Layers > Duplicate.
|
|
|
4.
Select the eraser tool. 5.
Erase eyes, eyebrows, mouth and lips, ears and earring, nostrils. This lets
the sharp bottom layer show through at these spots. An old adage is that if
the eyes are sharp, most people will consider the photo sharp. We are already
that far. 6.
Erase all the edges between what you want sharp and what you want blurry:
along chin line, outside edge of hair, edge between blouse and neck, edges of
neck |
|
|
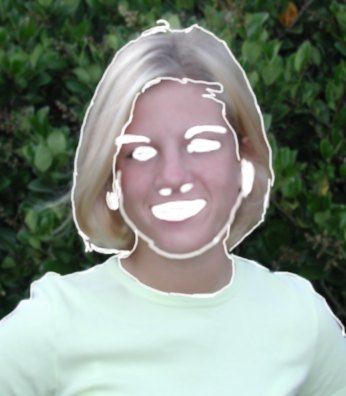
Here
is just the blurry layer from the above image, so you can see clearly where I
have erased. I
have saved one version of the file at this stage so you can see what I have
done. |
|
|
7.
Erase the blurry hair and blouse. This
gives the final image, as shown at right. |
|
|
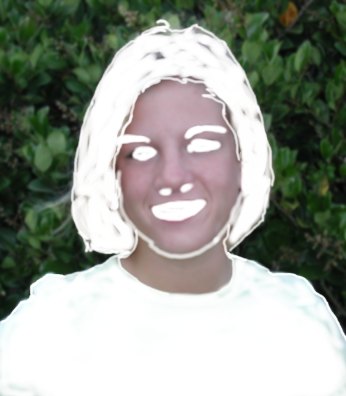
At
right is just the blurry layer of the final image. |
|

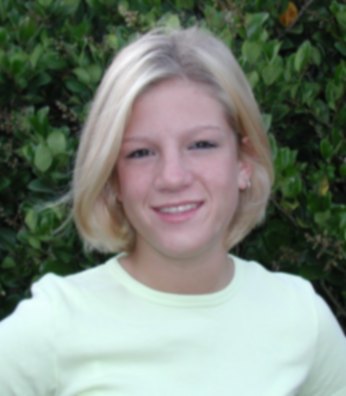


That's it!
Here are the initial and final images side
by side.
|
|
|
I have chosen to leave the background
blurry, since it is less distracting that way. If you prefer a sharp
background, just erase the background area of the blurry layer.
|
This
tutorial was taken from the following url: http://www.wfu.edu/~matthews/misc/psp/portrait/portrait.html The
author’s name is Rick Matthews. He is
a professor at Wake Forrest University. The
original tutorial was made for Paint Shop Pro. Minor changes were made by Mr. Campeau to
adapt it for Paint.NET. |