Tutorial 17 – Fractal Background
Created by Lucas Burns (2012)
Note: You cannot do both
Tutorial 17 and Tutorial 17B for marks.
Only one will count.
STEP 1
Figure out the size of your desktop
resolution. This can usually be done by
right clicking on your desktop and choosing one of the options. The resolution for my laptop’s desktop is
1366 x 768. If you aren’t sure, ask your
awesome teacher.
STEP 2
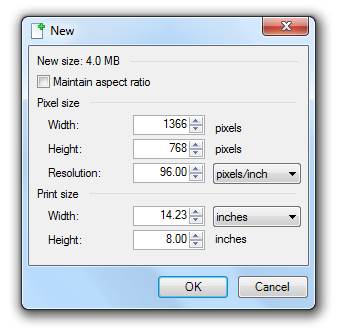
In Paint.net, choose File > New.
STEP 3
Set the Width and Height of the new image to
be the same as your desktop’s resolution. See below.
STEP 4
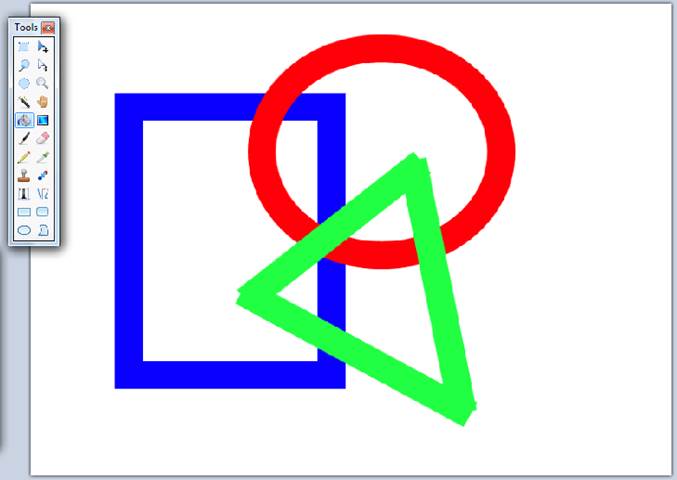
Use one of the shape tools or the line/curve
tool to create a simple design. It could
be as simple as a few shapes. You can
use different colours. Below, I used a link thickness of 35. Your design should fill a good part of the
canvas.
STEP 5
Choose Effect > Distort > Polar
Inversion. Set the Amount and Quality to
max (see below).

STEP 6
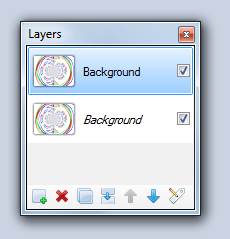
Duplicate the layer (Layers > Duplicate
Layer).
So you should see this in the Layers
panel. (If you need to see the Layers
panel, go to Windows > Layers.)
STEP 7
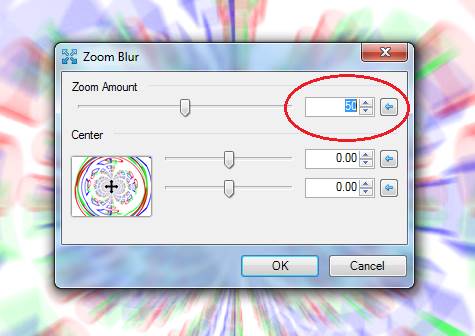
With the top layer selected, choose Effects
> Blurs > Zoom Blur. The Zoom
Amount should be about 50.
STEP 8
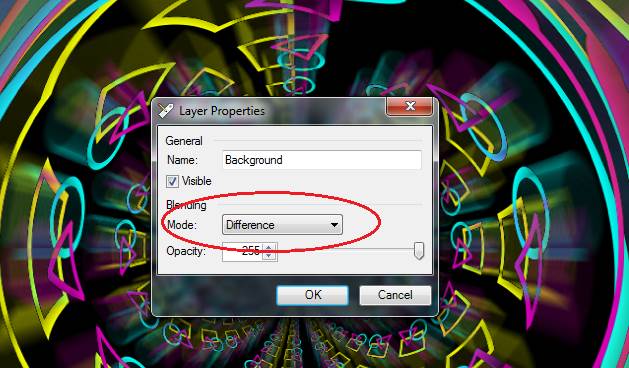
In the Layers panel double click on the first
layer. Set the Blending Mode (see below)
to Difference.
STEP 9
Choose Layers > Merge Layer Down.
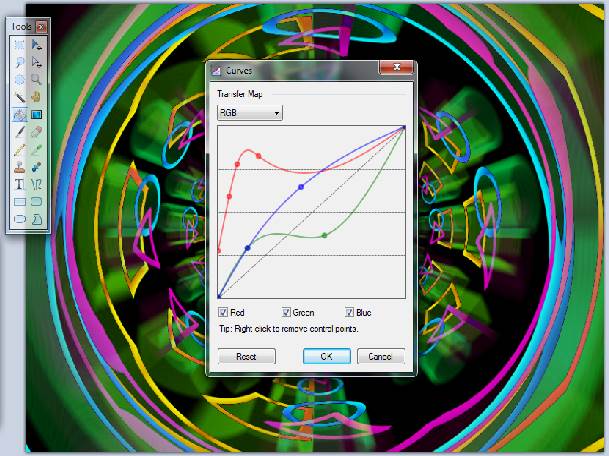
STEP 10
Choose Adjustments > Curves. In the drop down menu, choose RGB. Play with the curves till you like what you
see.
STEP 11
You’re done.
Add your name and save your file as a PNG. You can make this image your background if
you wish.
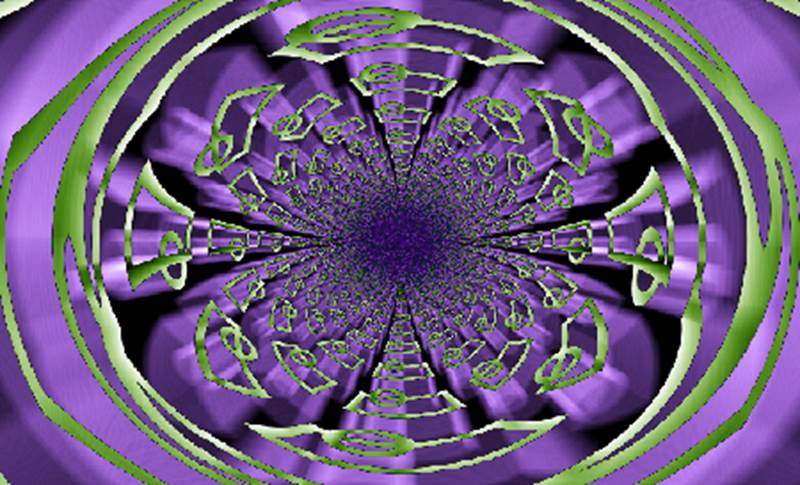
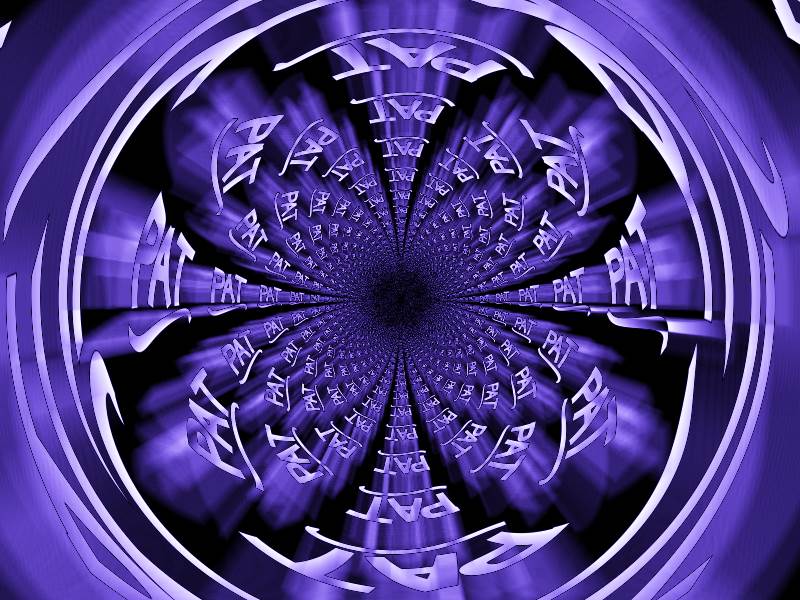
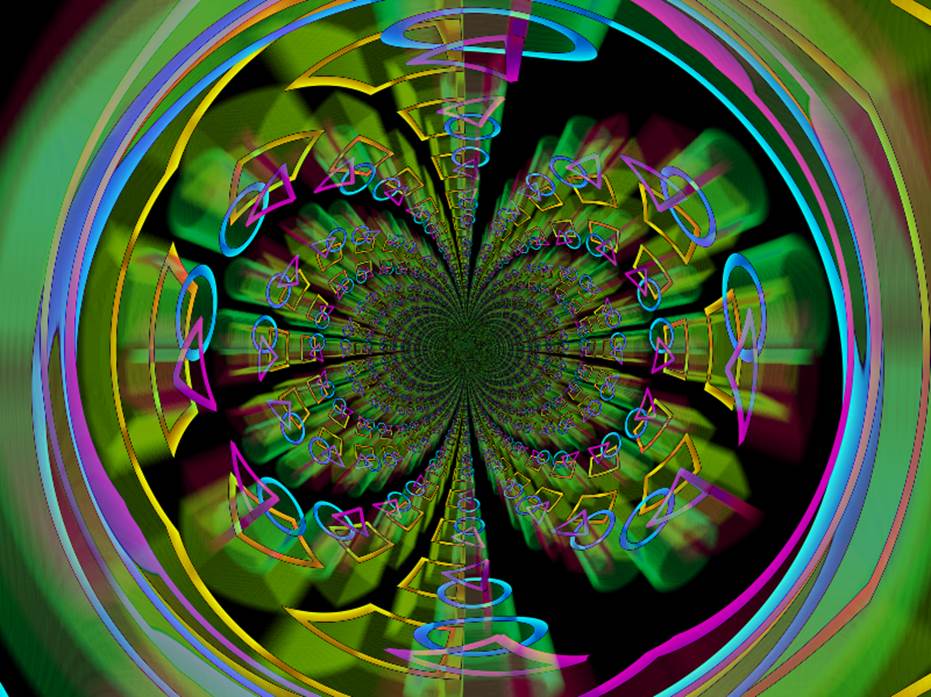
A few examples…