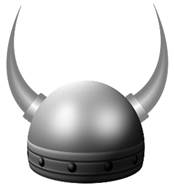
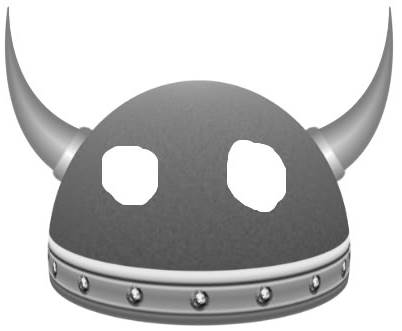
Tutorial 15 – Viking Hat
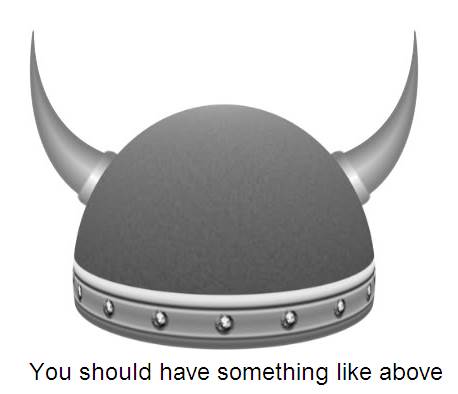
You will create something like this:
STEP 0
You need a few plug-ins for this tutorial.
a)
Save this file in C:/Program
Files/Paint.NET/Effects.
b)
Unzip it.
c)
Go into Paint.NET.
STEP 1
Open a new canvas that is 600 x 600.
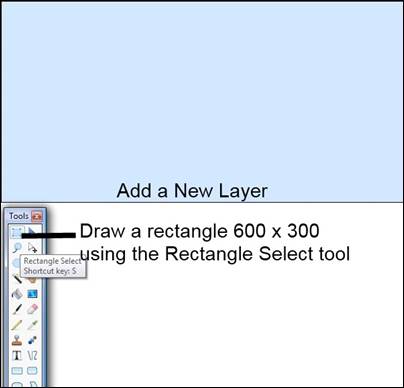
STEP 2
Add a New Layer. (see image)
STEP 3
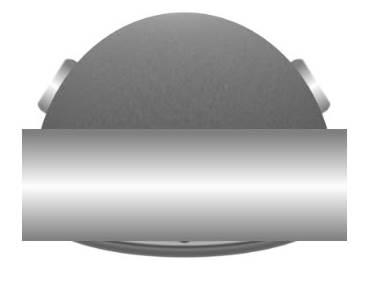
Choose the Rectangle Select tool and select
exactly the top half. (see image)
STEP 4
Set your colours for the hat. In this tutorial, we have chosen Light Gray
and Dark Gray.
STEP 5
Create a linear gradient inside the
selection. (see image)
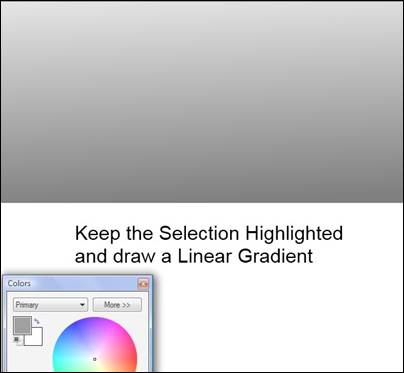
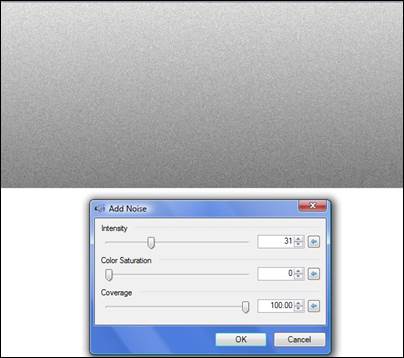
STEP 6
Use Effects > Noise > Add Noise as
shown in the image. (See image)
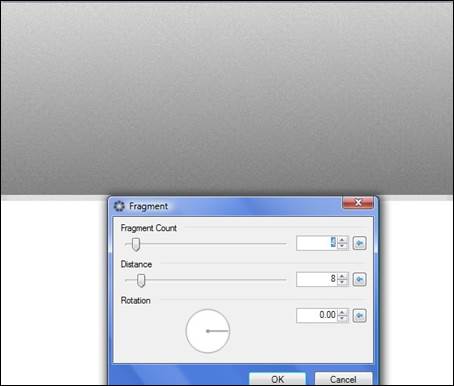
STEP 7
Use Effects > Blurs > Fragment as shown
in the image below. (See image)
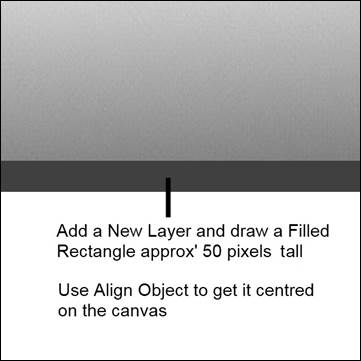
STEP 8
Add a new layer. (see image below)
STEP 9
Draw a rectangle that is about 60 pixels high
and the full width of the image (600 pixels).
(see image below)
STEP 10
Use Effects > Align Object and center the
rectangle. (see image below)
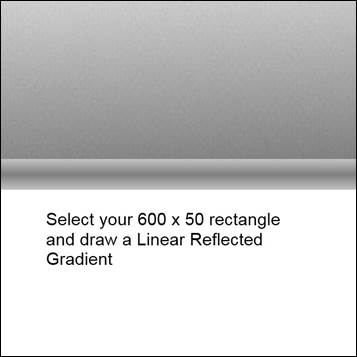
STEP 11
Use the magic want to select the rectangle.
STEP 12
Fill the rectangle with a linear reflected
gradient. To do this:
·
Choose your colours (tutorial uses the same ones).
·
Choose the gradient tool.
·
At the top, in the gradient options, choose Linear (Reflected).
·
You might have to swap your primary and secondary colours around.
STEP 13
Still with the rectangle selected, add a new
layer.
STEP 14
Use Effects > Selection > Bevel
Selection. (Configured like in the image
below.)

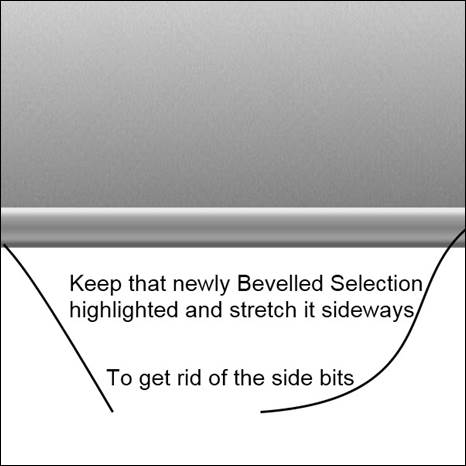
STEP 15
Still with the rectangle highlighted, stretch
out both sides to get rid of the beveled ends.
(See image below)
STEP 16
Add yet another layer.
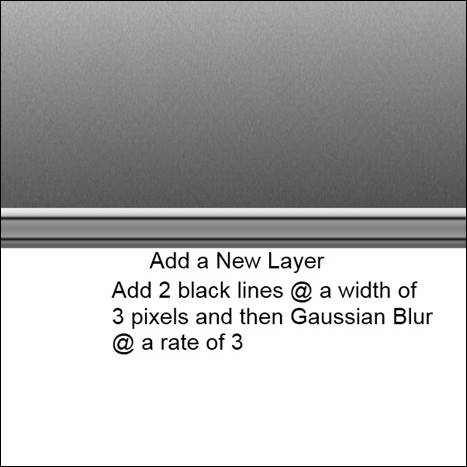
STEP 17
Add 2 black lines with a width of 3
pixels. (See image below for placement)
STEP 18
Apply Effects > Blurs > Gaussian Blur
with a Rate of 3. (See image below)
STEP 19
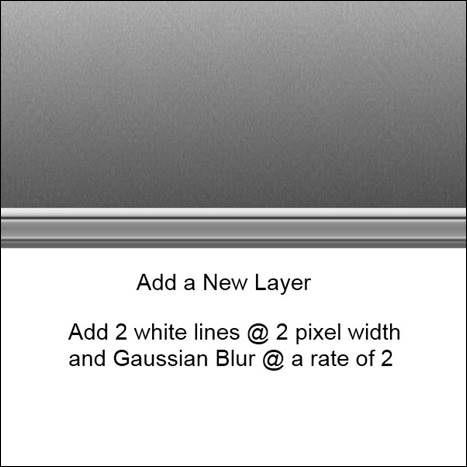
Add another layer.
STEP 20
Add two white lines with a width of 2 pixels.
The lines should be located just under and just above the black lines. (See image below)
STEP 21
Apply Effects > Blurs > Gaussian Blur
with a Rate of 2. (See image below)
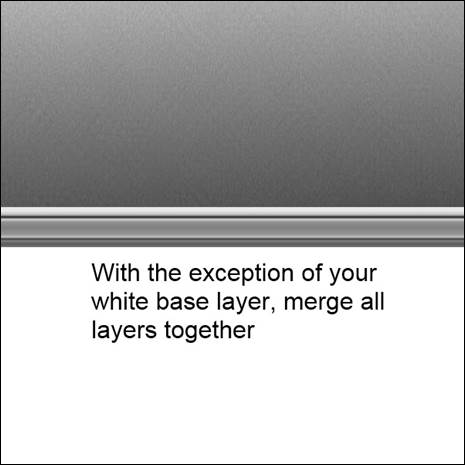
STEP 22
Merge all layers together except the bottom white one. So you should have two layers after this.
STEP 23
Add a new layer.
STEP 24
Create a circle selection the size that would
fit inside of the two blurred black lines.
STEP 25
Inside the selection, create a circular
gradient like in the image below.
Colours used below are white and black.
Note: Multiple
copies of this circle will form the studs on the hat. If you have time, you are welcome to explore
better ways to create nice studs.
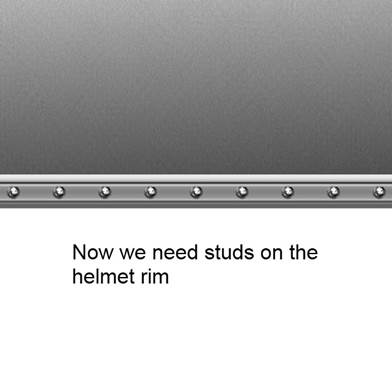
STEP 26
Copy and paste the
circle. Move the circle to the desired
location on the hat.
STEP 27
Repeat step 26 as
many times as you wish to get the desired hat and studs. (See image below.)
HINT: Take your time placing the studs so that they look evenly
distributed. The coordinates at the
bottom should be useful. (In fact, you
could do a few calculations to make them all equi-distant.)
STEP 27B – NOTE
It seems that you might have to merge the
layers containing the studs and the hat before proceeding to Step 28. Please note that this has not been fully
examined yet. Please let your teacher
know what works for you.
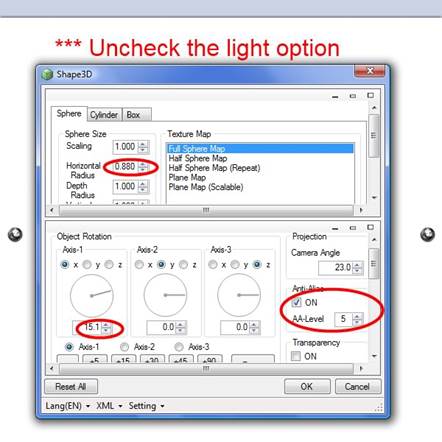
STEP 28
We now are ready
to create a hat shape with our graphic.
Use Effects >
Render > Shape3D with the configuration shown in the image below.
Do not hit OK
yet! Wait till next step!
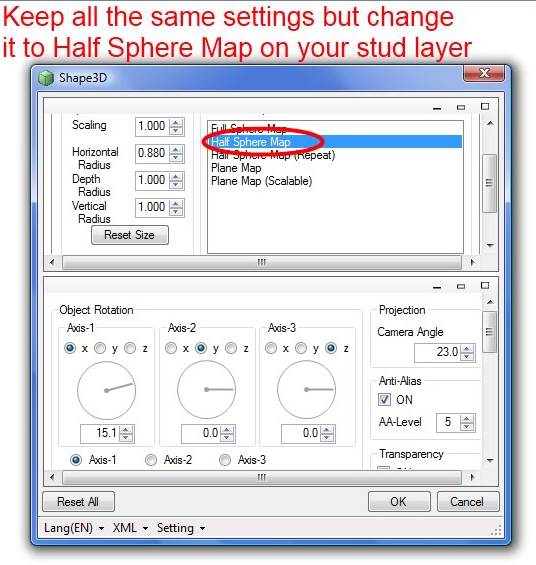
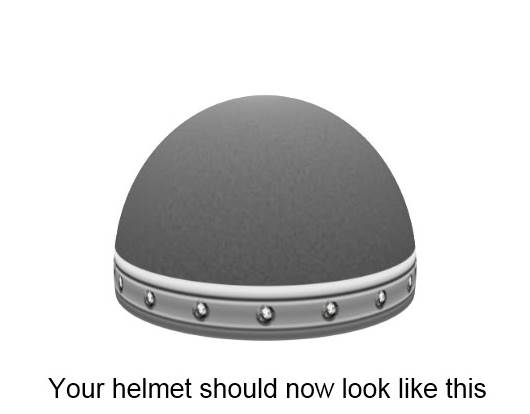
STEP 29
Select the Half Sphere Map option.
STEP 30
Using Layer > Rotate / Zoom, resize your
image down to 80%. To do this, simply
bring the Zoom slider down to 0.80x (or as close to this number as you can.)
STEP 31
Add a new
layer.
STEP 32
On the new
layer, draw a rounded rectangle (as shown below).
STEP 33
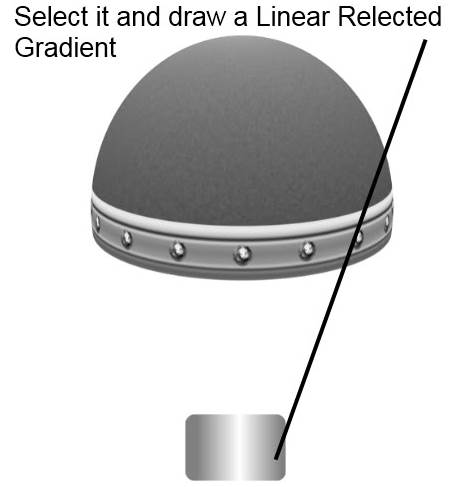
Select the
rectangle (using the Magic wand tool).
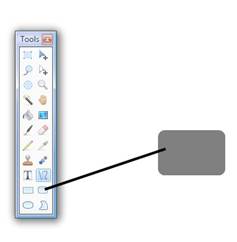
STEP 34
Fill the
selected rectangle with a linear gradient (like below).
STEP 35
Move the
rectangle into place to make it look like below. Remember that:
·
Right-clicking on a corner of the
selected rectangle allows for rotation.
·
You might have to resize.
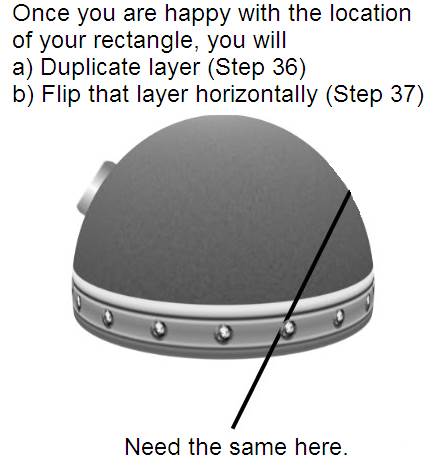
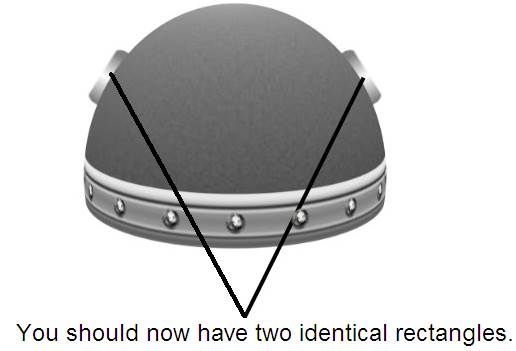
STEP 36
Duplicate the
layer. (Layers > Duplicate Layer)
STEP 37
Flip the layer
horizontally. (Layer > Flip horizontal)
STEP 38
Add a new
layer. Name it “Horn”.
STEP 39
Using the
rectangle selection tool, make a large rectangle (see below).
Fill the
rectangle with a linear gradient (like below).
STEP
40
Align the object centrally. (Effects > Align Object and then choose
the circle under the heading “Both”.)
Note:
You may have to hit CTRL-D beforehand to deselect any existing selection.
STEP
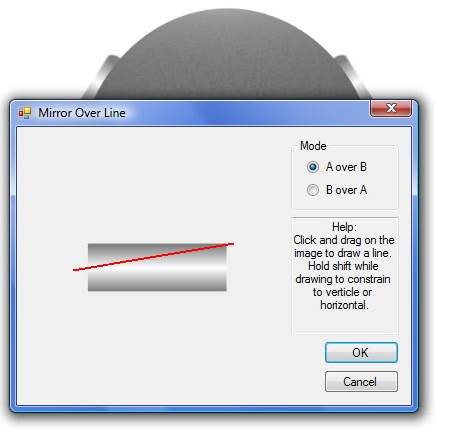
41
Use Effects > Mirror >
Mirror Over Line
Draw the line from left to right
(otherwise you will mirror the other part).
STEP
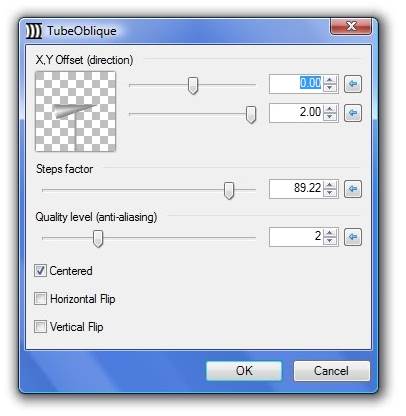
42
Use Effects > Distort >
Tube Oblique with the details in the image below:
NOTE:
If your horn doesn’t appear, it is probably because you have your
graphical element inside a selection and the horn is to appear outside of
it. Simply deselect the element by
pressing CTRL-D and try again.
STEP
43
You should now have a horn that
you can move, rotate and resize. Place
it where you want it. (See the image
below to see when the horns go.)
STEP
44
Move the Horn layer beneath the
other layers (Not the bottom white one) so that it appears behind the main
helmet section.
To do this, you use the down
arrow in the Layer panel window.
STEP
45
Duplicate the layer. (Layers >
Duplicate Layer)
STEP
46
Flip the layer horizontally
(Layers > Flip horizontally)
STEP
47
Select the top layer and add a
new layer. Call it Lighthing.
The new layer should be at the
very top of all layers.
STEP 48
Using the paintbrush, add white
forms like below:
STEP 49
Apply Effects > Blurs >
Gaussian Blur at radius 70.
STEP 50
You’re done! Merge all layers together (Use Layers >
Merge Layer Down repeatedly until you are down to one layer.)
SOURCE:
http://www.pdnfanatics.com/make-a-viking-helmet-image-heavy-t735.html