Tutorial 13 – Hurricane Wave
Found on the internet by
Justin Soulliere (2007)
STEP 1
Start with a new image. Resize the canvas to 500 pixels by 500 pixels
(Image > Canvas Size).
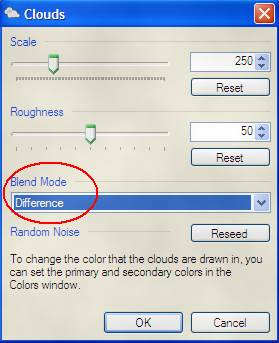
STEP 2
Apply the Clouds effect (Effects
> Clouds). Set the Blend Mode to
Difference.
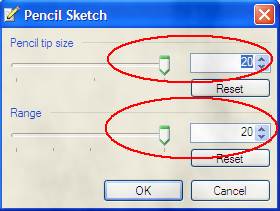
STEP 3
Apply the Pencil Sketch
effect. (Effects > Pencil Sketch)
Use Size=20 & Range=20.
STEP 4
Apply the Zoom Blur effect
(Effects > Blurs > Zoom Blur).
Use Zoom Amount = 100.

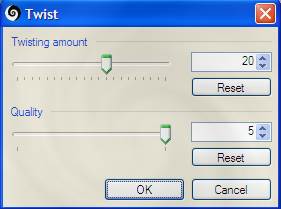
STEP 5
Apply the Twist effect. (Effects > Distort > Twist).
Use Twisting amount = 20 &
Quality = 5.
STEP 6
Duplicate the layer. (Layers >
Duplicate Layer)
STEP 7
On top layer, apply Twist
effect. (Effects > Distort > Twist).
Use Twisting amount = -40 &
Quality = 5. (Yes, that is negative 40.)
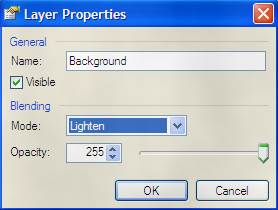
STEP 8
Set the top layer’s blending mode
to Lighten.
(Layers > Layer Properties)
STEP 9
Flatten Image (Image >
Flatten).
STEP 10
Open the Curves option
(Adjustments > Curves).
Play with the curve colours until
you are satisfied with your product.
STEP 11
Put your name on the image and
save it.
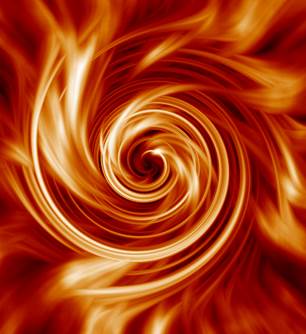
Here is what the author got:

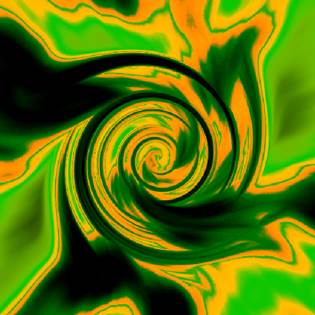
Another person’s
work:
|
This
tutorial was taken from the following url: http://paintdotnet.forumer.com/viewtopic.php?f=15&t=4158 The
author’s name is unknown. The author’s
alias is Europe. The screenshots were done by alias cjmcguinness as well as
by Mr. Campeau. |
STUDENT RESULTS

Alex Pitzel - 2009
Paul Au-Yeung (2013)