Tutorial 10
– Neon Spider
Found on
the internet by Justin Soulliere (2007)
I posted an image in the pictorium and
on my deviantArt pages called 'Ready
to Pounce'
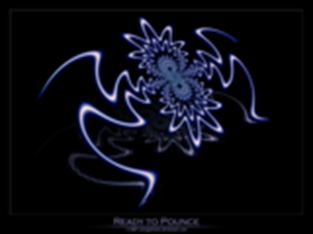
I received a request to post a tutorial as to how I made this, so here goes...
Required Plugins:
Grid Maker
Sine Waves
Gradient
Mapping
Start with a 1600x1200px canvas
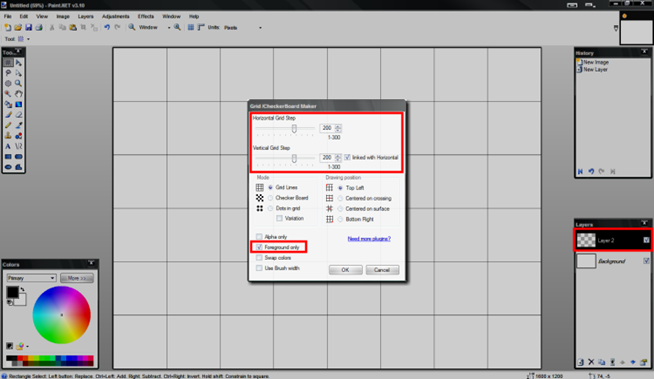
Create a new layer and call it Grid
On the 'Grid' layer: Effects > Grid/Chequerboard
Maker - Horizontal 200, Vertical 200, Foreground only.
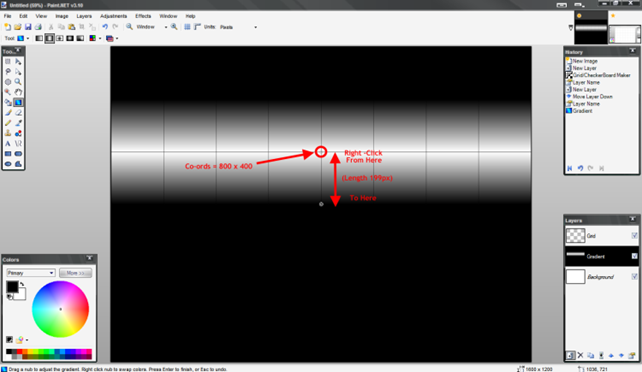
Create a new layer and call it 'Gradient' - move this below the Grid layer
With Primary Colour = Black & Secondary Colour = White, select the Gradient tool, set to Linear
Reflected
Start at co-ords 800 x 400 and, hold the shift key
and right-click to drag a gradient straight down 199px
Duplicate the Gradient layer and go to LAYERS > Flip Vertical. Set the
blending mode on the new layer to Additive.
Merge the two gradient layers together (CTRL+M).
You can now delete the Grid layer (this was just here as reference for setting
the Gradients in the right place).
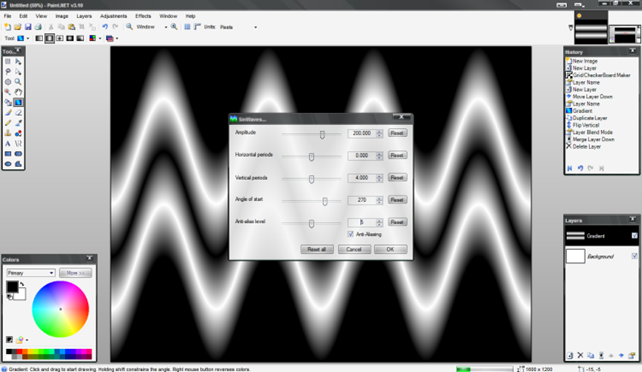
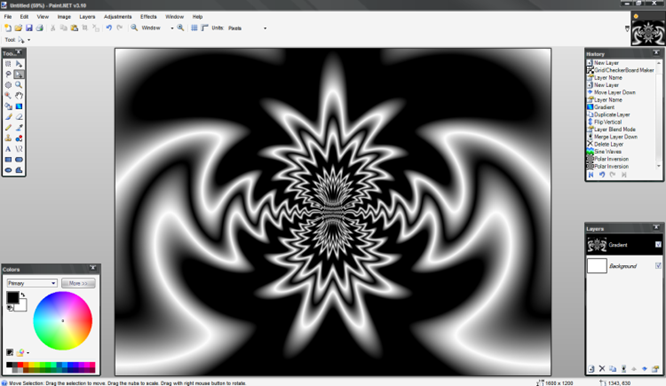
On the Gradient layer, EFFECTS > Distort > Sine Waves: Amp = 200, Hor = 0, Ver = 4, Angle = 270, AntiAlias = 5.
Still on the Gradient Layer, EFFECTS > Distort > Polar Inversion: Amount
= 100, Quality = 7.
Then, EFFECTS > Distort > Polar Inversion: Amount = 1, Quality = 7. This
will clean up the centre of the image.
Create a new Layer and call it Radial. Select the Gradient tool and set it to
Radial.
Place the cursor in the centre of the image,
right-click and drag a radial gradient to the left edge of the image.
Set the Blending Mode of this layer to Color Burn.
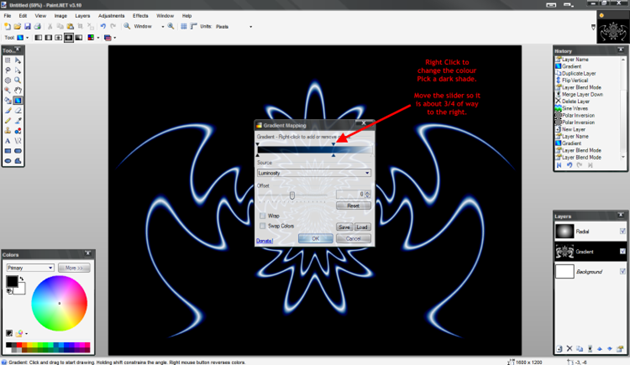
Go back to the Gradient Layer (with the polar inversed image) and select
Adjustments > Gradient Mapping.
Right click on the middle gradient arrow to change the colour
- choose quite a dark shade - and move the slider about 3/4 of the way to the
right. Next - EFFECTS > Soften Portrait: Soft = 10, Light = 10, Warm = 0.
You can now merge the Radial with the Gradient layer.
This is the basic Neon Spider image.
- - - - - - - - - -
These are the additional steps to make it 3D, rotate, position and add the tile
reflection:
Duplicate what is still called the 'Gradient' layer. Rename the top Gradient
layer 'Top' and the next Gradient layer 'Reflection'
Use the Magic Wand tool, with the tolerance set at about 30%. Hold the Shift
key and click anywhere in the black area - then press delete.
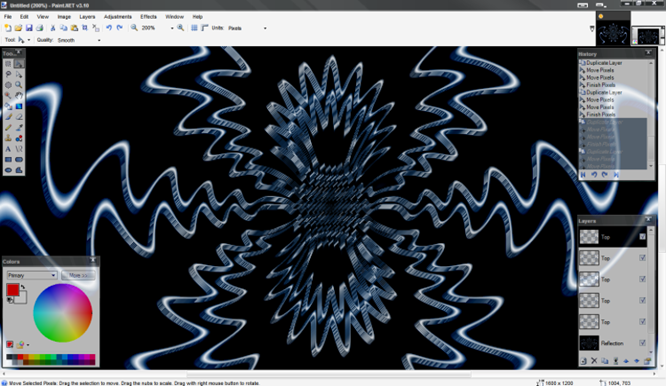
To add some depth to the image we are going to perform a repeating 5 step
process.
Duplicate the 'top' layer, press CTRL+A to select all, choose the Move Selected
Pixels tool, press the up arrow once and the right arrow once (this will move
the top layer up and across by 1 pixel.
Repeat this process another 4 times until you have 5 'Top' layers, each offset
up and right by 1 px from the last. This will create
a 3D effect.
Start from the top layer and merge down 4 times, until you have a single 'Top'
layer. Press CTRL+D to deselect.
On the 'Reflection' layer, EFFECTS > Distort > Tile Reflection: Rotation
= 45, Size = 50, Curvature = 5.
Deselect this layer for now, so we can work on the top layer. Also, fill the
Background (bottom) layer Black.
On the 'Top' layer - LAYER > Rotate Zoom > Angle = 25, Twist = 20, Radius
= 40, Xpan = 0.150, Ypan =
-0.250, Zoom = 80%

Deselect the 'Top' layer, for now, and reselect the 'Reflection' layer. Create
a new layer and call it 'Shadow'
Select the Gradient tool and set it to Linear. Left-Click about 200px from the
top of the canvas and drag a gradient down to the bottom.
Set the Blending Mode to Multiply and merge this down
with the Reflection layer.
Turn on the 'top' layer again, so it is visible - but select the Reflection
layer. Use LAYER > Rotate Zoom > Angle = 45, Twist = 90, Radius = 60, Xpan = -0.040, Ypan = 0.080, Zoom
= 75%
*NOTE - you may have to play with the Rotate/Zoom settings slightly to get
the top and bottom images to line up
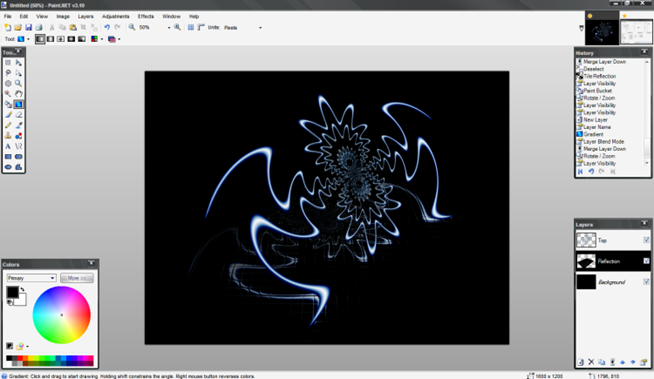
You are now finished.
I hope this tutorial will enlighten users as to the useage
of layer blending modes, the Sine Wave & Gradient Mapping plugins and usage
of the Rotate Zoom feature. Play with the original gradients, Sine Wave
settings, Polar inversion settings and colours to create your own images - have
fun and please post your results.
|
This
tutorial was taken from the following url: http://paintdotnet.forumer.com/viewtopic.php?f=15&t=20980 The
author’s name is unknown. The author’s
alias is cjmcguinness. |