Paint.NET Tutorial – Making an Exploding
Planet
STEP 1
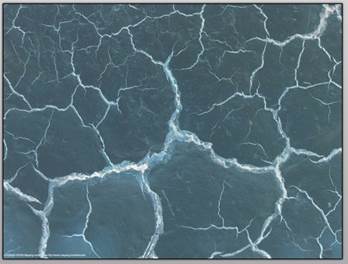
Start off
by finding dry mud. You can try using
different starting objects if you want to (in fact, I encourage it) but dry mud
is sure to work. If you want to use dry
mud, you are also encouraged to find a different picture than this one so that
yours doesn’t look too similar to everybody else’s.
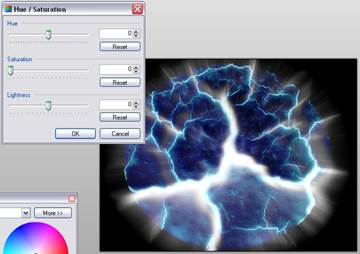
Also, you
may want to change the hue of the starting image. (Adjustments > Hue / Saturation)

STEP 2
Copy the
image and Paste it as a new image (in the Edit menu).
STEP 3
Invert
the colours of the image. (Adjustments -> Invert Colours)
STEP 4
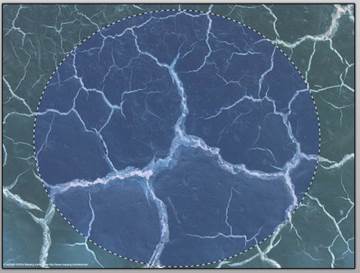
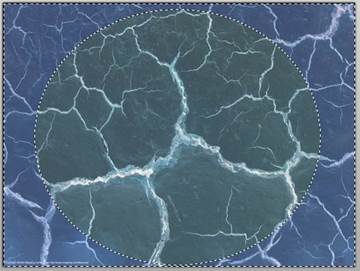
Select
the Ellipse tool and select an area of mud. (as big or
as small as you like just as long as it's somewhat centered)
STEP 5
You now
have a circle selected. You want
everything but the circle. So you need to invert
the selection. You can do this by
hitting Ctrl-I or you can go into the Edit menu.
STEP 6
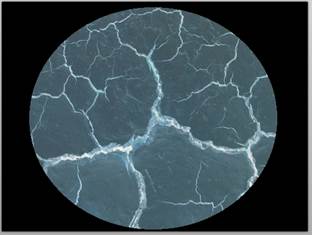
Hit
delete to delete the selection. You
should now see a bunch of little squares in the area outside your circle.
STEP 7
Fill the
squared area with black. You simply need
the bucket tool for this.
STEP 8
Remove
the current selection by hitting Ctrl-d.
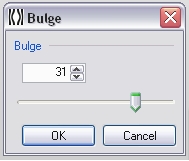
STEP 9
Next step is to bulge the image. (Effects -> Distort -> Bulge...) This
makes it look round and thus planet-like. For this image I used a bulge of 31%.
Do what looks best for your size of image.
STEP 10
Duplicate the layer. (Layers >
Duplicate Layer)
STEP 11
On the top layer, adjust the layer blending to Color
Burn. To do this, you need to double
click on the top layer’s name in the Layers window. If you cannot see the Layers window, click on
Window > Layers to make it visible.

STEP 12
Duplicate
the top layer (the one you just did the Color burn on. You should now have three layers.
STEP 13
For the
top layer, set the layer blending to Additive.
STEP 14
Be sure
that the top layer is selected. Merge
layer down. Merge layer down again. You should only have one layer now.
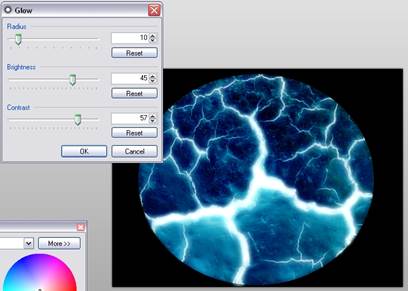
STEP 15
Add a
glow effect (Effects -> Glow or
Effects -> Photos -> Glow)
You'll
have to adjust the glow depending on the effect you want and the image. You'll
need more or less depending on how many cracks your "planet" has.
STEP 16
Duplicate
the layer. (Afterwards, you should have
two layers.)
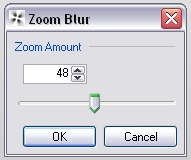
STEP 17
On the
top layer, do a Zoom Blur effect (Effects -> Blurs -> Zoom Blur)
Use about
48%. You may choose a different amount
if you prefer.
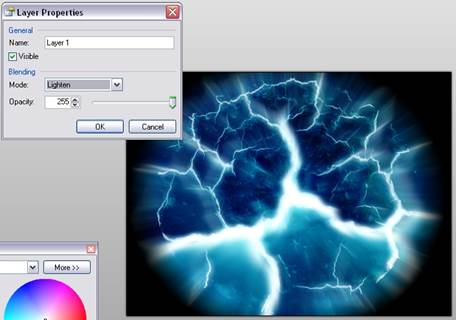
STEP 18
On the
image we just did the blur on, adjust the blending to Lighten.
STEP19
Turn the
saturation to zero (Adjustments -> Hue/Saturation).
If you
don’t like what this does, then you can skip this step.
STEP 20
Be sure
that the top layer is selected. Merge
layer down.
STEP 21
You’re
done! Put your name in one of the
corners and save your work.
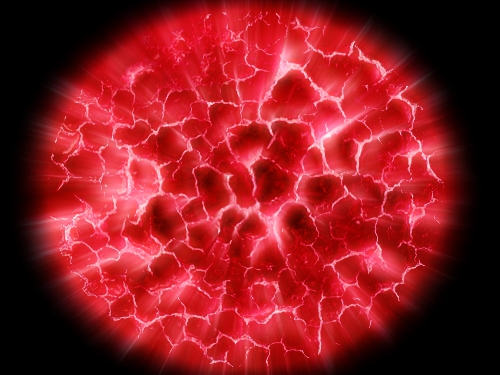
Here's an
image that the author did with a different mud. He did change the hue before
starting.
Possible Addition
Try adding your planet on a starry background to make it look
that much more authentic.
|
This
tutorial was taken from the following url: http://paintdotnet.forumer.com/viewtopic.php?f=15&t=2792 The
author’s name was not stated. The
author’s username was pacercoin. Minor
changes were made by Mr. Campeau. |
STUDENT CREATIONS

Taylor Wyman - 2008
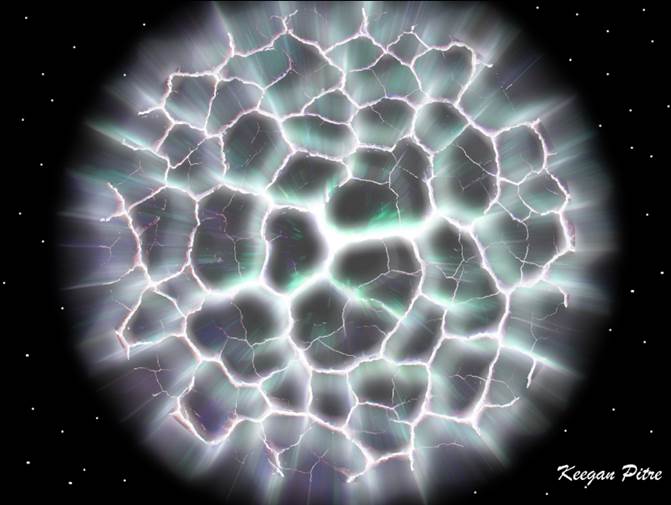
Keegan Pitre – 2009
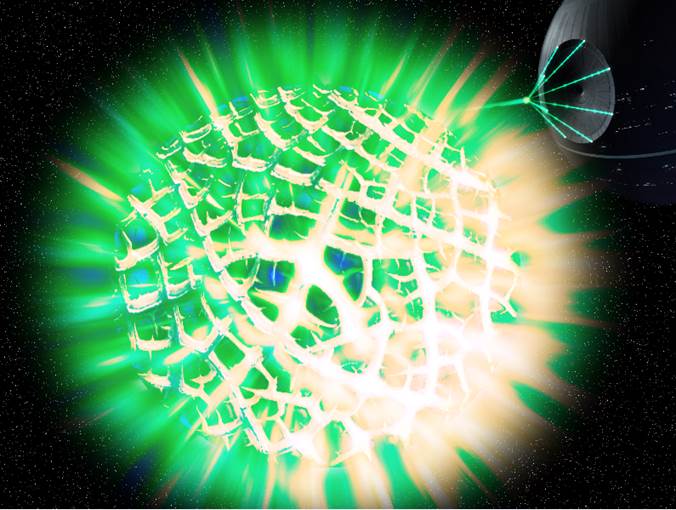
David Pushman –
2015 (Preview to The Force Awakens?)