|
MICROBIT PROJECT
SMILEY FACE

DESCRIPTION
Students will learn how to display a smiley face on the microbit’s
5x5 LED matrix.
STEPS
STEP 1
Connect your Microbit to your device (laptop).
STEP 2
In your browser, go to the coding site: https://makecode.microbit.org/
STEP 3
Click on New Project and name the
project Smiley Face.
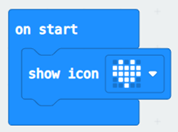
STEP 4
Under Basics, find the show icon
block and drag it inside the on screen
block. It should look like the image
below.
STEP 7
Press the down arrow to change the icon to the Smiley Face.

STEP 8
Download the program to your microbit by
hitting the Download button.
STEP 9
Hit the Reset button to re-run
your code.
STEP 10
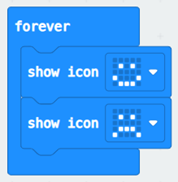
Move your show icon block to the forever code.
STEP 11
Add another show icon block under
the other show icon block. Choose the icon you want.
STEP 12
Download and run your program.
EXTRA
1. Explore the other icons that are available.
2. You can create your own icons by using the block show leds instead of the show icon block. Try it out!
|