|
MICROBIT PROJECT
HELLO WORLD

DESCRIPTION
Students will learn how to display a simple message on screen.
STEPS
STEP 1
Connect your Microbit to your device (laptop).
STEP 2
In your browser, go to the coding site: https://makecode.microbit.org/
STEP 3
Under the heading My Project,
click on New Project and name the
project Hello World.
STEP 4
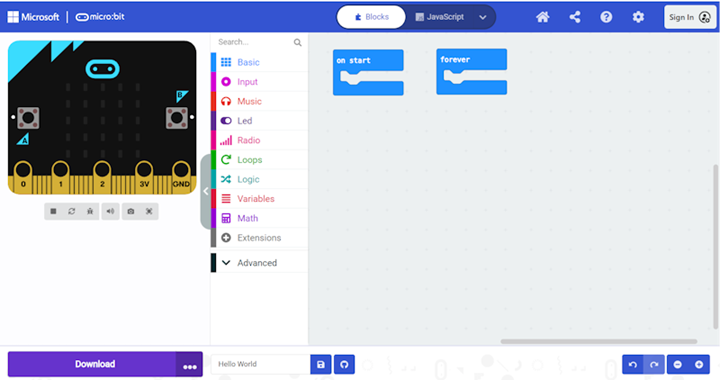
Check that your screen looks like the image below.
Note that there are two blocks that are already in your block coding canvas: on start and forever. When your program
starts, the on start
section is executed first but only once, then the forever section is repeated over and over forever.
STEP 5
In the center of your screen, you have all of your coding options. Take a minute to click through the options.
STEP 6
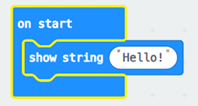
Under Basics, find the show string
block and drag it inside the on screen block. It
should look like the image below.
STEP 7
Change the string of characters “Hello” to “Hello World”.
STEP 8
Note that you are getting a preview of what your program will do on you
screen. To transfer the program to your
microbit, you need to hit the Download button.
STEP 9
You will be asked to pair your software with the microbit. Follow the on-screen instructions. Once done, the download will start. (NOTE: Does
this step require more information? I had to disconnect and reconnect my
microbit to pair it properly.)
STEP 10
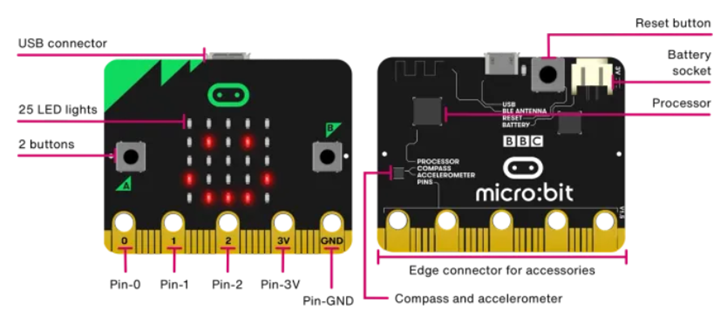
Once the download is complete, press the Reset button on your microbit to run your program. Note that the Reset button is on a
different side than the 25 LED lights that display your program.
EXTRA
1. What happens if
you move your show string block
from the on screen
block to the forever block? Try it.
Remember that you have to re-download your program.
2. Change your program so that it displays your name on the screen and
test it out.
|