CAMPEAU’S INKSCAPE MINITASKS
|
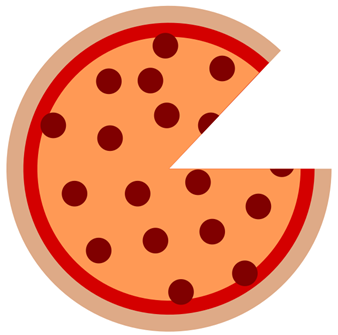
PIZZA
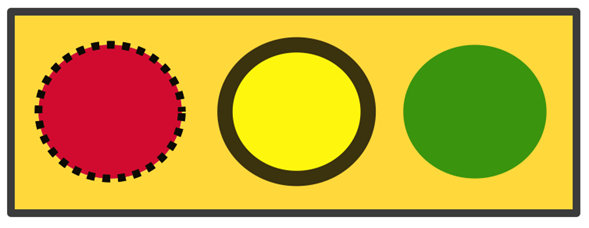
INSTRUCTIONS Create your three circles representing the crust, sauce and cheese. If needed, use the Align and Distribute panel to align all three circles. (Object > Align and Distribute). With all three circles selected, you will have to click on the two small centering icons to center vertically and horizontally. Use the Node tool to take away a slice. You might want to zoom in to be precise. Create one pepperoni. Copy and paste it all over your pizza. You need to have at least two pepperonis that are cut off at the slice. You can cut a pepperoni by using the Node tool. POSSIBLE IMPROVEMENTS Perhaps having the slice there but pulled away from the pizza would be a neat addition. Perhaps an extra topping or two would be nice. Mushrooms? Bacon? Idea by Victoria B. Thank you! |
|
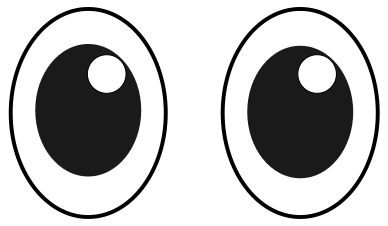
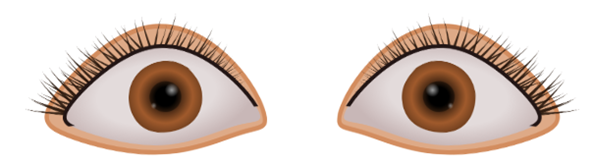
CUTE EYES (BY VICTORIA B)
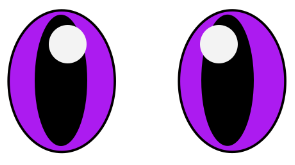
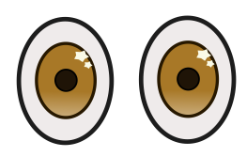
INSTRUCTIONS Both eyes are identical. Each eye consists of three ellipses with pixel sizes of 60 x 80, 40 x 50 and 15 x 15. To set an ellipse’s fill colour, simply select the ellipse and click on a colour at the bottom. To set its stroke colour, hold SHIFT when clicking on the colour. You want to make sure that the two eyes are identical in size (width and height) and at the same level (y value). This can be done by selecting any object and checking the values at the top. You will want to center the black ellipses inside the larger white ones. ALTENATE EYES (BY IRIS M.)
ALTERNATE EYES (BY SHAYLA S.)
ALTERNATE EYE (BY MIA S.)
|
|
FILL & STROKE
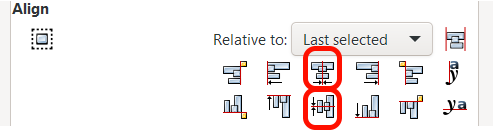
INSTRUCTIONS 1-Create your first circle with the Circle tool and keeping CTRL key pressed to ensure a perfect circle. 2-With the circle selected, pick the red color at the bottom. 3-Open the Fill and Stroke panel (Object > Fill and Stroke). 4-On the Stroke and Fill panel, select the sub-tab named Stroke Style. 5-Beside the Dashes option, choose one of the dotted lines so that it matches the image above. 6-With the Arrow tool, select the circle and hit CTRL-D for Duplicate. You can also right click and choose Duplicate. 7-Use the right arrow key to move your new copy of the circle over. 8-Make your new circle yellow and give it a thicker stroke. 9-Again, duplicate one of the circles and use the arrow keys to move it over. Make that circle green and give it a stroke width of zero. 10-Create a rectangle like above. 11-Move the rectangle to the bottom of the layer (Object > Lower to Bottom). 12-Open the Align and Distribute panel (Object > Align and Distribute). 13-We want to center the rectangle both vertically and horizontally with the yellow circle. First, select the rectangle and then shift click on the yellow circle. Now, on the Align and Distribute panel, click on the Center on Vertical Axis button and then on the Center on Horizontal Axis button. (see image below)
Done! |
|
CUSTOM GRADIENTS
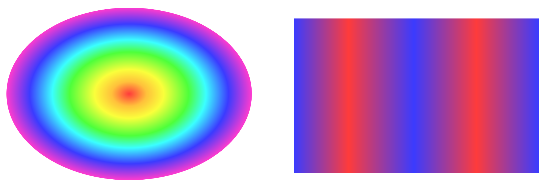
INSTRUCTIONS FOR LEFT GRADIENT 1-Create a shape such as a circle or ellipse. It should fill up a decent percentage of your screen. 2-Open the Stroke and Fill panel (Object > Fill and Stroke) 3-On the Stroke and Fill panel, select the sub-tab named Stroke Style. 3-With your shape selected, set the stroke width to 0 and hit Enter (or Return). 4-Now click on the Fill sub-tab. 5-Choose a radial gradient. Notice the gradient in your shape. 6-To alter the gradient, select the Gradient tool on the left or simply hit G. 7-Notice the horizontal and vertical lines that appear in your shape. Notice the small colour anchors on those lines. You can add anchors by double clicking anywhere on those lines. 8-To change the colour at any specific anchor point, first click on it to select it. Then in the panel on the right, simply change its colour (as well as its opacity or alpha). 9-Create the two gradients similar to the ones in the image. INSTRUCTIONS FOR RIGHT GRADIENT The instructions are the same but you will use a linear gradient instead of a radial gradient. |
|
KEYHOLE (CUSTOM SHAPE)
INSTRUCTIONS 1-Create three shapes similar to the ones in the image below. The triangle will have to be stretched
after being initially created.
2-Place the rectangle over the top part of the triangle. 3-With the arrow tool, select both the triangle and rectangle. You can do this by clicking on one and then shift-clicking on the other. 4- Then use Path >
Difference to get a shape that is only the bottom of the triangle (see image
below).
4-Open the Align and Distribute panel (Object > Align and Distribute). 5-Select your two shapes. 6-On the Align and Distribute panel, choose Center on Vertical Axis. 7-Select only the half triangle, and with the up and down arrow keys place it over the circle so that the contour forms the keyhole you want. 8-Seclect both shapes and merge them together by using Path > Union. Done! |
|
HOUSE (CUSTOM SHAPE)
MAIN HOUSE 1-Start by creating the large rectangle for the base of the house. Set the stroke colour to X (no colour). 2-Create the triangle for the roof. 3-Place the triangle above the rectangle. 4-Open the Align and Distribute panel (Object > Align and Distribute). 5-Select both shapes, and on the Align and Distribute panel, choose Center on Vertical Axis. 6-Select both shapes and do a Path > Union. CHIMNEY 7-Create the two smaller rectangles for the chimney. 8-Select both small rectangles and on the Align and Distribute panel, choose Center on Vertical Axis. 9-Move the rectangles vertically so that they look like a chimney. 10-Select both chimney rectangles and do a Path > Union. 11-With the arrow tool, move the chimney to its location on the house. 12-Select the chimney and house and do a Path > Union. DOOR 13-Create a rectangle for the door. You determine the size you want. 14-Make the door a different colour (such as green). 15-Use the Align and Distribute panel to center the door and house with Center on Vertical Axis. 16-Use the up and down arrow keys to move the door in place. 17-Select the house and the door and do a Path > Difference. WINDOWS 19-Duplicate that square and use the arrow keys to move it to the right of the current square leaving about five key presses of a gap between the two. 20-Select both squares and duplicate them. 21-Using the arrow keys, move the two new squares downwards again leaving about five key presses of a gap between the two. 22-Place the four squares on the house by moving them all at ounce. 23-Select all four squares and duplicate them. 24-Use the right (or left) arrow key to move the newly duplicated window to the other side of the house. 25-Select both windows and group them by using Object > Group. 26-Select the house and the pair of windows and hit the Center on Vertical Axis button (on the Align and Distribute panel) to center the windows on the house. 27-Move the windows up or down if necessary. 28-Select the windows and ungroup all the square by using Object > Ungroup. 29-Select the house and one of the either squares and choose Path > Difference. 30-Repeat the previous step for each of the window squares. Done! |
|
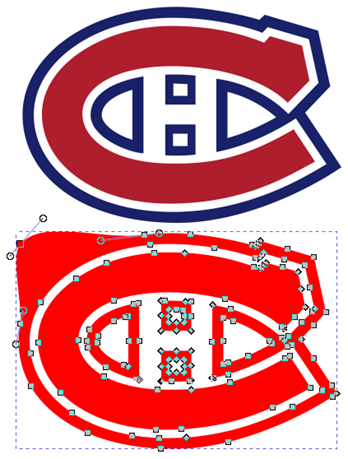
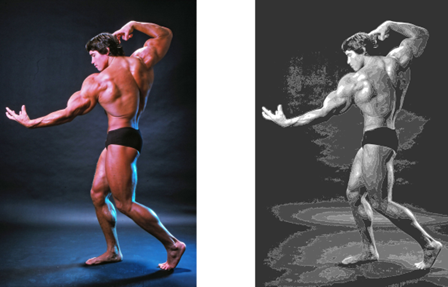
VECTORIZING (TRACING BITMAP)
1-Copy and paste a simple logo into Inkscape. 2-Select the logo and choose Path > Trace Bitmap. 3-On the right, in the Trace Bitmap panel, choose Apply to execute the Trace Bitmap. 4-With the Edit Path tool, click on the traced logo. You will see that its lines can now be altered. Try the same thing with a photo. Notice the vector graphic has less detail (and colour). Also, notice if Inkscape has difficulties after you have such a detailed vector graphic open. (On Mr. C’s computer, Inkscape pauses after every command.)
Done! |
|
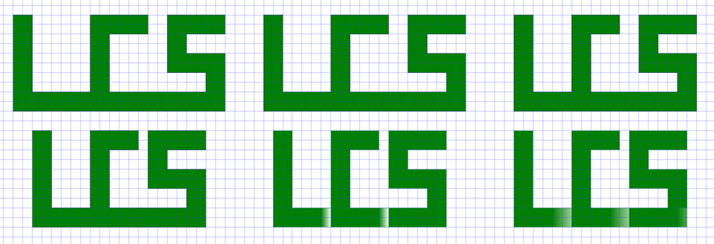
BLOCK LETTERS
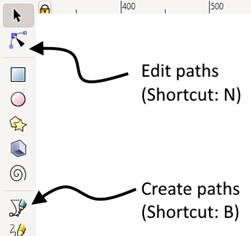
0-First, test out the two tools you will use (see image). Press B for the tool to create a path. Click a few places to create a path and double click to close it off. Now press N for the tool to edit the path. Click on the path and you will see all the anchor points that you can move around.
1-Set the grid display (View > Page Grid) 2-Use CONTROL & Mouse Wheel to zoom out so the grid is quite small. 3-Press B (Draw Bezier Curves and Straight Lines tool). 4-Understand that each letter is 5 tiles high and 3 tiles wide. (If you zoom out like in the image above, the grid is doubled, so letters are 10 by 6.) 5-Start by placing a point in a corner of your first letter. Then add points are each corner. To finish a shape, simply double click. 6-Select your path and click on a colour below to fill it in. 7-Now press N for the Edit Paths tool and alter your letter as needed. 8-Add more letters in the same way. 9-You can join a path with any other path by selecting both paths and choosing Path > Union. TASK Create a word with at least three letters. Try to come up with interesting design ideas. Don’t be afraid to duplicate your work and alter the second copy so that you can see the different versions that you have created. If you hope to do the light gradient separation effect, you simply need a small rectangle with a linear gradient on it. |
|
PENTAGRAM (BY ALEX K)
A few hints…
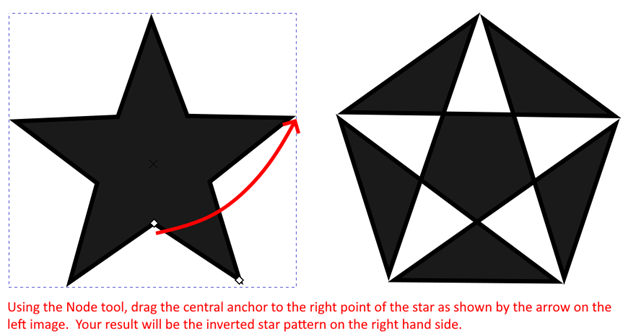
Figure
1 – You need to start with a star like on the left. Using the Node tool, drag the central
anchor of the star to the right point of that star as shown by the red arrow
on the left image. Your result will be
the inverted star pattern on the right hand
side. Then, you can squish it
downwards to make it appear as if it were on the floor.
Figure
2 – You can create a candle using the basic shapes on the left and simply
aligning them.
Figure
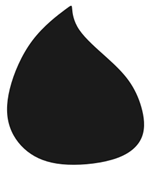
3 – You can create a simple flame like above using the Pen tool with the
mode BSpline Path on. You can select this mode in the top bar
once you have started the Pen tool. |
|
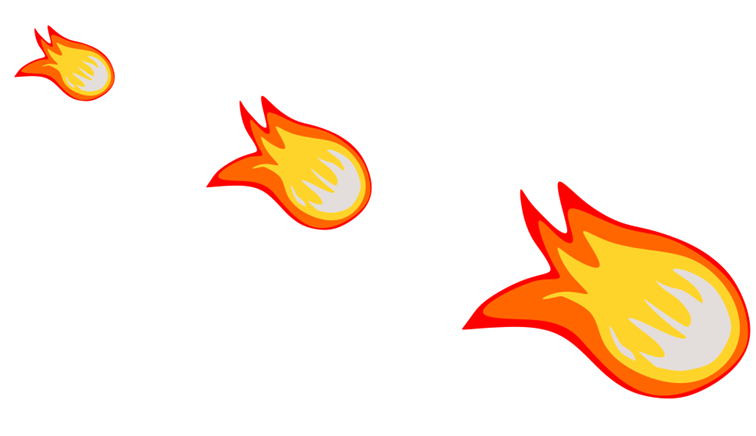
FIREBALL
INSTRUCTIONS You will create one of the fireballs and then simply copy it and resize it to get the other ones. Creating the fireball is done using the Pen tool with BSpline Path Mode. Feel free to alter the shape and colours as you see fit. |
|
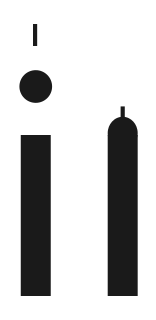
INSTRUCTIONS For this task, you will make use of the Pen tool with BSpline Path mode on. This tool will help you with the three flame shapes. It will also help you with the melted wax at the top of the candle. The candle itself is a rectangle with a small rounding at the corners. |
|
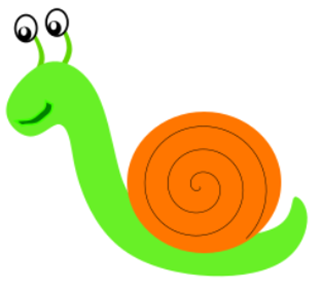
INSTRUCTIONS · Create a circle and colour it orange for the shell. · Use the spiral tool and add a spiral onto the shell. · Use the pen tool to create a snail body like green shape and use the “lower button” to place it behind the shell. · Create a small oval for the eyes and add a black outline onto it · Use a smaller black oval for the pupal then an even smaller white circle for a highlight · Duplicate the eye for the second one · Use the calligraphy pen to make the mouth and eye attachments ·
Done! |
|
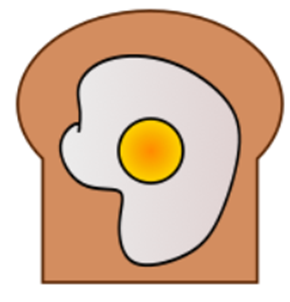
INSTRUCTIONS · Create a circle and a square, changing them to toast color and giving them a darker colour outline to look like crust. · Overlap the two shapes and use the align button then combine the two using the union button. · Use the pen tool to create an egg like shape and align it onto the middle of the toast · Use the circle tool to create the yolk, align on top of the white of the egg. Use a gradient for the yolk colour. · Done!! |
|
INSTRUCTIONS ·
Create a blue star using the “star and
polygon” tool o
Set the rounded setting to -1.500 o
Set the spoke ratio to 0.010 ·
Add a yellow circle to the center of the
flower |
|
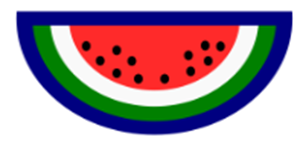
WATERMELON (BY KIANA L)
INSTRUCTIONS ·
Create three circles and adjust the sizes and colours ·
Add a rectangle to cover the top half of the
watermelon ·
On each layer use the control “difference”
under the category “path” to erase half of the circles ·
Create mini circles to appear as seeds · Create a dark blue border around the outer circle |
|
PENGUIN (BY MERISA M.)
INSTRUCTIONS Step one - Make 2 ovals with the circle tool for the body and belly. Step two - create 2 big circles 2 small circles and 2 more smaller
circles for the eyes. Step three - Create three more ovals for the nose and feet. Step four - Create 2 super thin ovals for the arms. Move it behind the belly with the layer tool. |
|
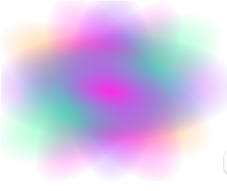
CANDY CLOUD (BY MERISA M.)
INSTRUCTIONS Step one - Create an oval using the circle tool. Step two - Then select your first colour on
the bottom of the screen. Step three - Then select your circle and click the radial gradient. Step four - Then you change the second colour,
this is found under the stops tool and the second circle. Step five - Repeat this process and layer them on top of eachother with different colours until you get the desired look. |
|
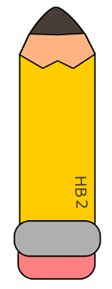
PENCIL (BY MEGAN M.)
INSTRUCTIONS Create a rectangle using the rectangle tool. Create the ferrule and eraser by making a rectangle and increasing
the Ry value. Make two identical pentagons with the polygon tool and place them on
the pencil so the edges just touch. Click and shift click the pentagons then go
to Path, Union to join them. To make the lead use the polygon tool with three sides and increase
the rounded value. Use align and distribute and center while shift clicking everything necessary on vertical axis. |
|
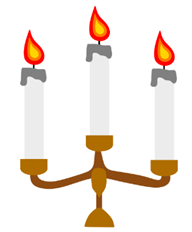
CANDLELABRA (BY MEGAN M.)
INSTRUCTIONS Make your candle using the rectangle tool and the draw bezier tool. Create your candle holders with a rectangle and a circle that ends at
180. Use path, union with the rectangle and semi circle
to make them one object. To join the candle holders draw the
connecter with the draw bezier tool. The rectangle joining the next two pieces is made with the rectangle
tool. Draw the piece under the joiner and the stand with the draw bezier tool. |
|
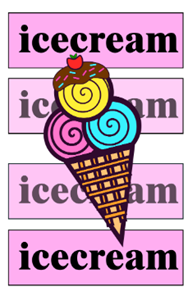
ICE CREAM (BY MASON V. B.)
A “poster”
for ice cream. The ice cream contains swirls and the cone has a waffle
pattern. Chocolate sauce, sprinkles and a cherry on the top. Everything is
grouped together and has an outline. |