LESSON 03 – HTML FORMS
FORMS
You have surely seen
buttons, textfields, checkboxes, textareas, radio buttons, drop down menus on
websites before. These objects are
called elements and are actually built-in to HTML. The reason we don’t see this in the HTML
unit is that we need Javascript to do anything useful.
THE
<form> TAG
The <form> tag
specifies where we can start placing any of the elements mentioned above. We can also add regular text and html tags
inside the <form> section.
<form>
add elements of the form
add text
add html tags (any order)
</form>
ADDING AN
ELEMENT - THE <input> TAG
Most elements are added
using the <input> tag. The reason
the tag is called “input” is that these elements allow the user to provide
input to the webpage.
As mentioned above, the
<input> tag is used to add one of many possible elements. Therefore, one requirement is that you use
the type attribute to specify the type of element you want to
create. For example, placing
type="text" inside the <input> tag will create a text field.
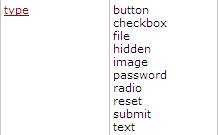
Here is a list of all values
that you can give to the type attribute.
NAMING
ELEMENTS & FORMS
You should always give a
name to your elements and forms. For
now, you simply need to know that naming your forms and elements will be
necessary for Javascript.
Doing so is easy. You simply use the name
attribute. You can give it any value
(or name) that starts with a letter (not a number). The following code would create a text field with named coco:
<input type="text"
name="coco">
The following would create
form named subscribe:
<form name="subscribe">
THE VALUE
ATTRIBUTE
The value attribute exists
for all elements. However, it has a
slightly different meaning for each one.
For a button, the value attribute will set the word that appears on the
button. For a text field, the value
attribute will set a starting word in the text field.
We will see the effects of
the value attributes in the examples below.
EXAMPLES OF EACH ELEMENT
Below is a basic example of
how to create each element. This
includes the creation of elements that created by using different tags other
than the <input> tag.
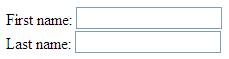
EXAMPLE 1 –
TWO TEXT FIELDS
Consider
the following code:
<form>
First
name: <input type="text" name="firstname"><br>
Last
name: <input type="text" name="lastname">
</form>
The
result of the code will be:
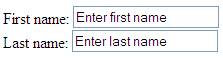
EXAMPLE 2 –
TWO TEXT FIELDS WITH VALUE ATTRIBUTE
Consider the following code:
<form>
First name: <input type="text"
name="firstname" value="Enter first name"><br>
Last name: <input type="text"
name="lastname" value="Enter last name">
</form>
The result of the code will be:
NOTE
As
you can see in the examples above, the value attribute is optional for text
fields. Often, you won’t use it.
EXAMPLE 3 – PASSWORD TEXT FIELD
A password text field is simply a text field that hides
what is typed into it.
Consider the following code:
<form>
Password:
<input type="password" name="pass"><br>
</form>
The result of the code will be:
![]()
And after typing into the text field, you get this:
![]()
EXAMPLE 4 –
BUTTON & TEXT FIELD
Consider
the following code:
<form>
<input
type="text" name="tf"><input type="button"
value="Ok" name="okButton">
</form>
The
result of the code will be:
![]()
NOTE
For buttons, you must use the value attribute to set the
text that appears on the button.
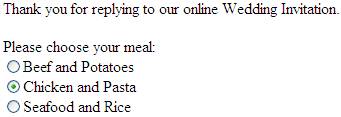
EXAMPLE 5 –
RADIO BUTTONS
Consider
the following code:
<form>
Thank
you for replying to our online Wedding Invitation.<br>
<br>
Please
choose your meal:<br>
<input
type="radio" name="meal" value="beef">Beef and
Potatoes<br>
<input
type="radio" name="meal"
value="chicken">Chicken and Pasta<br>
<input
type="radio" name="meal" value="seafood">Seafood
and Rice<br>
</form>
The
result of the code will be:
EXAMPLE 6 –
CHECK BOX
Consider the following code:
<form>
<input
type="checkbox" name="news">Subscribe to the newsletter.
</form>
The result of the code will be:
![]()
EXAMPLE 7 –
TEXT AREA
Consider the following code:
<form>
<textarea
rows="12" cols="35">
This
is a text area.
</textarea>
</form>
The result of the code will be:
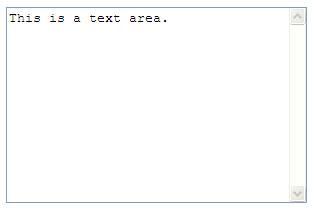
NOTE
The text area element is not created with the
<input> tag.
The rows and cols attributes set the width and height of
the text area.
EXAMPLE 8 –
DROP DOWN BOX
Consider
the following code:
<form>
Congratulations
on the online purchase of a new car! (Sucker!)<br>
<br>
Pick
a colour.<br>
<select
name="col">
<option
value="red">Red</option>
<option
value="blue">Blue</option>
<option
value="pink">Neon Pink</option>
</select>
</form>
The
result of the code will be:
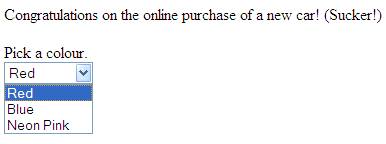
NOTE
The default choice in the drop box is simply the first option
that you specify. If you want to change
the default choice, lookup up the selected attribute for option.
EXAMPLE 9 –
FIELD SET
Consider
the following code:
<fieldset>
<legend>
Health
information:
</legend>
<form
action="">
Age
<input type="text" size="3" name="age">
Height
<input type="text" size="3" name="height">
Weight
<input type="text" size="3" name="weight">
</form>
</fieldset>
The
result of the code will be:

NOTE
The field set creates a border around information inside
it. The title (in blue) is inside the
<legend> tag.