|
IMAGE
SLICING
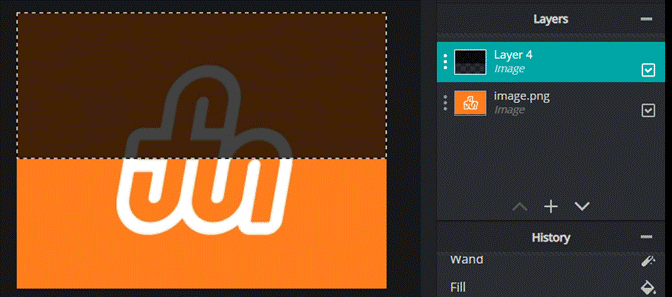
FUN LOGO IMAGE SLICING EXAMPLE 1. We start with our image.
2. We open it in a graphic
editor. (I used Pixlr.) 3. We add an empty layer above the
image. Change the layer’s transparency
to 50%. 4. Using the Rectangle Selection
tool, we select the top row and fill it with a colour.
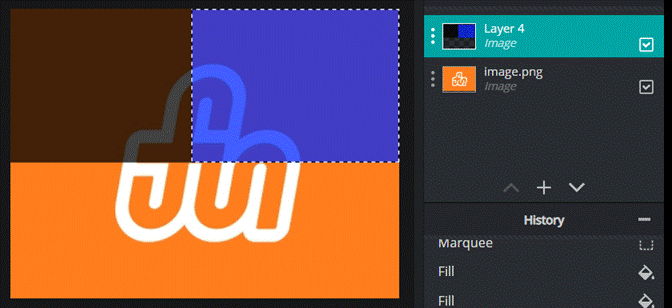
5. We now use the Rectangle Selection tool with the Remove
From Selection mode (see top bar) to remove the left slice from our
selection. We fill the remaining
selection with a different colour.
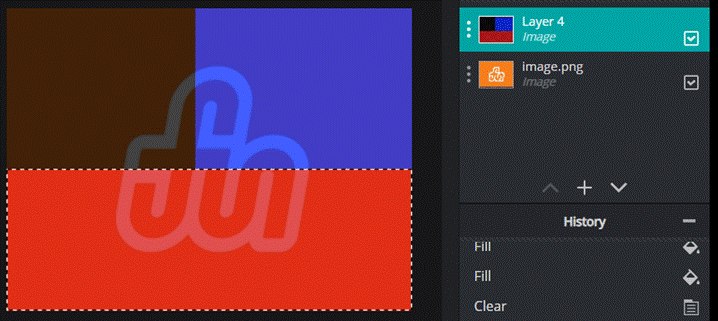
6. We now hit CTRL-D or Select >
Deselect to remove the selection. 7. We now use the magic wand to
select the bottom row and fill it with a third colour.
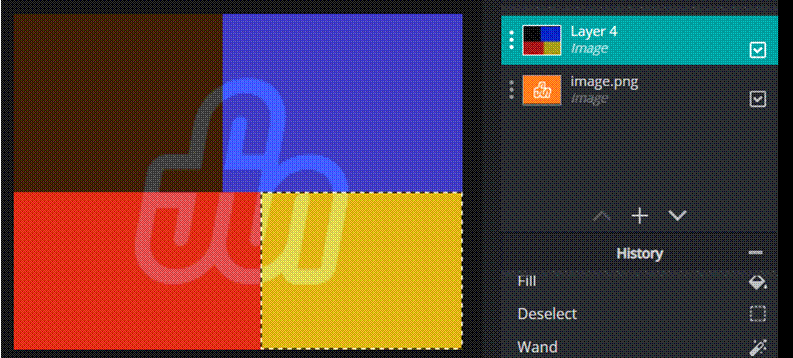
8. We now again use the Rectangle Selection tool with the
Remove From Selection mode to remove the left slice from our selection. We fill the remaining selection with a
colour.
9. We have now figured out how to
separate our image. We still need to
save each section individually. TO
SAVE A SUB IMAGE (SLICE) 10. Select the area you want to save by
using the Magic Select Tool and clicking on that rectangle. 11. Now crop the image to your
selection. 12. Switch the order of the layers so
that the coloured rectangle is not visible. 13. Save your image. 14. Undo twice or until you return to
your full image. 15. Redo the previous five steps for
each sub image you want. RESULTING
SUB IMAGES You
get these four images:
INTERACTIVE
PRODUCT Click here to see an interactive product created with these
images. Note that for this product, I
opened each slice up, made it black and white, and saved it again under a new
name.
|