|
GETTING STARTED IN GODOT – ORIGINAL VERSION |
|
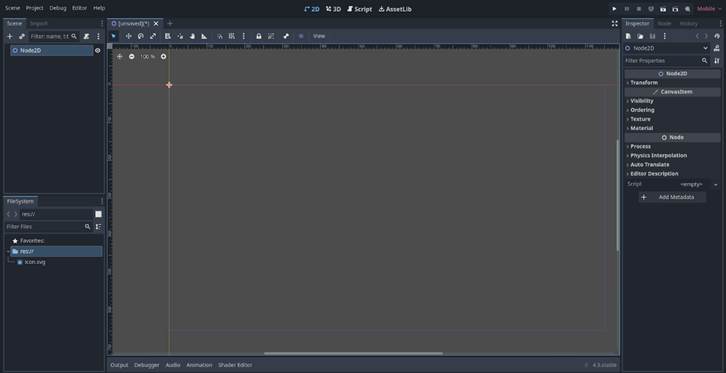
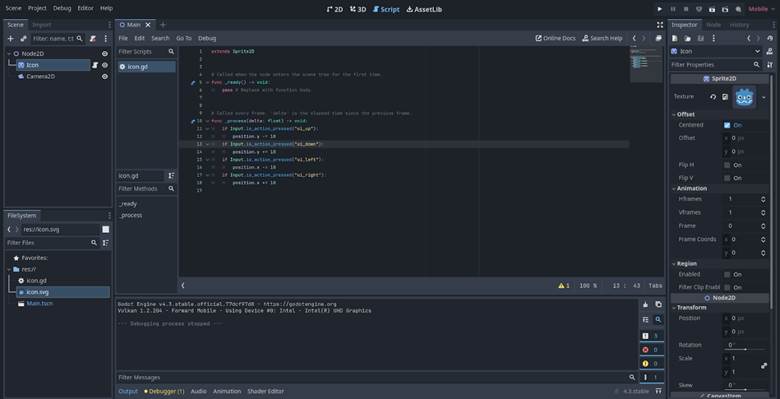
Once you’ve created a new project, press the “Node2D” button on
the left side of the editor. This should bring you to this screen.
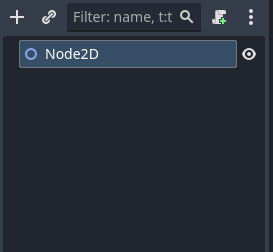
It’s where you see the nodes in the scene. Right now you only have a single node.
Called the “root node.”
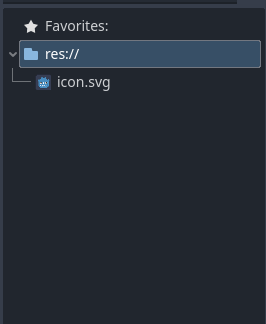
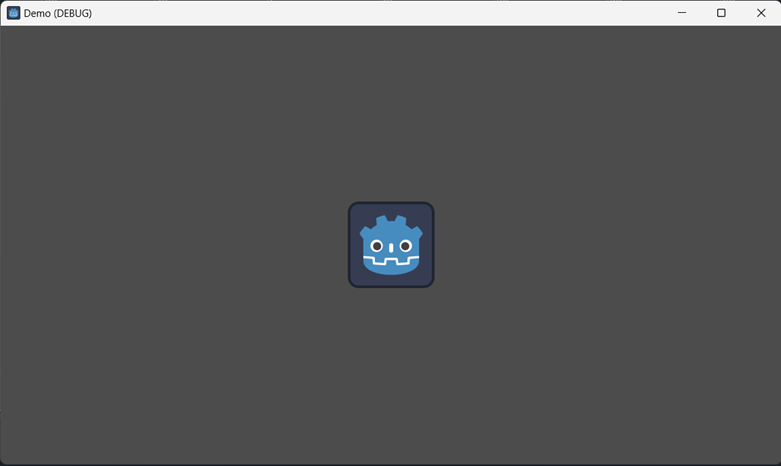
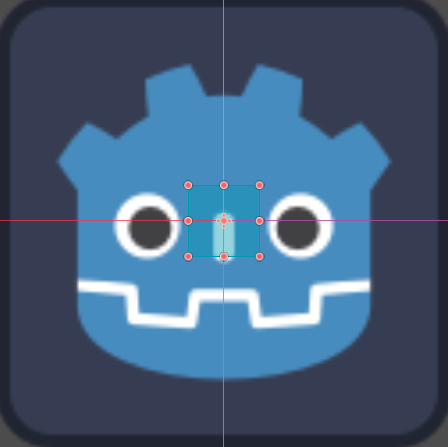
Icon.svg is an image,
specifically the godot logo. We’ll be using it for
the demo.
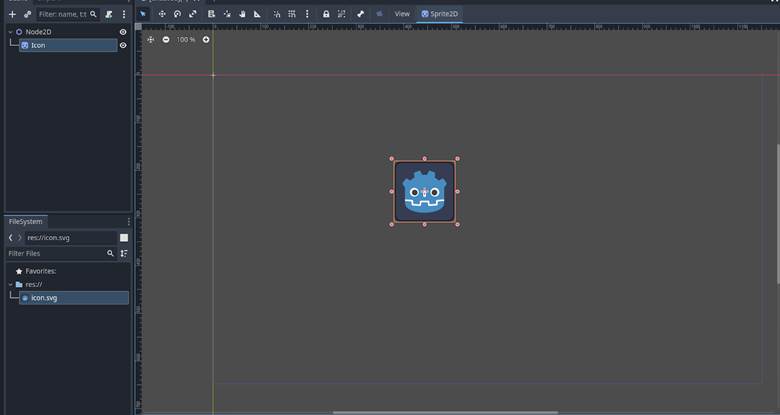
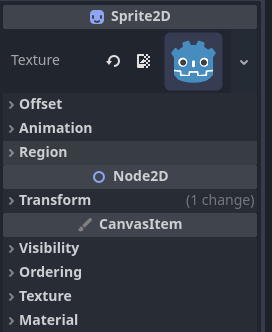
Good job! You’ve created a node. Specifically, a Sprite2D.
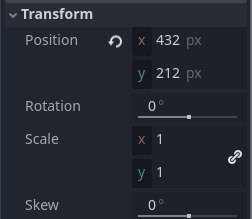
This → Is called the inspector. Open transform. You’ll get the image below:
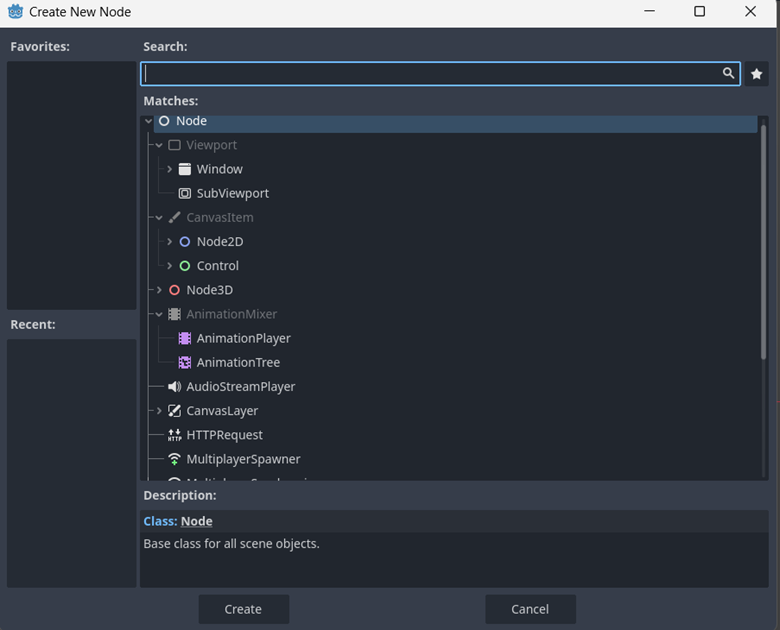
Solved those? Good. now press the little recycle image beside all the values. You’re almost ready to press play. But we need a camera first. Right click on the root node, (the Node2D) and press add child. This menu opens up: This is a lot of things. Most of them are not important right
now. But for a rough explanation: Anything opened by selecting the Node2D section, coloured blue. are 2D objects. That’s the type we’re
working with right now. Anything opened by selecting the Node3D section, coloured red, are 3D objects. They’re a bit too complex
to explain right now. Control, the green nodes. Are special, they’re 2D. And designed
for HUDS or GUI. the interface and buttons. We’ll go into them later. Select Node2D –> Camera2D. Double click or press “Create.” Now you have your Camera, you can select it on the scene tree. Now to play! The play button is the triangle above the
inspector.
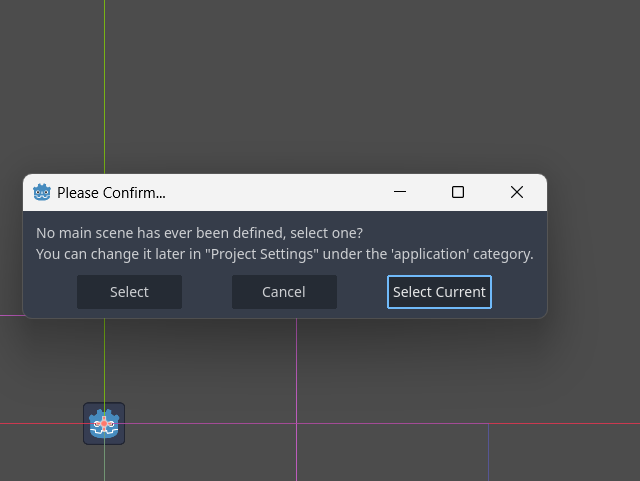
This isn’t too bad. It’s just a reminder that you need to set
where the game starts. Press “select current” and you’ll be prompted to save
the scene. Call it “Main.” Now your game is running: Isn’t it glorious? Now, you can’t do anything but stare at the face, because we
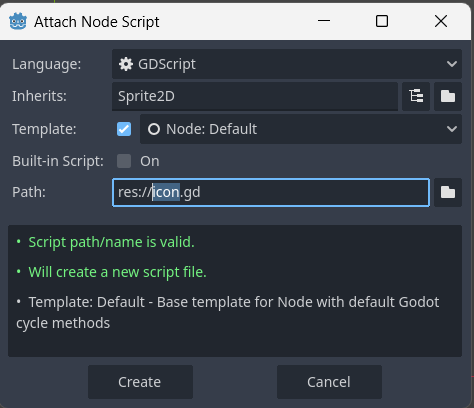
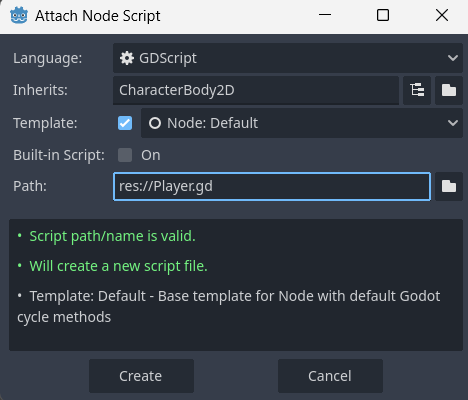
don’t have any Scripts. Scripts are the instructions on how to run. Close off your game, Right mouse button on the icon, and press
“attach script”
Select a different path, call it “player” or something. But
leave the “res://” and the “.gd”
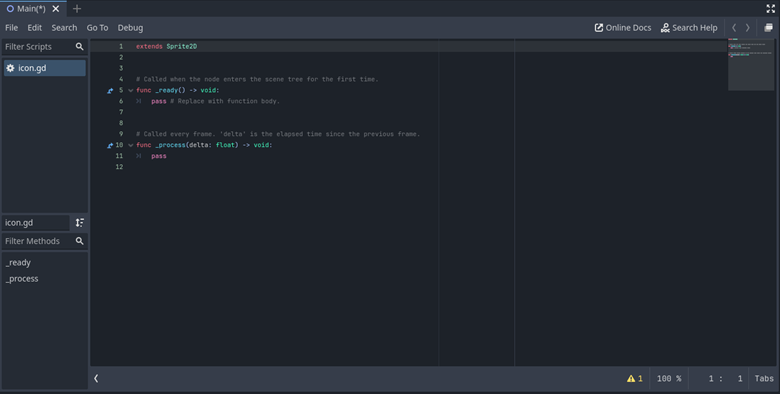
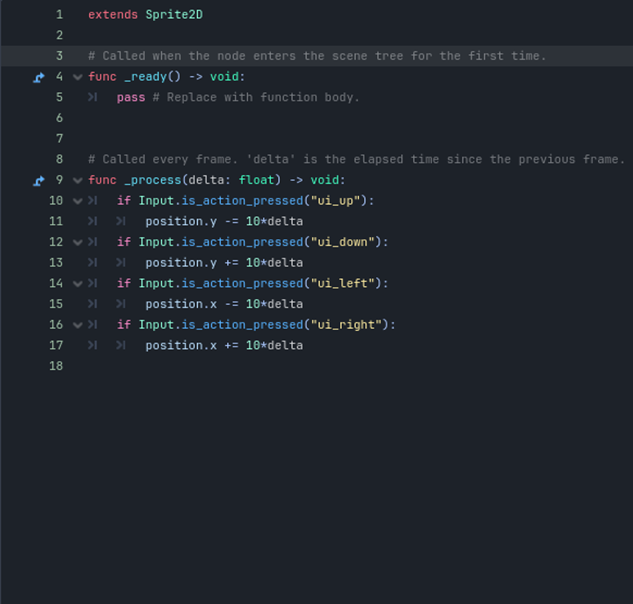
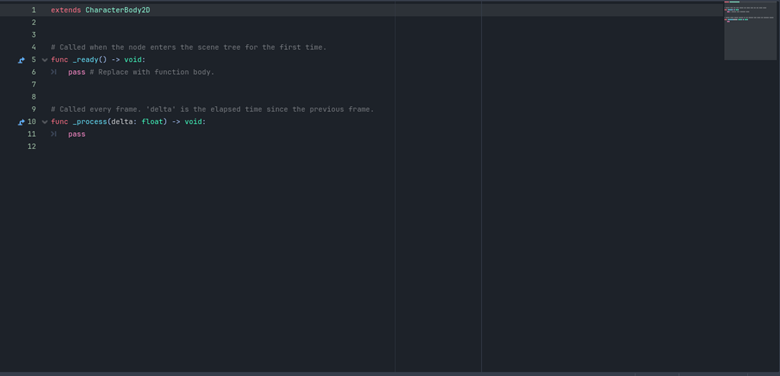
This is your script, you can change between the 2D scene and
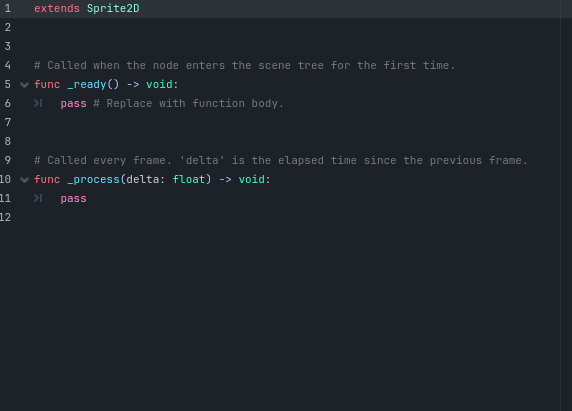
scripting at the top of the screen. Closer look, there are three things you’ll notice.
Everything indented after “_ready()”
will run a single time. When you start the game. Everything indented after “_process(delta:
float)” will run constantly. Let's start coding, remove the pass from after _process. And
replace it with: print(“Hello
World”) Now run your game, and look at the console. (the little box
below the scripts) Pretty cool right? Now remove the print function. Add this: if Input.is_action_pressed(“ui_accept”): position.y += 10*delta What does this do? Lets break this down. “If” is an if statement, it checks conditions. Input is a class. A collection of different concepts. is_action_pressed() is a function that
returns a condition. Checking if you’re pressing something “ui_accept” is one of Godot’s
pre-existing key presses, it checks for the space key. position.y is a variable.
Specifically, it’s the thing you see when you check the position on the
inspector. Delta is another variable. It’s the amount of time that passed
since last frame, we use it to ensure that lag doesn’t affect physics. Now try running your game. Your challenge for this section: Using “ui_left”, “ui_right”,
“ui_up” and “ui_down”,
allow the player to move in all directions. |
|
PART 2 (TAB 2) Variables + Project Settings Roughly this is what the editor should look like. Today, we’re going to talk about some important concepts. First: Variables. Between the extends and _ready(). Place
this code: var speed = 10 This is called a variable. A saved value in the code. Now, go through and set the position to be moved by speed*delta
instead of 10*delta. No change? Try changing speed. See what happens.
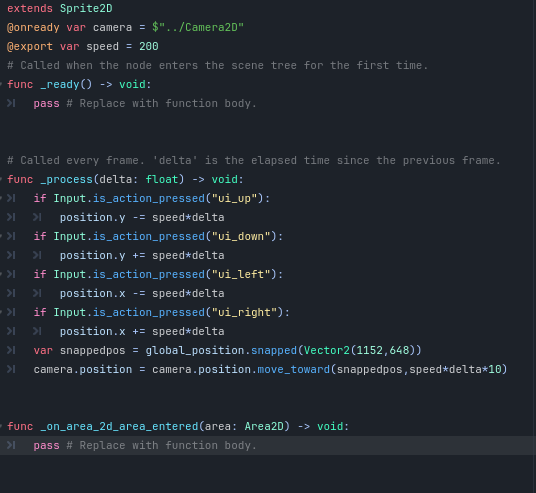
But it gets easier. Place: @export Before the “var”. Then check out the icon in the inspector again. Cool, right? Next step: Moving is cool and all, but you can leave the screen very
easily. Here’s how we can change it. First, define a variable with this code: @onready var camera
= $”../Camera2D” This is complicated so let's break it down: @onready means that the code only runs
once everything has loaded. “var camera” is just a standard variable define, like speed. $”../Camera2D” is a reference in the
scene tree. What it’s saying is “go back up one step on the tree, then find a
node called Camera2D” Got it? Good. Now, in the process function, write: Camera.position =
position This is pretty self explanatory, it
makes the camera have the same position as the player. Try running it. You’ve stopped moving, right? No you haven’t. It’s just that the camera is
stuck to the icon. So you’re always going to be at
the centre of the screen. To solve it, we’re going to do something fun with the variable,
replace the position change with: Camera.position = position.snapped(Vector2(1152,648)) This snaps your position to the default size of the game. Using
a special variable calleda a “Vector” which is
basically just a position. This ensures that the camera only moves when you
move the screen. But there’s two problems:
The first is solved with this code: var snappedPos = position.snapped(Vector2(1152,648)) This assigns a new variable, “snappedPos”
and sets it to the your position, but snapped to
default screen size. Then it sets the camera position to the result of a function.
The function “move_toward” moves the position it’s
called on towards a second position, by an amount depending on the second
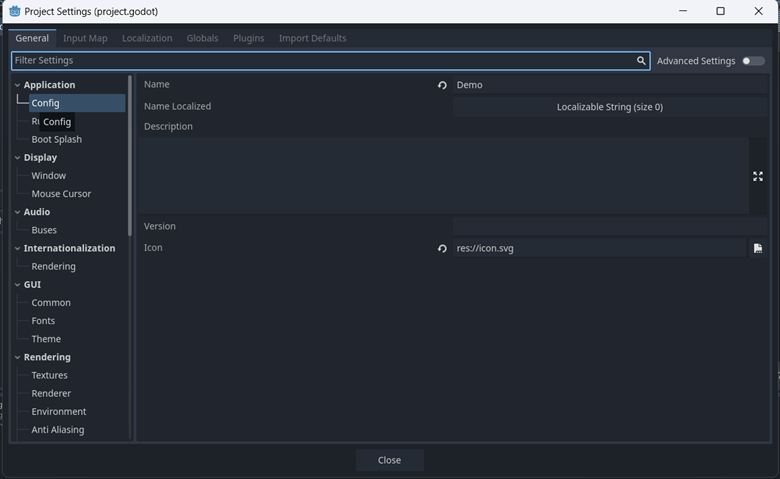
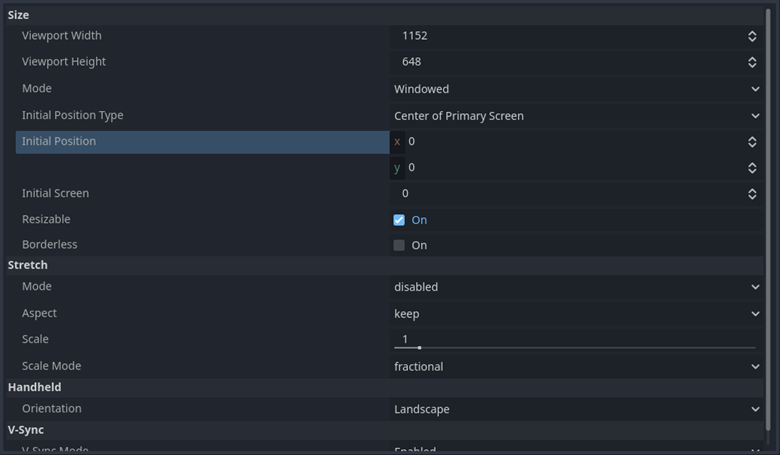
value. With problem #1 solved, let’s look at problem #2. This one isn’t solved in code. At the bar on the top of the
screen, press “Project” then “Project Settings…”
Go down to stretch. That has three modes: Canvas items means that all objects are expanded when you expand
the tab. This is good for detailed art, not so much for pixel art. Viewport means that everything keeps the same resolution (amount of pixels) but the tab is stretched to fill the
screen. This means that if you’re going for a specific pixel art size, it’s
best. Pick canvas items for now, we’re not doing pixel art yet. Now you’ve got basic movement. Your challenge for this section
is: Add another icon and another script, both called “enemy” have the enemy be coloured red
(Visibility -> modulate in the inspector). And have the enemy script constantly
move the enemy towards the player. |
|
PART 3 (TAB 3) So, based on the previous challenges, you’ve got a player. An
enemy, and a camera. The enemy follows the player. Lets give it a bit more
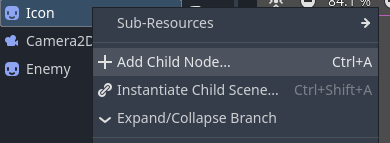
stuff. Select your player (the Icon), right click it. And “Add Child
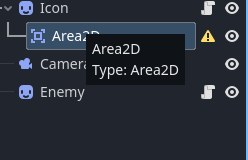
Node” You want to add an Area2D. Make sure that it’s indented and
underneath the Icon.
It should look like
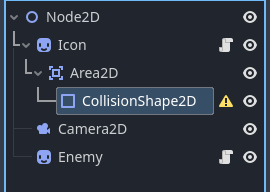
this. See that little error? That’s because we need to add another node. Give
the Area2D a child “CollisionShape2D” That just moves the error down. But we don’t need another node,
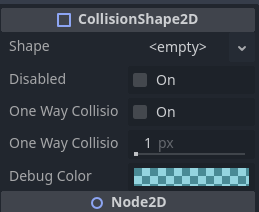
this time we go to the inspector. Selecting the CollisionShape2D. Select shape, add a new rectangle shape. This will be the shape of the player’s hitbox. However, as you can see here. It’s way too small! Select the
orange dots, and drag it to fill the player approximately. Now select the area. Right mouse button, press “copy” then paste
a copy of the area on the enemy. Now the player and enemy can collide. But they don’t actually,
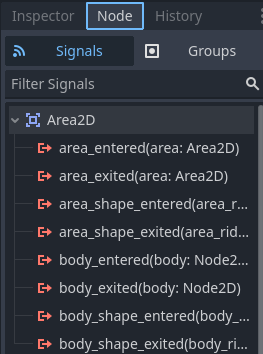
because there’s nothing that triggers when they collide. Let’s fix that. Select the player’s Area2D, then Select “Node”
on the bar above the inspector. That’ll open the Signals tab. Remember this, but for the second
we aren’t using it. Go to groups. Add a group, call it “Player Hitbox” Do the same for the enemy, but call it’s
group “Enemy Hitbox” Now back to signals. With the player’s Area2D selected, press
the little area next to “area_entered.” Connect it
to the icon.
That will open up the player’s script. And add a new function. Everything after this function runs when an area touches the
player. With a variable “area” that represents the area that touched the
player. We want this code: get_tree().quit() This is another if statement, this one checks if the colliding
area is the enemy, and if it is then it quits. Cool. it works, but now you’re helpless. Lets change that, with the magic of Scenes. Create a new icon with a hitbox. Have it’s group be “Bullet Hitbox,” scale it down to one
fourth of the standard size, call it “bullet” and give it a new script. Make sure the bullet is at position 0,0. The centre
of the game. In the bullet’s script, add a variable with a value of
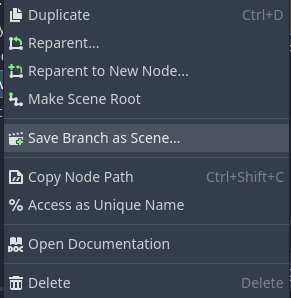
“Vector2(0,0)” and the name “direction” Have it move by the direction*delta every frame. Now for the fun part. Save your bullet as a scene. Then delete the bullet in the main
scene. Now you have two scenes. Select “bullet.tscn” in the file select. This will open the
“bullet” as its own scene. You can play around with the bullet here, make it
green. Then go back to the main scene and select the player code. Add a new variable to the player: var bullet = preload("res://bullet.tscn") This will store the bullet scene as a variable. Then create: var hasshot = false Now, in the processing:
if Input.is_mouse_button_pressed(MOUSE_BUTTON_LEFT): if !hasshot: hasshot = true var
bulletinst = bullet.instantiate() bulletinst.position = position bulletinst.direction = position.direction_to(get_global_mouse_position())*10 $"..".add_child(bulletinst) else: hasshot = false Complex code again, so it’s time for another breakdown! Input.is_mouse_button_pressed(MOUSE_BUTTON_LEFT)
detects if you’re holding down the left mouse button. !hasshot detects if hasshot is false. The code then sets hasshot to true (so
that it doesn’t shoot an endless stream of bullets if you hold down) var bulletinst = bullet.instantiate() makes a copy of the bullet
scene. And saves it to bulletinst . We then set the bulletinst to be the
player’s position. And set it’s direction to be
based on where the mouse is, relative to the player’s position. Then we add the bulletinst to the
world, as a child of the root node. If you aren’t pressing, then it sets hasshot
to false so that you can shoot again next time you start pressing. Now you can shoot bullets, but they don’t do anything. Set it so the enemy can detect areas entering, and then add this
script to it’s “area enters” function: if area.is_in_group("Bullet
Hitbox"): queue_free() queue_free() means “destroy this
object.” Now do the same for the bullet, but make it be destroyed if it
hits “Enemy Hitbox” Now for one more thing: Save the enemy as a scene (making sure it’s at position 0,0
first). Then drag the “enemy.tscn”
from the filemanager to the main scene. Now you can spawn arbitrary enemies! Good job. Challenge for this section: Give the enemy an exported variable “health” with value of 5, Set it to lose one health when the bullet hits it, then queue_free()
when health hits zero. |
|
PART 4 (TAB 4) Now we’re setting up animation. First, save this image -> Now, right mouse click the player, and
press “Change type.” Then set them to be an AnimatedSprite2D. You’re going to need to change the “extends” at the top of the
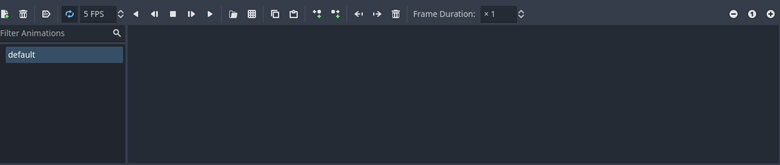
player’s script to be AnimatedSprite2D instead of Sprite2D. In the inspector go animation -> sprite frames and create new
sprite frames. Now if you select the sprite frames, it opens a little menu at
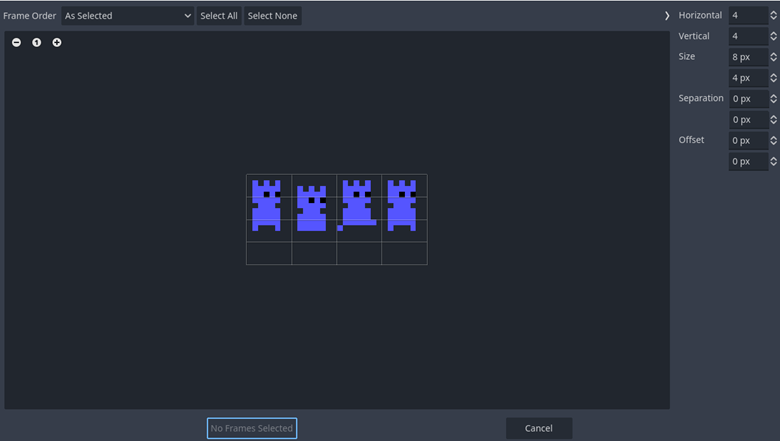
the bottom: Press the waffle. Then select the player image you saved. It’ll
open up this:
Set “Vertical” to 1. Then select each of the steps and press
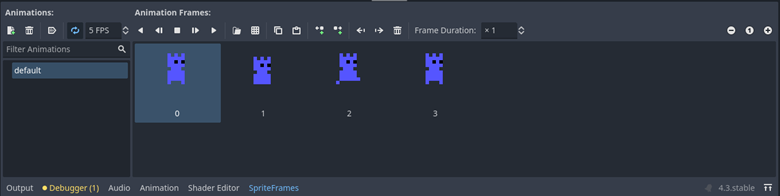
“Add 4 Frame(s)”
And it will start playing. But now a problem: Pixel art animation is much smaller than our scene is made for. So let’s go back to project settings. Set both the “Viewport Width” and “Viewport Height” to 128. Search for “default texture filter” and set it to Nearest (this
makes it less blurry) Then change the stretch, because we’re doing pixel art now. You’ll want to go into player scripts and set the snapping to be
your new width and height. (Also make the size of your hitbox match your new size.) Now the enemies are massive! Repeat this process on the enemy scene. They should still be
red. Also scale down your bullet, you can keep it with Icon.svg Now you’re small, and animated. But you dance when you’re
standing still and always point right. First, the dancing. Add a new animation called “still” to your
player’s sprite frames. Make it be only the unmoving frame. Add this code to your player: if Input.get_vector("ui_left","ui_right","ui_down","ui_up") == Vector2(): play("still") else: play("default") Input.get_vector returns a Vector2()
based on what direction the four inputs are being inputted. So with this, you are still unless you’re
inputting. Now for the turning: if get_global_mouse_position().x > position.x: flip_h = false else: flip_h = true Great! Now you face the mouse. Your challenge for this section: |
|
PART 5 (TAB 5) Part 5: Now we’ve got streamlined code, a swarm of enemies, a weapon,
and a camera. But it’s still all drab and gray. Now, we can change the grayness just by going into project
settings and changing the “default clear colour”
but it’d still be a drab world. We could make a thousand blocks, all static bodies that block
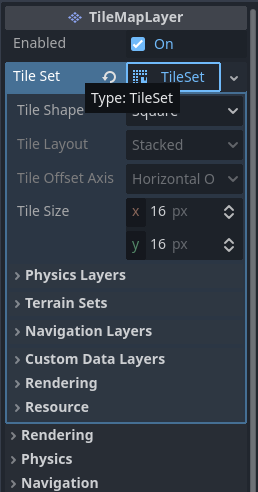
the player’s movement. Or we could make one node: A tilemaplayer. First, create a tileMapLayer node,
it’s just like any other node. Give it a new tileset (A Collection of
different blocks) Now you’ll want to set the tilesize to
(8,8) instead of (16,16).
Now with the TileMapLayer selected, go
down to where it says “TileSet” at the bottom of
the screen, and drag the tileset image into the box
at the left of the screen. It’ll ask you if you want to auto-create tiles, say yes. Now you have the tiles, go back to “TileMap”
and you can paint them onto the screen
In the navigator, search and change “Z Index” to -10, this is
how far back the tilemap is, But those tiles don’t do anything right now. So
with the image I used, the red should be a blocker. So
lets set that up, First, in the inspector, add a physics layer to the tileset. We don’t need to change anything right now about
that. So go down to the bottom of the screen and
select TileSet. Navigate to where it says paint. Scroll down in the properties box until you get to physics layer
0, and paint it onto the red tile. If you accidentally get it on the green tile. C and F swap
between adding and erasing. Now to add collision on the player’s end, give them four
children: A Raycast2D pointing to x:-3 y:0 called
Left A Raycast2D pointing to x:2 y:0 called Right A Raycast2D pointing to x:0 y:4 called Down A Raycast2D pointing to x:0 y:-5 called
Up For each raycast, set the player’s
script to check for their collision, and if so, move by 16*delta in the
opposite direction. Your challenge: Make the blocks also block enemies and bullets. |
|
GUIDE 2 PART 1 (TAB 1) Part 2: Okay! Now that you’ve got the basics down, let's make a
platformer. You’ll want to create a new game, get it to 128 by 128, with the
right stretch mode for pixel art. This time, you’ll want to add a CharacterBody2D, it’s the same
type of node as the area, so you’ll need to give it a shape2D. Give it an animatedSprite2D, using this image -> Only use the first frame so far. Then, give it a script. THIS
IS IMPORTANT: make sure the template text says “Node: Default,” not “CharacterBody2D: Basic Player” Ok cool, now You’ll have the image below: | V
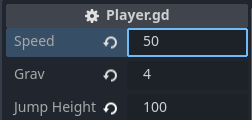
You’ll want to add “@export var
speed: float” “@export var gravity:
float” and “@export var jumpHeight: float” to the top. These are basic
variables. Now, after the _process(delta), write: velocity.x = Input.get_axis("ui_left","ui_right")*speed if
is_on_floor(): velocity.y = 0 else: velocity.y += grav*delta*60 move_and_slide() Breakdown time! Velocity is a special variable used by character bodies. It
represents how much you’re moving. You should recognize Input.get_axis() from the earlier
section. We don’t need delta here because it’s setting, not adding. Is_on_floor is a function unique
to character bodies, can you guess what it does? move_and_slide() does the actual
moving, based on the velocity you set. Make sure the variables aren’t zero, then try running this, what
happens? Yep. That’s what happens when you don’t have a floor. So, let’s add a tileMap, use this
-> Now, unlike the previous section, you don’t need to code
collision, because everything’s in the move_and_slide(). So you can move, and fall, but you can’t jump. Add this, just before the move_and_slide: if
Input.is_action_just_pressed("ui_accept"): if
is_on_floor(): velocity.y -= jumpHeight I think you should be able to figure out what this does by now. Play around with the values until it feels good to play, this is
what I’m using:
Anyway, your challenges for this section - add animations, a “still” animation for when your velocity.x equals zero, a “run” animation for when it
doesn’t, and a “jump” animation for when you are not on the ground. - add a camera, have it always at the same x position as the
player, but not move in y. |
|
GUIDE 2 PART 2 (TAB 2)
Do everything you did to make the player, add it to the enemy
group, then give it a raycast2D. Make sure the raycast
is aiming down a little below the enemies feet, use
this -> Now in the script for the enemy, you’ll want a variable
“direction” and make it have a value of 1. This is the start of the enemies
process script: if
is_on_wall() or !$RayCast2D.is_colliding(): direction
*= -1 velocity.x = direction*10 $AnimatedSprite2D.scale.x
= direction Nothing here should be new to you. And it shouldn’t be hard to
figure out what the last line needs to be. (move_and_slide()) So this way, the enemy will walk back and forth,
bouncing when it hits a wall or would walk over the edge. But it can’t attack
or anything. So we can’t just use the area system, because
the player’s not an area. So here’s what we do Go to the enemy’s inspector, and go down to Collision, look at
the layer and mask, they both have the 1 highlighted, but nothing else.
Switch that around so it’s 2 that’s highlighted, and not 1. Now you need to go to the tilemap, and
set its physics layer to have both 1 and 2 highlighted. Now the player doesn’t collide with the enemy, but the enemy
collides with the walls. Now you’ll want to go into the player’s code and
put: for
i in get_tree().get_nodes_in_group("enemy"): if
i.global_position.distance_to(global_position) < 8: get_tree().quit() This checks for every enemy, and ends the game if they are
touching the player. Your challenges for this section: Save the enemy as a scene for easy movement and placing. Set it up so that if the player is falling and touches the
enemy, the enemy dies and the player bounces. Set it up so the player dies if they pass below where the camera
sees. |