|
GETTING STARTED IN GODOT – PART 9 – CAMERA II Now that we have learned a little bit about vectors, we can make
a few small changes to our code to change how the camera follows the player. 1.
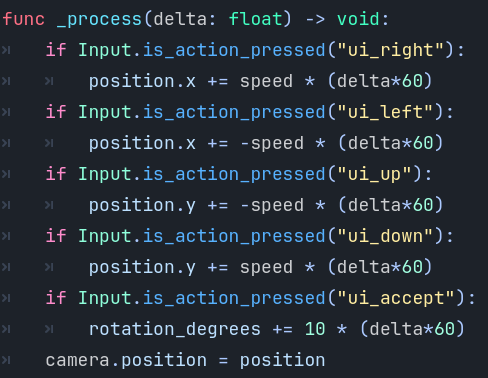
Start by examining your existing code in the _process function. Notice that we are using position.x and position.y
when setting the player’s position.
The variable position is a Vector2.
2.
The location of the camera in the room is also a vector. We can access its position by typing camera.position. Currenlty, the
bottom line in the code sets the camera’s position vector to the player’s
position vector. 3.
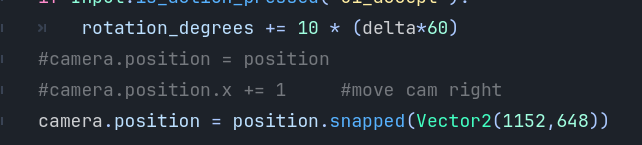
We can make the camera move right gradually by commenting out
the the bottommost line and adding the line:
4. Test your game. The
camera should move right. 5. We can make use of the Vector’s snapped method to create a
different and interesting camera movement.
Try the following: camera.position = position.snapped(Vector2(1152,648))
6. Test your game. Pretty sweet effect eh? 1.
It moves instantly, which can be disorientating. 2.
If you full screen the game, the camera moves before you reach
the edge of the screen. 7.
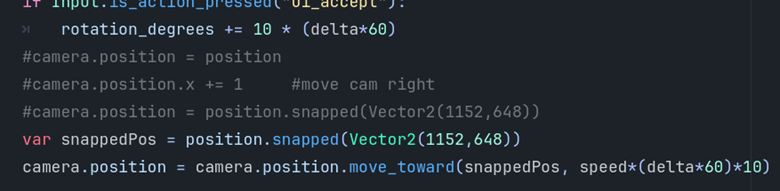
Optional. We can slow the
rate at which the camera snaps to another location by making the camera move
towards its new location instead making it jump directly to that location. This is done using the following code: var snappedPos = position.snapped(Vector2(1152,648)) camera.position = camera.position.move_toward(snappedPos,
speed*(delta*60)*10)
8.
Test your game. You
decide if you like this new transition between camera locations or if you
prefer how it was before. 9.
Now to deal with the 2nd problem – changing the room’s
size doesn’t work well with the snapping.
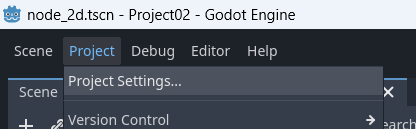
To deal with this, we need to change the settings of the project. ·
On the top bar, click on Project and
then Project Settings.
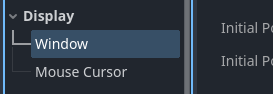
·
In the new window that appears, choose Display
and then Window.
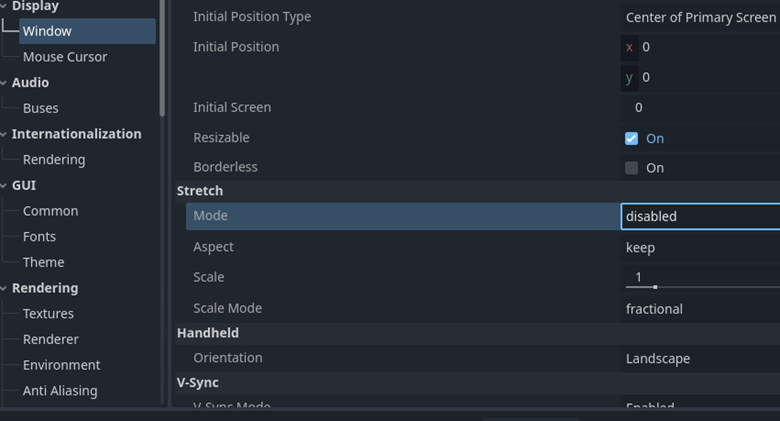
·
Find the Stretch
heading and the Mode
sub-heading.
· There are three modes:
disabled, canvas_items and viewport. o
Disabled is default, it means that expanding the tab increases
how much the camera picks up. o
Canvas_ items means that all objects are expanded when you
expand the windows. o
Viewport means that everything keeps the same resolution (amount of pixels) but the window is stretched to fill the
screen. This means that if you’re going for a specific pixel art size, it’s
best. · For our game, we will
choose canvas_items. 10. Test your game. The movement should not be affected when it
is in full screen. |