|
GETTING STARTED IN GODOT – PART 7 – CAMERA I By Alex K. In this guide, we will start to learn how to use a few lines of
code to make the camera follow the player. 1.
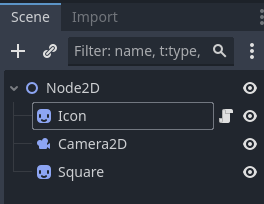
Before starting, we need to take a look at the scene tree (image
below) to see where our Camera2D object is located.
2.
We are coding in the Icon object which is in the Node2D
object. Similarly, the Camera2D object
is also in that Node2D object. 3.
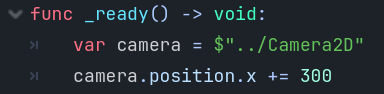
For now, we will work in the _ready function. We will create a camera variable that will
refer to our camera. To do this, we
have to use a sequence of characters called a path. The line of code looks like this: var camera = $"../Camera2D" 4.
Now that we have a reference to our camera, let’s move it’s position to the right by 400 pixels by using the
following line of code:
5.
Run your program. Notice
that the camera is now 300 pixels to the right which effectively moved any
images to the left by 300 pixels. 6. Try exploring by moving the camera to other
positions. You can also change its y
coordinate. 7.
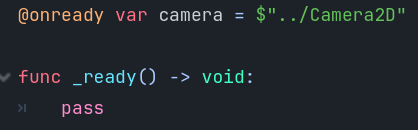
For
most applications, we want to be able to refer to our camera object in
different functions. So, we need to
declare the camera variable above the _ready function. Let’s start off removing the lines of code
in the _ready function and re-adding the pass statement.
8.
There
is a problem however. Variables
outside of functions are created very early on when your game is starting and
the scene tree with the objects might not be created yet. So, we need to add the statement @onready in front of the variable declaration to tell Godot to
wait until it is going to run the _ready function before creating the variable.
9.
All
of this work so far just to understand that one line of code! Sigh…
Note that now we can access the camera variable from inside any
function. 10.
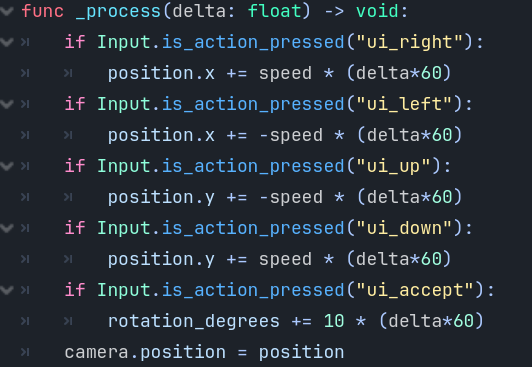
Inside
the _process function (which gets executed over and over), at the bottom, we
will update the camera’s position to be at our position. We do this by using:
11. Run your game. The
camera should be following the player.
Pretty sweet eh? |