|
By Alex K. We will now change the script from the previous guide to allow the
user to control the Icon’s location using the Arrow keys. 1.
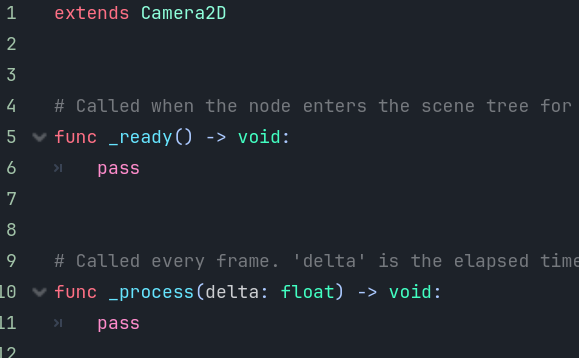
Let’s remove any print statements from both the _ready() function and the _process function. Add the pass statements like below to
return the script to its default code.
2.
We need to check for arrow key input every frame. So the code that
does this needs to run every frame. So we will be working in the _process function. 3.
In the _process function, start by removing the pass statement. 4.
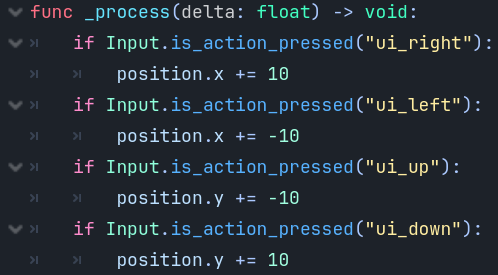
Add the following to the _process function: if Input.is_action_pressed("ui_right"): position.x += 10
5.
Try running your game.
Hit the right arrow. Pretty
sweet eh? 😊 6.
Try adding another if statement to your code that will
work for the left arrow. Can your
figure it out without looking below?
7.
Test your game to see if you can now move both right and
left. 8.
Now, try adding two more if statements. One to move upwards and one to move downwards. Note that moving down will increase the y-coordinate
and moving up with decrease the y-coordinate.
9.
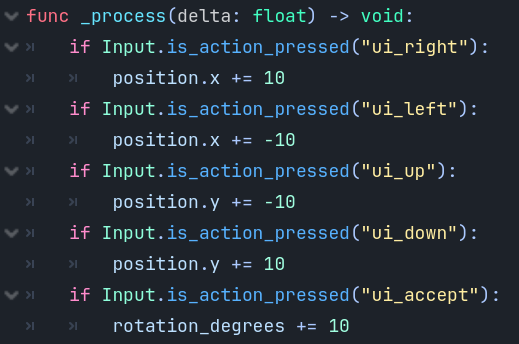
Test your game to make sure your icon moves in all directions. 10. We can also listen for the space
bar by using "ui_accept" in the if statement. Furthermore, we can rotate our icon by
changing it’s rotation_degrees variable. Try it!
11. Test your game. Try out the spacebar to see what happens. |