|
BLENDER
ANIMATION TASK A) TASK You will
create a simple unpainted animation that demonstrates a model doing an
action. Examples:
B) INSTRUCTIONS TO CREATE
AN ANIMATION Open the
rigged model in Blender. Switch to
Pose mode. At the top,
click on the Animation layout (by pressing on Animation). You can now
see a time line at the bottom. Create your
starting pose. To save this
as your first keyframe:
To add a new keyframe:
If your
animation strangely stops before it should, you might have to adjust the
overall length of it. C) HOW TO MAKE A COPY OF
AN OBJECT In Object
mode, select the object and its armature (if it has one). You can press A to select all of you do not
have other objects in your project. D) HOW TO BRING IN AN
OBJECT FROM ANOTHER BLEND FILE At the top,
pick File > Append. Choose your
blend file to navigate the components of that blend file. Go inside the
Objects folder and choose only the objects you want. (No cameras or lamps.) Note: You
will not see any material on the imported objects unless you hold Z and
change the type of view. E) HOW TO MOVE THE
CAMERA When you
render, your render will be based on the camera’s view. If you do not
have a camera, hitting SHIFT A will add one. To change
your view to camera view, hit 0 on the numpad. (Need an alternative for computers without numpads.) Now, to move
the camera, hit SHIFT ~. (The ~ key is
to the left of the 1 at the top left of your keyboard.) You now have
control of the camera using A W S D and the mouse. Right clicking will end the camera
movement. You are now
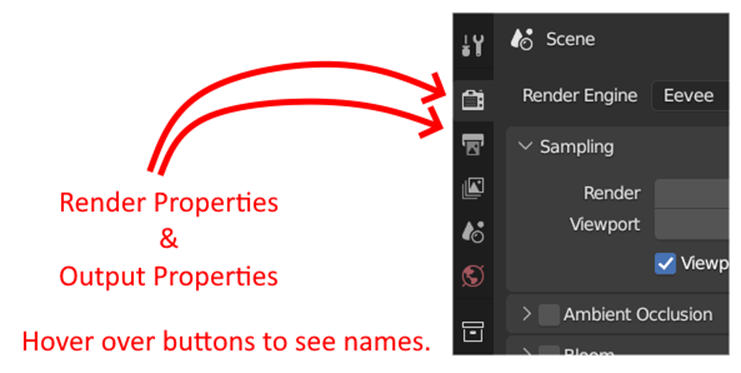
ready to render. First, you
need to set your Rendering Settings.
This will be done on the right hand side in the Output Properties
section. (Note that you might want to
look at the Render Properties section as well.)
In Output
Properties, look at the bottom in the Output subsection. There, specify the output folder. For File
Format, pick FFMpeg Video. Just underneath, for Container, choose
MPEG-4. That’s
it. You are ready to render. At the top of the screen, choose Render
> Render Animation. Note that this
can be quite time consuming.
|