Unity Guide Part 2
Enter Blender
by Connor Killingbeck
So you have returned again eh?
Well, after the extremely simple tutorial last time, I was approached by our Lord Campeau to create a tutorial that also utilized the 3d modeling software Blender. Now I am no 3D Modeler, quite the opposite actually, but I know my way around blender well enough to create a simple tutorial.
Now, some of you may know that I do not really like to upgrade. In this case however, I decided TO UPGRADE just so I could teach you as easily as possible. WAITS FOR APPLAUSE.
Now, as soon as you open blender, you will be met with a cube, a camera, and a light. For the most part, you can delete the camera and light entirely. These features are for rendering your objects inside blender. This is not useful in this case as we are going to be handling rendering and lighting in unity, however, for more advanced custom lighting options, it may be useful.
NOTE: Blender sometimes inverts mouse inputs by default, if this happens, I recommend going into Edit > Preferences and changing this in the Input tab.
Step 1: The rundown.
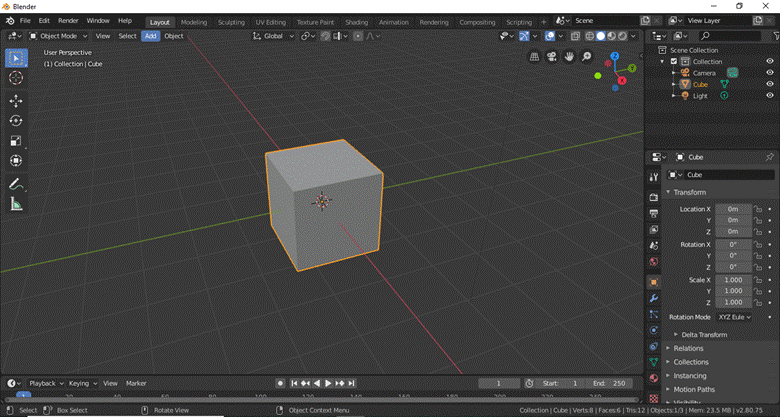
Oh man, where to begin? Lets take this one step at a time.

This is your general uses bar, or as I like to call it, the GENUSAR patent pending. This is where most of your general use tools reside, such as move(3rd button), rotate(4th button), scale(5th), select(1st), ect.
We will be using these tools often, so you will be familiar with them soon.
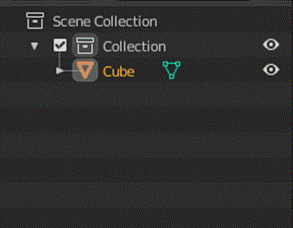
Remember the Unity hierarchy? Well this works the same way. All of your objects are displayed here.
Finally we have the objects characteristics tab:
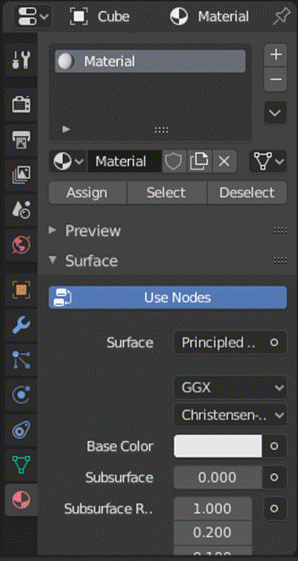
Yeah, there is a lot to work with here. This is a section that has lots of diversity when it comes to things you can do. For this tutorial, the main tab we are going to be using is the bottom one, the materials tab. The materials tab handles all sorts of colors and materials applied to this object. We will visit this tab again later.
1.1: Tab to the top
Pressing tab will open up the EDIT section
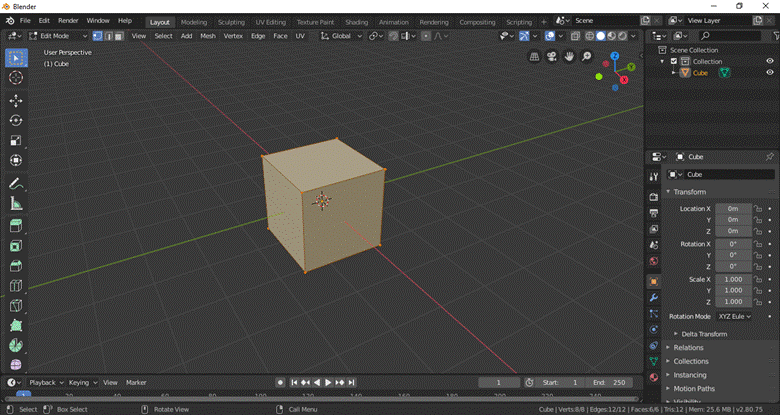
Yeah, that changed real fast.
On the left hand side is our tools bar, which is now equipped with tons of new features. Another important new feature is the selection type bar:
![]()
This bar is important, it allows us to decide how we want to select different parts of our cube. Be it by selecting entire faces, selecting entire lines, or just selecting specific points.
By pressing “A”, we can select out entire object. To deselect the object, simply click off of it. We will make our first edit by press “A” to select the entire object, then by right clicking and selecting “Subdivide”. This will essentially divide out our cube into smaller pieces. Do this twice. Your cube should now look like this.
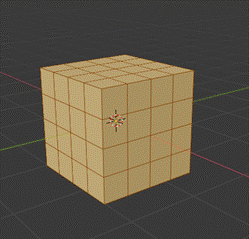
Now that we have created divided faces, we will now EXTRUDE. Extruding is when you pull a face outwards, if you ever worked with any sort of CAD software this will be familiar. There are 2 ways to extrude in unity once we have selected our desired face, we can do the right click method and select extrude, or we can simply press the “E” key.
Now, we are going to select 4 of our subdivided faces in the middle of one of our cubes. We can do this 2 ways, by control clicking or by shift clicking. Shift clicking will just select that desired section, while control clicking will select the desire section and ANYTHING IN BETWEEN the selected section and the previously selected section. If that sounds weird, try messing around with it!
In this case, Shift clicking will suffice. Select your faces so that your cube looks something like this:
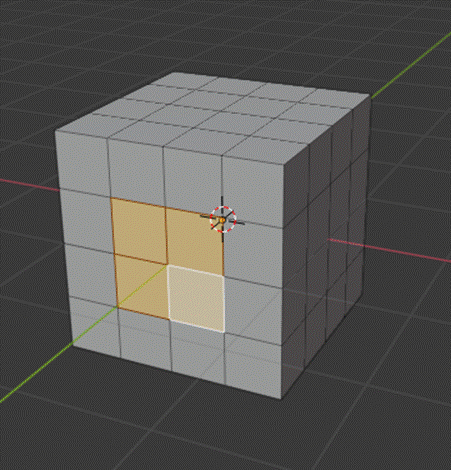
Now its extruding time baby. Using either method, start the extrusion. This will make the face start to pull out of (or into in some cases) the cube. Blender allows you to type in numerical input to do things to precise measurements, so in our case, if we type in 1 (or -1, depending on how you selected and how your looking at the cube) we will see the faces shoot out. Press enter and now, we have done it. WE HAVE EXTRUDED A FACE!
 CRINGE INTENSIFIES
Your cube should now look something like this:
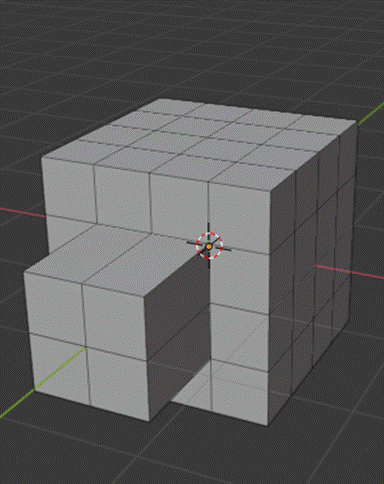
WOW! Now we are going to do a little trick. With the 4 faces selected, you are going to extrude again, but this time, you are going to extrude 0! Don’t worry, you will see. After extruding zero, press the “S” key to get quick access to the scale command. Type in 1.5 and then press enter. You should now have something like this now:
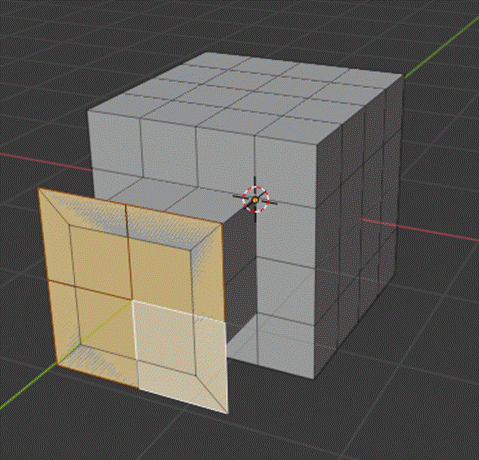
Now, simply extrude once more, putting in 0.3, and boom, one side of our ship is finished.
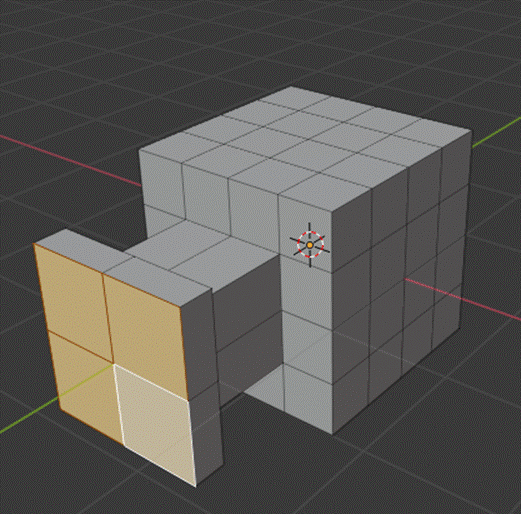
Now, duplicate this same process on the other side.
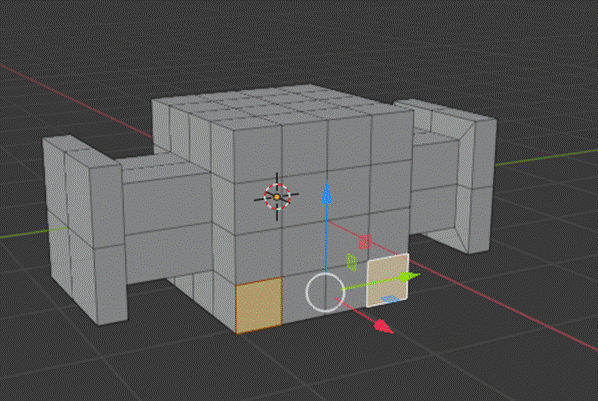
Now, select these to cubes and extrude them 0.75.
Now we will use the transform tool, aka the move tool. On the right hand side, select this button:

Now, select the middle 4 cubes on this face and move them forward 0.75 then press enter. Your cube should now look like this discount ty-fighter.
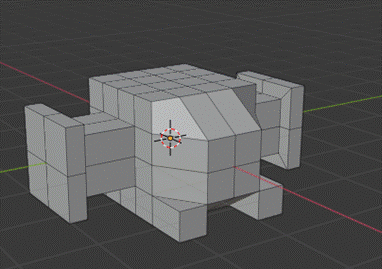
And thats it! We have now created a simple yet effective little ship that will soon become a functioning starfighter! HOORAY! Now simple save your file as a blender file.
A few other things to note before we finish with blender. When you have multiple objects you can only edit one at a time.
Now its Unity time, create a new project with the 3d template, I personally will be naming mine “PewPew”.
Alright, lets get rolling right away. Create a blank gameobject by right clicking the hierarchy and choosing Create Empty. Name this empty object ship.
To import our ship model, purely find the model wherever it may be and drop it in the library in Unity. It will be added automatically! Once our ship is loaded, drag in into our scene and make it a child to our empty ship object. Make sure that the ship model is at 0,0,0 in relation to our blank object.
You may notice that our ship is rotated at -90, this is because unity and blender have differing versions of the vector 3 system, with Unity having y as up and Blender having z as up. This CAN cause issues later, and in this case it might. Make sure our ship model is rotated to
(-90, 0, 90).
This is what we should have so far:
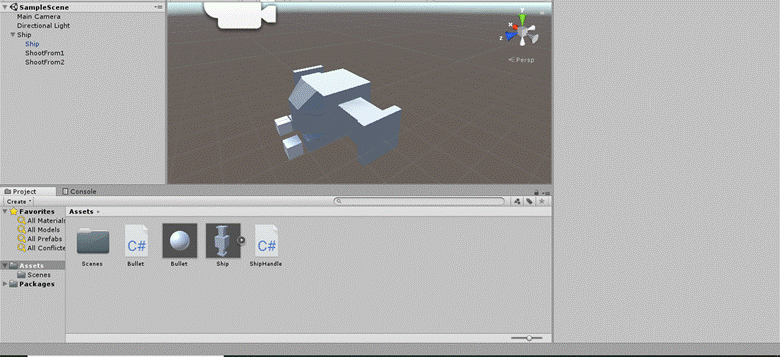
As depicted above, create 2 small cubes names ShootFrom1 and ShootFrom2. Make them children of our blank ship object, and move both cubes in front of both of our canons. Now, disable the box colliders on the little cubes, you can do this simply by clicking the gear symbol at the top right of the bubes box collider component and selecting “Delete Component”.
Now we are gonna make our bullets. Create a sphere and name it bullet, give it a rigidbody component. Now, select your object in the hierarchy and drag it into the library. This will create a prefab of that object! Prefabs or Prefabricated Objects are essentially cloneable objects. If you change the main prefab in the library, you can change all of the clones in the scene as well!
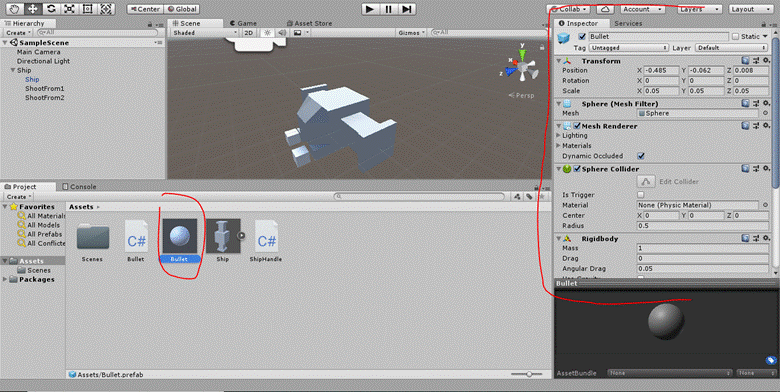
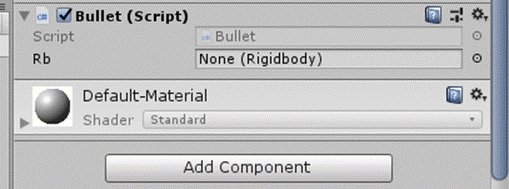
On our bullet, we are going to add a new c# script called AddVelocity. Open up the script. This is going to be a simple script. We are going to create a public float called power and a public Rigidbody named rb, like such:
![]()
From here, in our Start() function, we are going to set rb to our objects Rigidbody;
![]()
Finally, using our newly set up rigidbody, we are going to make a force be added in the forward direction, we need to make sure to use Time.deltaTime to guarantee that all bullets get forced added consistently, and then we are going to apply that force using our power variable. In short, the higher power is, the faster the bullet.

Finally, we want our bullets to get destroyed so they aren't using resources after their use is fulfilled. To do this, simply use the Destroy() function. gameObject references our own object, and the float we pass is how long Unity will wait to destroy our bullet.
Now, after our script compiles, add the script to the prefab bullet in the library, it will now be applied to every bullet we instantiate!
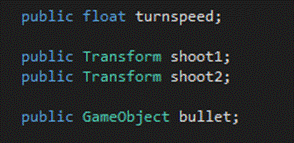
Now it’s time to make our shooting script. Create a new script called ShootHandle. In this script, create 4 public variables, a public float names turnSpeed, a public Transform for shootfrom1, and a public Transform called shootfrom2. Finally, create a public GameObject (different for gameObject) called bullet.
Now to make our ship rotate. Transform.Rotate() allows us to rotate our object without manually setting the rotation. In our case, we will make a check if either q or e is being held, and if it is, we will rotate out ship. Transform.rotate (transform with a lower case references your own objects transforms) rotates our ship on the specified axis, this can be hard to grasp, but in this case, we want to rotate around the up axis, so we will use transform.up in our rotate call. Your code should look like this:

Boom. Now, finally, its instantiating time. Instantiate is a very useful command where we can spawn in clones of prefabs. First we will create a check to see if the spacebar is pressed. Inside that check we are going to put our instantiate call. A cool thing about instantiate is that you can create a temporary GameObject of your instantiated prefab, and then make direct edits to it! In our case, we are going to want to set the rotation of our bullet (so it goes forwards in relation to our ship). We will do this twice, and for each statement we will have it shoot from a different shoot from. Most instantiate calls will be passed; (object, position), and then from there, we can edit our new bullets rotation, like so:

And there we go! Finally, all we have to do is add the ShootHandle script to our blank parent ship object, then drag the positions of our shootfrom1 and shootfrom2 objects into the transform slots we created. Finally, drag the prefab bullet into the bullet slot and we should be shooting!
![]()
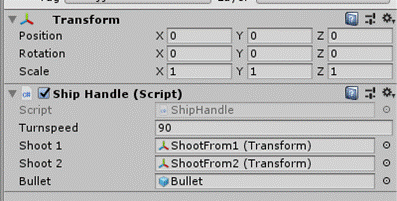
NOTE: DRAG AND DROPPED REFERENCES DO NOT SAVE UPON LOAD, IN A FUTURE TUTORIAL WE WILL GO OVER THE USE OF RESOURCES.LOAD TO GET REFERENCES.