|
Java
Swing – GRAPHICAL USER INTERFACES (GUIs)
LESSON NOTE
GUI The word GUI stands for Graphical User
Interface. GUI applications are
usually made up of objects called components.
The better known components are buttons, labels, text fields, text
areas, check boxes, drop down menus and radio buttons. EVENT-DRIVEN PROGRAMMING For GUIs to work, computers have to display them
and then wait for something (an event) to happen. Therefore, your program will be broken up into
different parts that only run when an event such as a mouse click or a key
press occurs. This is called event-driven
programming. We will worry about dealing with events during our
next lesson. For now, we will only
concern ourselves with the creation of a GUI look. COMPONENTS Components are simply the common parts of a
GUI. They include buttons, text
fields, text areas, radio buttons, labels, scroll bars and so on... CUSTOMIZED JFRAME If you did the Swing Graphics unit, you know that
we created a customized JPanel and placed it on a
regular JFrame.
The JFrame was standard and didn't need to
be customized. The JPanel
was special with specific drawing commands, and hence needed to be
customized. In GUI applications, we need to customize the JFrame to meet our needs.
So we will have to extend the JFrame
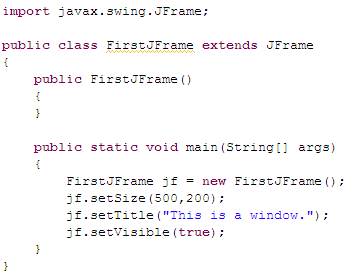
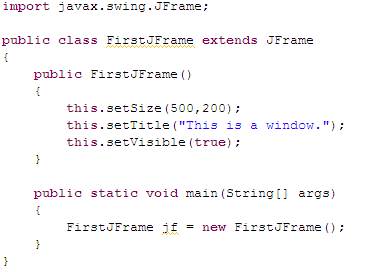
class. NEW TEMPLATE SETUP This
may seem strange, but the main method, because it is static, can really be
placed inside any class. Remember that
a static method does have access to the datafields. So it is very much independent of the class
it is in. So,
with this in mind, we place the main method inside the class that extends the
JFrame.
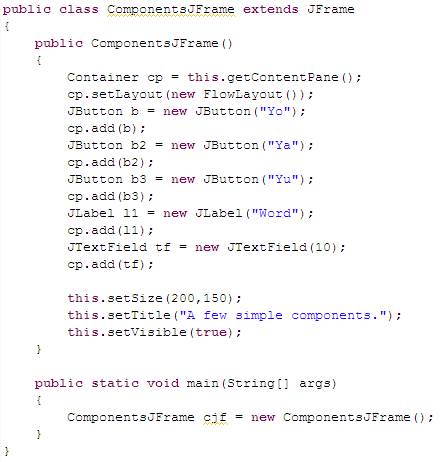
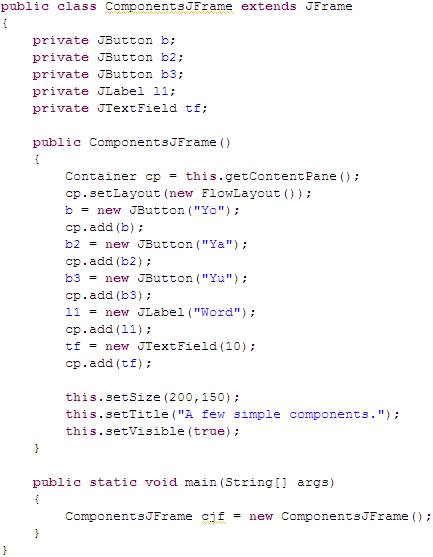
ADDING COMPONENTS We
can easily add components to our GUIs.
It is a two step process really. First, we create the component. Then, we add it to the JFrame. To
add a button object, we make use of the JButton
class. We create a JButton
object called btn with the text "Hi" on
it by using: JButton btn = new JButton("Hi"); We
can then add the above button to the JFrame's
content by using the add method. We
will use: cp.add(btn); Note
that cp is the content pane of the JFrame. More
below. FLOW LAYOUT There
is some complexity regarding the placement of components which deals with
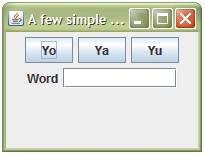
layouts. For now, we will simply use a
FlowLayout which means that components appear from
left to right in the order they were added to the JFrame. So
for now, just accept the lines: Container cp =
this.getContentPane(); cp.setLayout(new
FlowLayout()); They
will be explained later.
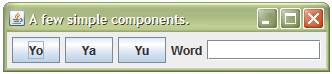
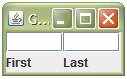
PACKING You can use this.pack(); to compress your window to the
size of your components. Using this on
the code above (placed right after the resize statement), we get this:
Note that if you resize your window after packing
it, you will undo the packing process. LAYOUTS
The FlowLayout
that you saw in Example 2 simply allows all components to flow from left to right.
When there is not enough room
remaining on the right side for a component, it simply jumps to the next
line. You can see this well by
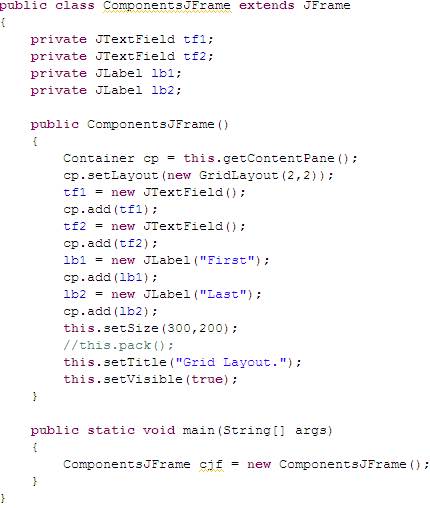
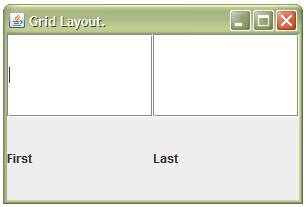
resizing the window back and forth. The GridLayout
allows you to split your window into cells by specifying the number of rows
and columns in the grid. The example
below shows this. Other
layouts that exist in Java include BorderLayout, BoxLayout, CardLayout, GridBagLayout, OverlayLayout
& SpringLayout.
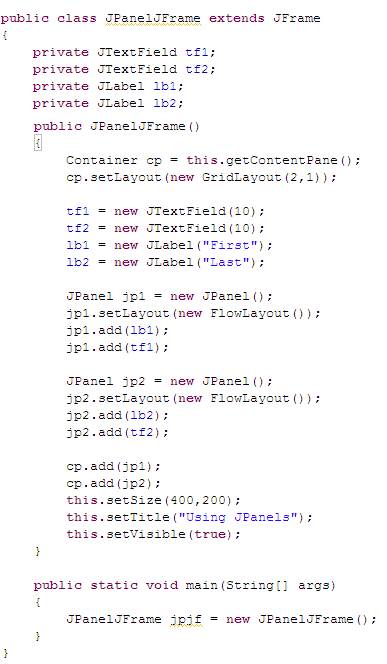
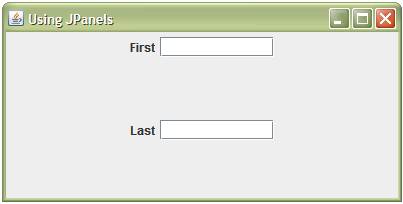
JPANELS You may have
seen that JPanels can be drawn on. They can also be used to hold
components. It is often
useful or even necessary to mix different types of layouts together. To do this, we can use the JPanel class. JPanel objects have their own layouts and we can add
components to them. In turn, a JPanel, just like a regular component, can be added to
the JFrame (or to other JPanels). JPanel
objects also keep components together.
This way, if they are part of a Flow Layout, the panel might jump to a
different line but the components it contains will always be together.
|
|||||||||||
|
|