|
Java
LESSON NOTE
GOAL The
goal of this lesson is to continue to develop your understanding of using
function prototypes all while learning a little bit about computer
graphics. NOOPDraw.java To
do this, you will use a library called NOOPDraw.java which is a file that
provides you with functionality to create a window and draw in it by doing
simple function calls. To use this
file, you will have to bring it into your project. The easiest way is to go on our website in
the Resource section and copy and paste all the code into a class called
NOOPDraw.java. This
file is available for download in the Resource section of this course. Graphics
in Java make use of object orientated programming (OOP). However, this file hides all OOP concepts
from the programmer and is therefore called NOOPDraw,
short for No OOP Draw. Students in the
course will learn about OOP concepts later on in the course. FIRST STEP – CREATING
THE WINDOW The
first step when using NOOPDraw is to create the
window. The createWindow() function
does this for you. There are three
versions (function overloading) that you can use. public static void createWindow() public static void createWindow(int width, int height) public static void createWindow(int width, int height, String title)
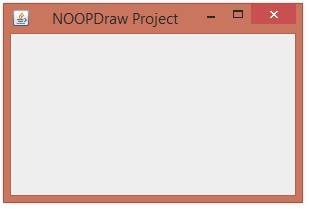
The
window above was created using: NOOPDraw.createWindow(300, 200); COORDINATE SYSTEM In
Java, the origin (0,0) is found that the top left of
the window. As expected, the x
coordinate increases as you go to the right.
However, unlike in math class, the y coordinate increases as you go downwards. DRAWING FUNCTIONS Here
is a full listing of drawing functions as of version 0.9: public
static void drawString(String s, double x, double
y) Draws the string s at coordinates
(x,y). public
static void drawEllipse(double x, double y, double
w, double h) Draws ellipse of specified width
and height with the top left of the bounding box at (x,y). public
static void fillEllipse(double x, double y, double
w, double h) Draws filled ellipse of specified
width and height with the top left of the bounding box at (x,y). public
static void drawRectangle(double x, double y,
double w, double h) Draws rectangle of specified width and height with top
left corner at (x,y). public
static void fillRectangle(double x, double y,
double w, double h) Draws filled rectangle of specified width and height with
top left corner at (x,y). public
static void drawLine(double x1, double y1, double
x2, double y2) Draws lines from (x1, y1) to (x2, y2). public static void drawTriangle(double x1,
double y1, double x2, double y2, double x3, double y3) Draws triangle with three
specified points (x1, y1), (x2, y2) and (x3, y3). public static void fillTriangle(double x1,
double y1, double x2, double y2, double x3, double y3) Draws filled triangle with
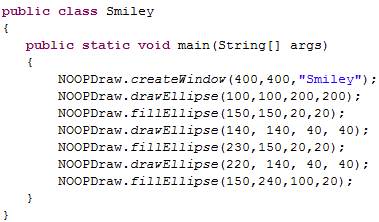
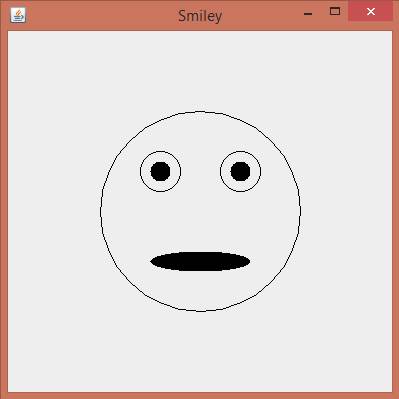
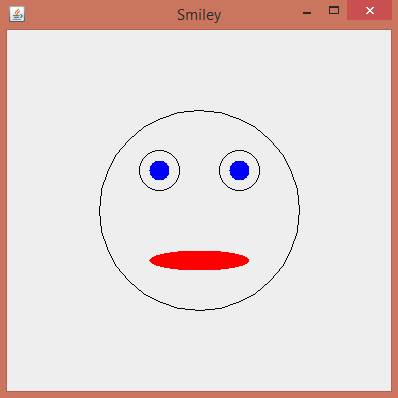
three specified points (x1, y1), (x2, y2) and (x3, y3). EXAMPLE Here
is a small program that makes use of the drawEllipse and fillEllipse functions:
FUNCTIONS TO CHANGE
DRAWING STYLE Here
is a list of functions that allow you to alter how the drawing occurs: public
static void setBrushSize(double r) Sets the size of the drawing brush
to a radius of r. public
static void setColor(int
r, int g, int b) Sets the drawing color created by rgb. public
static void setColor(String s) Sets the drawing color created by
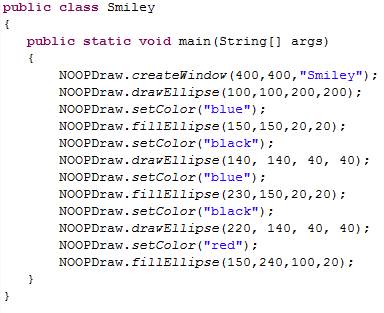
a color’s name inserted in a String. For example, you can provide “black” or “green”. EXAMPLE Here
is the same example as above but with different colours.
SAVING TO FILE You
can also save your image to a file.
All you need to do is provide a filename. The file will automatically be saved in the
project folder. public
static void save(String filename) Saves the image to a file in the
project folder. The filename has to
end with either .jpg, .gif
or .png for this to work.
|
||
|
|
||
|
|
||
|
|