JPAINT
PART 3B – DRAWING
INTERACTIVITY
![]()
In this part, we will see how to add drawing capability to the JPanel canvas.
DISCUSSION
Ok so we now have our program reacting to mouse clicks! Woo hoo!
Unfortunately, getting something drawn on a JPanel is not as simple as one might expect. You might think that you could do something like
JPanelName.drawLine(…)
That is not the case. All of the drawing commands need to take place inside the paint method for the JPanel.
One solution would be to store the information that has to be drawn in the JPanel’s data fields and simply draw based on data field values.
Another solution, the one Mr. Campeau will suggest, involves drawing everything to a BufferedImage and then, inside the paint method, simply redrawing the BufferedImage to screen.
Either way, we will have to create our own class that extends JPanel. That’s where we’ll start.
STEP 1
Create a new class called DrawingJPanel. It should extend JPanel.
STEP 2
It should
have two data fields like this:
BufferedImage img; //the image that we will draw everything
to.
Graphics2D g2D; //the graphics object that allows us
to draw to the image.
STEP 3
Inside the DrawingJPanel constructor, we will have the following two
lines:
img = new BufferedImage(200, 200, BufferedImage.TYPE_INT_ARGB);
g2D = img.createGraphics();
The first
line simply creates a blank image that we can draw on. We’ll revisit its size later.
The second line create a graphics object that can draw onto that image. We can now use g2D.drawLine(…)
and that will draw the line onto the image.
STEP 4
Include the
following paint method that is automatically called when the JPanel needs to be repainted.
public void paint(Graphics
g) //simply repaints what img contains
{
super.paint(g);
Graphics2D g2DLocal = (Graphics2D)g;
g2DLocal.drawImage(img, 0, 0, null);
}
Note that the
method above simply draws the img (our data field)
onto the panel.
NOTE
We are done
working with the new class. From anywhere
we create a DrawingJPanel object,
we can draw something on it by using:
objectName.g2D.drawingMethod(…)
STEP 5
Currently, in
JPaint.java, our canvas is a JPanel. We need to make it a DrawingJPanel. This requires that you change a line in the data
fields section and in the constructor.
STEP 6
Inside the mouseClicked
method, erase all of the code and replace it with:
canvas.g2D.drawLine(0,
0, (int)(Math.random() *
1000), (int)(Math.random()
* 1000));
canvas.repaint();
The first
line of code draws a line from (0,0) to a random
point. The next line updates the canvas.
Now, everytime you click the canvas, you should get a
new line appearing.
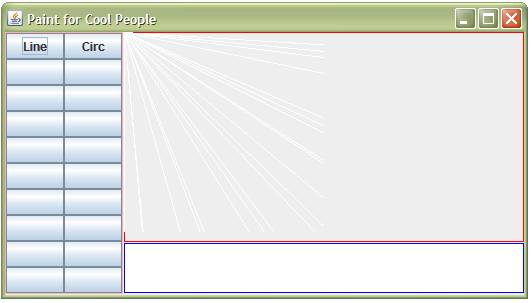
Notice all
the lines that appeared (one at a time after each click). The reason they are cut off is that our image
inside the DrawingJPanel is too small. That is something that still needs to be
adjusted.
In our next
section, now that we can draw onto our canvas, we’ll start looking at
implementing tools.
STEP 7 (OPTIONAL)
If you wanted
to make the lines go from (0,0) to the location of
where the mouse was clicked, you could use the following code inside the mouseClicked method instead:
canvas.g2D.drawLine(0,
0, e.getX(), e.getY());
canvas.repaint();
![]()